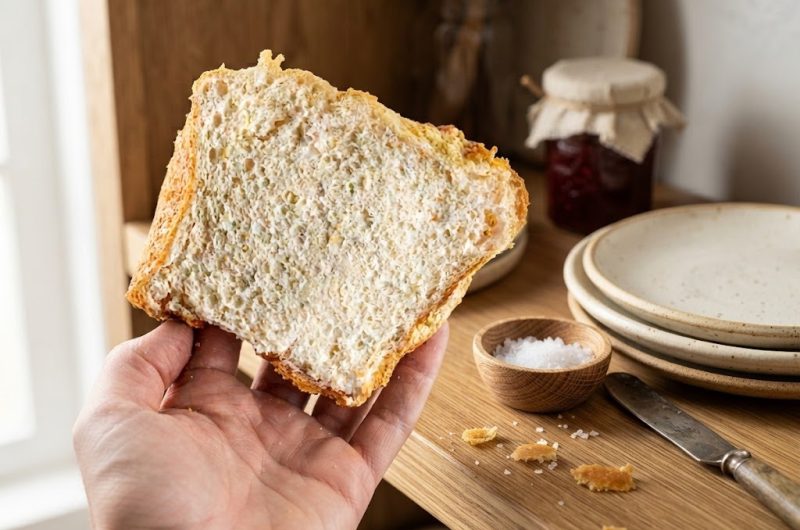
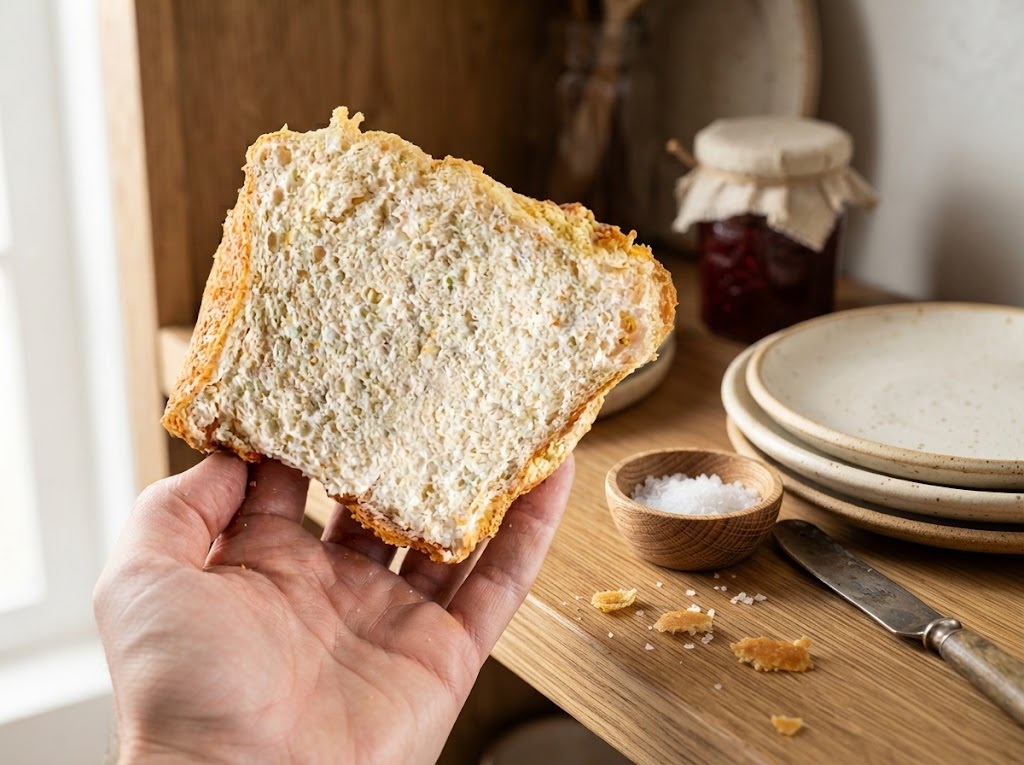
Finding a satisfying bread substitute can be one of the more difficult parts of following a keto or low-carb eating plan. Traditional bread is usually rich in carbohydrates, which means it may not fit easily into a ketogenic meal. This keto cloud bread loaf offers a simple alternative made with just three main ingredients: egg whites, unflavoured whey protein powder, and cream of tartar. The result is a light, airy loaf that can be sliced and used much like regular white bread.
Unlike many keto bread recipes that depend heavily on almond flour, coconut flour, cheese, cream cheese, or other high-fat ingredients, this version keeps the ingredient list remarkably short. That makes it useful for anyone who wants a low-carb bread option while still having room to add toppings such as butter, mayonnaise, cheese, eggs, meat, or avocado. The bread itself is mild in flavour, making it adaptable to both savoury and simple breakfast combinations.
What Is Keto Cloud Bread?
Keto cloud bread is a low-carbohydrate bread alternative made primarily from whipped egg whites. The egg whites are beaten until they reach stiff peaks, creating the airy structure that gives cloud bread its characteristic light texture. In this loaf-style version, whey protein powder provides additional structure and protein, while cream of tartar helps stabilize the whipped egg whites.
The texture is different from conventional wheat bread, so it is best thought of as a versatile keto bread substitute rather than an exact replica of bakery-style white bread. When prepared correctly, the loaf can be sliced into individual portions and used for sandwiches, breakfast toast-style meals, or simple snacks. Its neutral flavour allows other ingredients to become the focus of the finished dish.
Why This Keto Bread Recipe Uses Egg Whites
Egg whites are the foundation of this recipe because they can be whipped into a stable, airy foam. When beaten properly, the proteins in the egg whites create a structure that holds air, allowing the mixture to rise during baking. This is particularly useful in a recipe that does not rely on conventional wheat flour or traditional chemical leavening agents.
The large quantity of egg whites also keeps the basic recipe relatively simple. Rather than combining several types of low-carb flour and binding ingredients, this loaf depends on the structure created by whipped egg whites and whey protein powder. The result is a bread that is considerably lighter than many dense almond-flour keto bread recipes.
A Simple Alternative to Almond Flour Keto Bread
Many popular low-carb bread recipes use almond flour as their main ingredient. Almond flour can produce delicious results, but it also contributes a substantial amount of fat and can create a denser loaf. This cloud bread loaf takes a different approach by leaving almond flour out entirely.
That difference can be useful when planning a keto meal around other ingredients that already provide fat. A sandwich made with this bread can still include butter, mayonnaise, cheese, eggs, meat, or another preferred topping. Because the loaf itself is relatively light, you have more flexibility when building a complete meal around each slice.
Three Main Ingredients Keep the Recipe Straightforward
One of the most appealing features of this easy keto bread recipe is its short ingredient list. The main components are egg whites, unflavoured whey protein powder, and cream of tartar. Butter is also used for greasing the loaf pan. Each ingredient has a practical role in producing the final loaf.
Egg whites provide the airy base, while whey protein powder contributes protein and helps give the baked loaf enough structure to be sliced. Cream of tartar helps stabilize the whipped egg whites. Butter is used to prepare the baking pan so that the finished loaf can be removed more easily after baking.
Choosing the Right Whey Protein Powder
For this recipe, use an unflavoured whey protein powder rather than a flavoured variety. Unflavoured whey keeps the bread’s taste neutral and makes it easier to pair with savoury fillings. Vanilla, chocolate, or other flavoured protein powders would change the character of the loaf and may not work well with sandwich ingredients.
The protein powder also needs to be incorporated carefully after the egg whites have been whipped. Mixing too aggressively can reduce the volume created during whipping. The goal is to combine the ingredients evenly while maintaining as much of the airy structure as possible.
How to Whip Egg Whites for Cloud Bread
The success of this recipe depends heavily on properly whipped egg whites. Begin with a large, clean, completely dry bowl. Any significant amount of water, grease, or leftover fat in the bowl can interfere with the egg whites as they are being whipped.
Whisk the egg whites at medium speed until stiff peaks form. Depending on the equipment being used, this can take approximately five to eight minutes. Stiff peaks mean the whipped egg whites should hold their shape rather than immediately collapsing when the whisk is lifted. This stage creates the volume needed for the loaf.
The Importance of Cream of Tartar
Cream of tartar plays an important supporting role in this low-carb cloud bread. It helps stabilize whipped egg whites, making the foam more reliable during mixing and baking. Since the recipe contains very few ingredients, small details such as this can make a noticeable difference in the finished texture.
The cream of tartar should be added together with the whey protein powder after the egg whites have reached stiff peaks. The mixture should then be combined on low speed until the ingredients are evenly incorporated and the colour looks uniform.
Preparing the Loaf Pan
Before transferring the mixture to the pan, grease the loaf tin with butter and line it with parchment paper. This step is particularly helpful because the baked loaf is delicate and can be easier to remove when the pan has been properly prepared.
A useful technique is to scrunch the parchment paper into a loose ball before unfolding it. This softens the paper and makes it easier to press into the shape of the loaf tin. Once the pan is lined, the prepared egg-white mixture can be spooned inside.
Baking the Keto Cloud Bread Loaf
The oven should be preheated to 160°C (320°F) using the convection or fan-forced setting. Once the mixture is in the prepared loaf tin, spoon it high enough that it rises above the top of the pan. The surface can then be shaped gently with the back of a spoon to create a loaf-like appearance.
Bake the loaf for approximately 30 minutes. During baking, the whipped mixture transforms into a light loaf that can be sliced once completely handled and cooled. Avoid opening the oven unnecessarily while the bread is baking, as maintaining a consistent oven environment is helpful when working with an airy mixture.
Why the Loaf Needs to Cool Slowly
One particularly important stage happens after the 30-minute baking period. Instead of immediately removing the loaf from the hot oven, turn the oven off and leave the door slightly ajar. A kitchen towel can be positioned in the oven door to keep it from closing completely.
Allowing the oven to cool gradually for approximately 20 to 30 minutes gives the loaf time to adjust to the changing temperature. This gradual cooling process can help reduce the amount of sudden deflation that may occur when a delicate, airy bread is exposed immediately to a much cooler environment.
How to Slice Keto Cloud Bread
Once the loaf has completed its cooling stage, remove it from the oven and carefully take it out of the pan. The recipe is designed to produce approximately 10 thick slices. A sharp bread knife can help produce cleaner slices without compressing the soft loaf too much.
Because the bread is light and delicate, avoid pressing down heavily while cutting. Gentle, controlled movements are preferable. The finished slices can then be used individually for sandwiches or stored for later meals.
Ways to Serve Keto Cloud Bread
This keto cloud bread loaf recipe is versatile enough for several different meals. For breakfast, a slice can be paired with eggs or another favourite low-carb breakfast topping. For lunch, the bread can be used to create a simple sandwich with cheese, meat, vegetables, mayonnaise, or other suitable ingredients.
The mild flavour also makes it easy to combine with richer toppings. Because the loaf itself does not contain large amounts of added fat, it can work well when paired with ingredients that provide the flavour and richness you want from a sandwich.
Keto Sandwich Ideas
A simple cloud bread sandwich can be built around sliced meat and cheese, while another option is an egg-based breakfast sandwich. For a lighter lunch, the bread can be paired with vegetables and a suitable spread. The possibilities depend largely on your preferred low-carb ingredients and the type of meal you are preparing.
The key advantage is that the bread provides a convenient structure for toppings without requiring a conventional wheat-based loaf. This makes it easier to create familiar sandwich-style meals while keeping the bread component very low in carbohydrates.
Storage and Freezing Instructions
The prepared slices can be stored in the refrigerator for up to 3 days. Keeping the bread chilled can help preserve it for later use and makes it convenient to prepare the loaf ahead of time. Once sliced, the portions can be taken from the refrigerator whenever needed.
For longer storage, the slices can be frozen for up to 2 weeks. Place parchment paper between the individual slices before freezing so they do not stick together. This allows you to remove individual pieces without having to thaw the entire loaf at once.
What Makes This Recipe Different?
The main difference between this loaf and many other keto bread recipes is its emphasis on simplicity and lightness. There is no almond flour in the recipe, and the main structure comes from whipped egg whites and whey protein powder. That creates a different eating experience from dense, flour-based low-carb loaves.
The short ingredient list can also make the recipe easier to prepare. Rather than buying several specialty ingredients, the recipe uses items that are commonly available in grocery stores. For anyone searching for an easy homemade keto bread, that simplicity can make it a practical option for regular meal preparation.
Frequently Asked Questions
Is cloud bread keto-friendly?
This recipe is designed as a low-carbohydrate bread option and contains approximately 1 gram of carbohydrates per slice according to the supplied nutritional information. However, individual nutritional needs and dietary goals vary, so anyone following a specific ketogenic plan should consider the complete meal and their own dietary requirements.
Does keto cloud bread taste like regular bread?
Cloud bread has a different texture and flavour from conventional wheat bread. It is light, airy, and relatively mild, which makes it useful as a bread substitute. Its neutral character also means that toppings and fillings can provide much of the flavour in a sandwich.
Can I use flavoured whey protein?
Unflavoured whey protein powder is specified for this recipe. Using a flavoured powder would change the taste and may not be suitable for savoury sandwiches, so it is best to follow the specified ingredient.
How long does keto cloud bread last?
The prepared slices can be kept in the refrigerator for up to three days. They can also be frozen for up to two weeks with parchment paper placed between the slices for easier separation.
Why does cloud bread sometimes deflate?
Cloud bread depends on the air incorporated into whipped egg whites. Overmixing, insufficiently whipped egg whites, or rapid cooling can affect the structure. Following the whipping, baking, and gradual-cooling steps carefully can help maintain the loaf’s shape.
Keto Cloud Bread Loaf
A light and airy keto cloud bread loaf made with egg whites, unflavoured whey protein powder, and cream of tartar.
10
servings15
minutes30
minutes50
kcal45
minutesIngredients
350 ml egg whites, or egg whites from 12 large eggs
60 g unflavoured whey protein powder (2 scoops)
1/2 teaspoon cream of tartar
Butter, for greasing the pan
Directions
- Preheat a convection or fan-forced oven to 160°C (320°F).
- Place the egg whites in a large, clean, completely dry mixing bowl. Whisk at medium speed until stiff peaks form, which should take approximately 5–8 minutes. A stand mixer or handheld electric mixer can be used.
- Add the unflavoured whey protein powder and cream of tartar to the whipped egg whites. Mix on low speed until everything is evenly combined and the mixture has a uniform appearance.
- Grease a bread loaf tin with butter and line it with parchment paper. Scrunching the parchment paper into a ball and then unfolding it can make it easier to shape inside the tin.
- Spoon the egg-white mixture into the prepared loaf tin, allowing the mixture to rise above the top of the tin. Gently shape the surface with the back of a spoon.
- Place the loaf in the preheated oven and bake for approximately 30 minutes.
- After 30 minutes, turn the oven off. Place a kitchen towel in the oven door so that the door remains slightly ajar. Leave the loaf inside for 20–30 minutes while the oven cools gradually.
- Remove the loaf from the oven and carefully take it out of the tin. Slice into 10 thick slices.
- Refrigerate the slices for up to 3 days, or freeze them for up to 2 weeks with parchment paper between the slices.
Nutrition Facts
- Total number of serves: 1
- Calories: 50kcal
- Fat: 1g
- Carbohydrates: 1g
- Sugar: 1g
- Protein: 10g