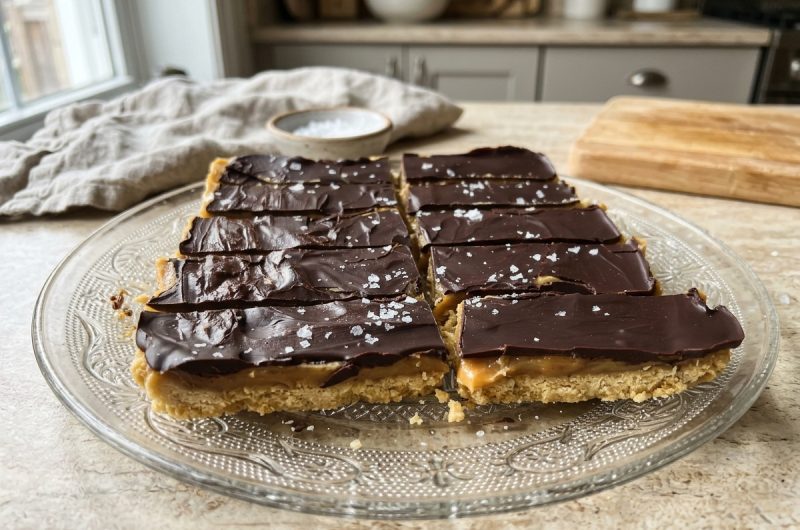
Homemade Vegan Twix Bars are a delicious way to enjoy the familiar combination of crunchy biscuit, creamy caramel, and rich chocolate without relying on traditional candy ingredients. These homemade chocolate bars feature three satisfying layers: a toasted coconut shortbread base, a naturally sweetened maple caramel filling, and a smooth dark chocolate coating.
A little flaky sea salt on top brings all the flavors together, creating a wonderful balance of sweetness and richness in every bite. They are perfect for anyone who enjoys homemade desserts with simple ingredients and plenty of chocolate flavor.
Unlike traditional Twix candy bars, this homemade version uses shredded coconut, almond flour, coconut oil, maple syrup, and coconut cream to create its different layers. The coconut biscuit provides a slightly crisp and nutty foundation, while the maple-based filling adds a soft, creamy texture that resembles caramel.
Once everything is covered in melted dark chocolate, the bars become a satisfying dessert that is enjoyable straight from the refrigerator. They are also naturally gluten-free when made with certified gluten-free ingredients, making them a useful option for people avoiding gluten.
One of the best things about preparing homemade vegan Twix bars is that you can control the ingredients and sweetness. Instead of purchasing packaged candy, you can prepare a batch using pantry-friendly ingredients and store the finished bars for later.
They work beautifully as an afternoon snack, an after-dinner dessert, or a sweet addition to a homemade dessert platter. Whether you are making them for your family, sharing them with friends, or preparing treats for the week, these chocolate caramel bars offer plenty of flavor in a homemade package.
What Makes These Homemade Twix Bars Special?
The appeal of these homemade Twix bars comes from the contrast between their three layers. The bottom layer is made with shredded coconut and almond flour, which creates a biscuit-like texture after baking. It is slightly crumbly, lightly toasted, and naturally nutty. Coconut oil helps bring the ingredients together, while a small amount of honey or maple syrup adds sweetness. Vanilla extract gives the base a pleasant aroma that complements the coconut and chocolate.
The middle layer is a simple homemade caramel-style filling prepared with real maple syrup, coconut cream, and nut butter. Traditional caramel usually contains butter and refined sugar, but this recipe takes a different approach. Maple syrup provides sweetness and a distinctive flavor, while the coconut cream creates a rich consistency. Almond or cashew butter helps thicken the mixture, allowing it to sit comfortably between the biscuit and chocolate layers after chilling.
The final layer is melted dark chocolate mixed with coconut oil. This combination creates a smooth coating that becomes firm when chilled. It adds the familiar chocolate flavor associated with classic Twix candy bars and protects the softer filling underneath. A finishing sprinkle of flaky sea salt is optional, but it makes a noticeable difference by balancing the sweetness and bringing out the flavor of the dark chocolate.
How to Make Homemade Vegan Twix Bars
Preparing homemade vegan Twix bars involves three main stages: baking the coconut biscuit, cooking the maple caramel filling, and coating the assembled bars in chocolate. Although the recipe has several steps, each stage is straightforward. The most important part is allowing enough cooling and freezing time between layers so the filling becomes firm and the chocolate coating sets properly.
Prepare the Baking Dish and Oven
Begin by preheating your oven to 350°F. Line an 8-by-8-inch square baking dish with parchment paper, leaving a little extra paper along the sides if possible. This makes it easier to lift the finished layers out of the dish later. Preparing the pan first also helps you work more efficiently because the coconut mixture can be transferred directly into the dish once it is combined.
Make the Coconut Shortbread Base
Add the finely shredded unsweetened coconut, almond flour, melted coconut oil, honey or maple syrup, half a teaspoon of vanilla extract, and half a teaspoon of flaky sea salt to a medium mixing bowl. Stir everything together until the ingredients are evenly combined. The mixture should look moist and slightly crumbly, but it should hold together when pressed between your fingers. Avoid leaving large dry pockets of almond flour or coconut in the mixture.
Transfer the coconut mixture into the prepared baking dish and spread it evenly across the bottom. Use the back of a spoon or your fingers to press it into a compact, level layer. Pay particular attention to the corners because an uneven base can make the finished bars difficult to cut neatly. Place the dish in the preheated oven and bake for approximately 10 to 12 minutes, or until the coconut becomes lightly golden and toasted.
Remove the dish from the oven and allow the biscuit layer to cool completely. This cooling period is important because adding warm caramel directly onto the base can affect its texture and make the layers harder to separate. While the coconut shortbread cools, you can begin preparing the maple caramel filling.
Prepare the Homemade Maple Caramel
Add the real maple syrup and thick coconut cream to a medium-sized saucepan. Make sure you are using only the creamy portion of the canned coconut milk, leaving the watery liquid behind. Place the saucepan over high heat and bring the mixture to a boil. Once it starts boiling, allow it to cook for approximately 12 to 15 minutes until it thickens into a caramel-like sauce.
Keep an eye on the saucepan while the mixture cooks, stirring as needed to prevent it from sticking. The liquid will gradually reduce and become thicker as moisture evaporates. Cooking time can vary depending on the saucepan and heat level, so pay attention to the consistency rather than relying entirely on the clock. Once the mixture has thickened, remove the saucepan from the heat.
Stir in the almond or cashew butter along with the remaining one teaspoon of vanilla extract. Mix until the nut butter is fully incorporated and the filling looks smooth. Allow the caramel to cool slightly before pouring it over the cooled coconut base. Spread it carefully so the filling reaches the edges and forms an even middle layer.
Chill the Bars Until Firm
Once the caramel filling has been spread evenly, transfer the baking dish to the freezer. Allow the bars to freeze for approximately 30 minutes, or until the caramel layer is firm enough to handle. This step helps the biscuit and caramel layers stay together when you remove them from the pan and cut them into individual portions.
Do not rush this stage because a soft caramel filling can make the bars difficult to cut and dip. If the center still feels too soft after 30 minutes, give it a little additional time in the freezer. A properly chilled base also makes the chocolate-coating process easier because the cold filling helps the melted chocolate set more quickly.
Melt the Dark Chocolate Coating
While the bars are chilling, prepare the chocolate coating. Place the chopped dark chocolate and one tablespoon of coconut oil in a microwave-safe bowl. Heat the mixture in short intervals, stirring between each interval until the chocolate is completely melted and smooth. Avoid overheating because dark chocolate can become thick or develop a grainy texture if exposed to excessive heat.
Once melted, allow the chocolate to cool for approximately 10 minutes before dipping the bars. It should remain fluid enough for coating but should not be extremely hot. This short cooling period also helps prevent the chocolate from melting the chilled caramel layer when the bars are dipped.
Cut and Dip the Twix Bars
Remove the chilled coconut and caramel layers from the baking dish using the parchment paper. Place them on a cutting board and cut into 16 individual bars. Try to make the portions reasonably even so they have a similar appearance and thickness. Use a sharp knife and wipe it between cuts if the caramel begins sticking to the blade.
Dip each bar into the melted dark chocolate, making sure the biscuit and caramel layers are covered. A fork or dipping tool can help you lift each bar out while allowing excess chocolate to drip back into the bowl. Place the coated bars on a parchment-lined tray and finish with a small sprinkle of flaky sea salt while the chocolate is still soft.
Return the bars to the freezer for approximately 10 minutes, or until the chocolate coating has completely set. Once firm, transfer them to an airtight container and keep them refrigerated until ready to serve.
Tips for the Best Homemade Vegan Twix Bars
Choose Finely Shredded Coconut
The texture of the coconut base makes a big difference in the finished bars. Finely shredded unsweetened coconut creates a more compact biscuit layer than large coconut flakes. It also combines more evenly with almond flour, helping the base hold together after baking. If your coconut is particularly coarse, the finished shortbread may feel more textured and less like a traditional biscuit.
Use Only the Thick Coconut Cream
For a properly thick caramel filling, use full-fat canned coconut milk and scoop out the creamy portion. The watery coconut liquid can make the mixture thinner and may require additional cooking time. If your coconut milk has separated in the can, avoid shaking it before opening so the thick cream remains easier to collect.
Make Sure the Layers Are Completely Chilled
One of the most important steps is freezing the assembled bars before dipping them into chocolate. The caramel needs to become firm enough to support the biscuit layer during handling. Chilled bars are also much easier to coat because the chocolate begins setting shortly after contact. If the filling feels soft, return the bars to the freezer before continuing.
Add a Second Chocolate Coating
If you prefer thick chocolate-covered candy bars, you can dip each bar twice. After the first coating has set, return the bars to the freezer for a few minutes before dipping them again. This creates a thicker chocolate shell and gives the finished dessert an even richer chocolate flavor. It is an optional step, but a useful choice for anyone who enjoys extra chocolate.
What Do Homemade Vegan Twix Bars Taste Like?
These homemade Twix bars combine several familiar dessert flavors in a slightly different way from traditional candy bars. The coconut shortbread has a toasted, nutty taste with a delicate crumbly texture. The maple caramel is creamy and naturally sweet, while the dark chocolate adds a rich finish that balances the sweetness of the middle layer. A little flaky sea salt makes the chocolate flavor stand out and prevents the bars from tasting overly sweet.
Although the recipe is inspired by classic Twix candy bars, the homemade version has its own character. Coconut and almond flour create a different biscuit texture, and the maple-based filling does not taste exactly like traditional buttery caramel. Instead, the three layers work together to create a satisfying chocolate dessert with a combination of crunchy, creamy, and smooth textures.
How to Serve Homemade Vegan Twix Bars
These chocolate caramel bars are delicious served straight from the refrigerator when the chocolate coating is firm and the filling is cool. They make an excellent afternoon treat alongside a cup of coffee, tea, or your favorite dairy-free drink. You can also arrange them on a dessert platter with fresh berries, sliced fruit, and other homemade chocolate treats when entertaining family or friends.
For a simple dessert presentation, cut the bars into smaller portions and place them in individual paper candy liners. Their layered appearance makes them attractive without requiring additional decoration. If you enjoy a stronger chocolate flavor, choose dark chocolate with a higher cocoa percentage. The slightly bitter notes of dark chocolate work especially well with the maple sweetness and toasted coconut.
How to Store Homemade Vegan Twix Bars
Store the finished bars in an airtight container in the refrigerator for up to two weeks. Keeping them chilled helps maintain the firmness of the maple caramel and prevents the chocolate coating from becoming too soft. If you are stacking the bars inside a container, place parchment paper between the layers to prevent them from sticking together or damaging the chocolate coating.
For longer storage, these bars can also be kept in the freezer in a suitable airtight container. Separate individual portions with parchment paper so you can remove only the number you need. Allow frozen bars to sit briefly before serving if you prefer a slightly softer texture. Avoid leaving them at room temperature for extended periods because the coconut-based filling may become softer.
Frequently Asked Questions
Are Homemade Vegan Twix Bars Gluten-Free?
Yes, this recipe is naturally gluten-free when prepared with gluten-free ingredients. Almond flour and shredded coconut replace the traditional wheat-based biscuit ingredients. However, check the packaging of your dark chocolate, coconut milk, nut butter, and other ingredients to make sure they have not been exposed to gluten-containing products during manufacturing.
Can I Make These Twix Bars Completely Vegan?
Yes. To keep the recipe completely vegan, use maple syrup instead of honey in the coconut biscuit layer. Also check that your dark chocolate does not contain milk or other dairy ingredients. The remaining ingredients are plant-based when prepared as listed, making maple syrup the important choice for a fully vegan version.
Can I Use Almond Butter Instead of Cashew Butter?
Yes, almond butter and cashew butter are both suitable for the caramel filling. Choose a smooth, creamy variety so it blends easily with the maple syrup and coconut cream. Either option helps thicken the filling and gives the middle layer a rich consistency without changing the overall preparation method.
Why Is My Caramel Filling Too Runny?
A runny filling usually means the maple syrup and coconut cream mixture needs more cooking time or contains too much liquid. Make sure you use only the thick coconut cream rather than the watery portion of the canned coconut milk. Cook the mixture until it has reduced and thickened, then allow it to chill completely before cutting the bars.
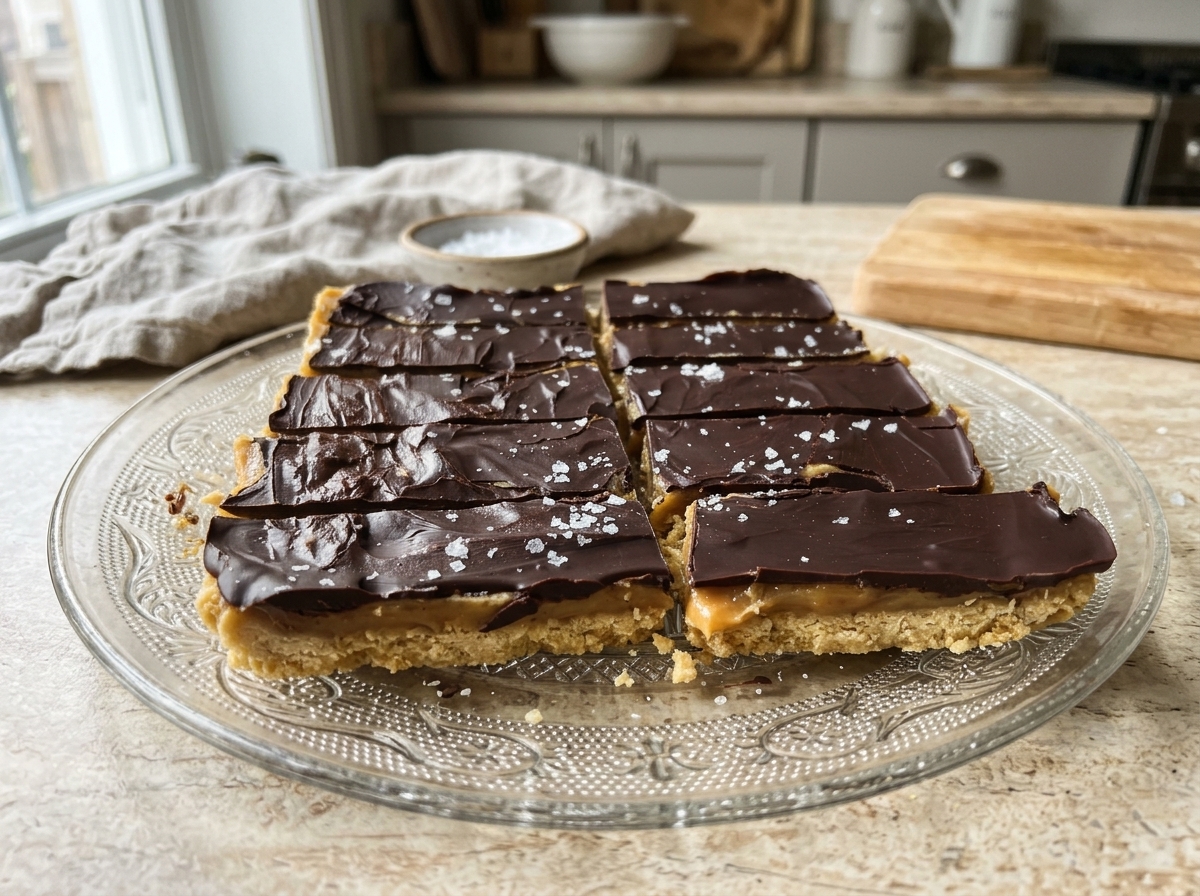
Gluten Free Homemade Vegan Twix Bar
These Homemade Vegan Twix Bars feature a toasted coconut shortbread base, creamy maple caramel filling, and a rich dark chocolate coating.
20
minutes15
minutes283
kcal45
minutes1
hour20
minutesIngredients
- For the Coconut Shortbread Layer
1 cup finely shredded unsweetened coconut
1/2 cup almond flour/meal
1/4 cup melted coconut oil
2 tablespoons honey or maple syrup
1 1/2 teaspoons vanilla extract
1/2 teaspoon flaky sea salt, plus more for topping
- For the Maple Caramel Filling
3/4 cup real maple syrup
1/2 cup canned full-fat coconut milk, using only the coconut cream, no water
2 tablespoons almond or cashew butter
- For the Chocolate Coating
12 ounces dark chocolate, chopped
1 tablespoon coconut oil
Directions
- Prepare the Oven:
Preheat the oven to 350°F. Line an 8-by-8-inch square baking dish with parchment paper. - Make the Coconut Base:
Combine shredded coconut, almond flour, melted coconut oil, honey or maple syrup, 1/2 teaspoon vanilla extract, and salt in a medium bowl. Press the mixture evenly into the prepared baking dish. - Bake the Shortbread:
Bake for 10–12 minutes until lightly golden and toasted. Remove from the oven and allow the base to cool completely. - Cook the Caramel:
Combine maple syrup and coconut cream in a medium saucepan. Bring to a boil over high heat and cook for 12–15 minutes until thickened. - Finish the Filling:
Remove the saucepan from the heat. Stir in the almond or cashew butter and remaining 1 teaspoon vanilla extract until smooth. - Assemble the Layers:
Allow the caramel mixture to cool slightly, then pour it over the cooled coconut base. Spread evenly. - Freeze Until Firm:
Place the baking dish in the freezer for approximately 30 minutes until the filling becomes firm. - Melt the Chocolate:
Combine chopped dark chocolate and coconut oil in a microwave-safe bowl. Microwave in short intervals, stirring until smooth. Allow to cool for 10 minutes. - Cut the Bars:
Remove the chilled layers from the baking dish and cut into 16 bars. - Coat with Chocolate:
Dip each bar into the melted chocolate, covering the layers completely. Place on a parchment-lined tray. - Add Sea Salt:
Sprinkle flaky sea salt over the chocolate coating before it sets. - Set and Store:
Return the bars to the freezer for approximately 10 minutes until the chocolate becomes firm. Store in an airtight container in the refrigerator.