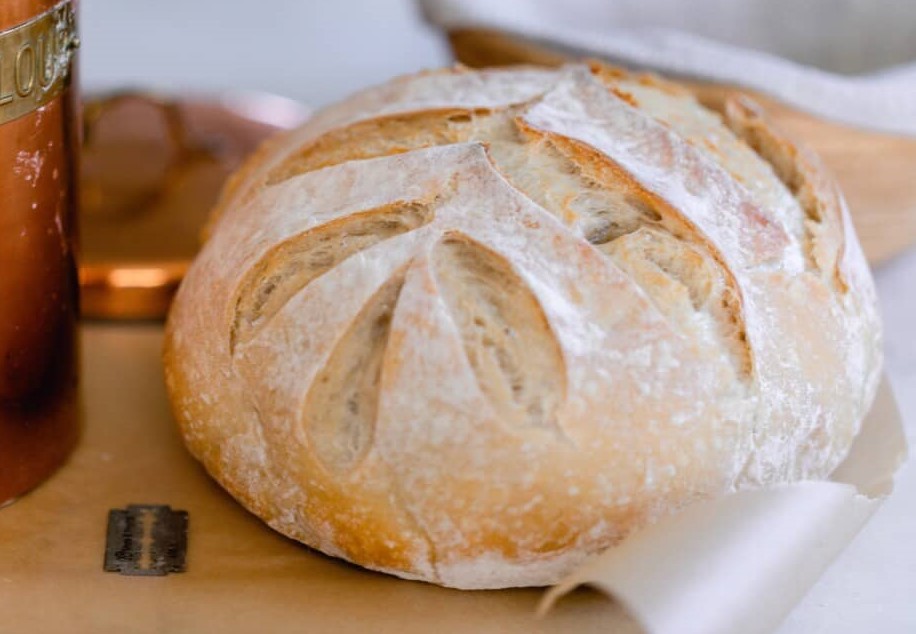
Sourdough bread has been cherished for centuries for its natural fermentation, chewy crumb, and crusty golden exterior. Unlike traditional yeasted breads, sourdough relies on a wild yeast starter, which brings both flavor and health benefits. While many beginners think sourdough is complicated, this recipe simplifies the process into approachable steps that anyone can follow. With only four basic ingredients—all-purpose flour, water, salt, and sourdough starter—you can create a bakery-quality loaf right in your own kitchen.
The key to successful sourdough is patience. Unlike commercial yeast, a sourdough starter works slowly to ferment and develop flavor. This long fermentation not only enhances taste but also improves digestibility, as the natural bacteria help break down gluten and starches. While the total recipe time spans over 22 hours, most of that is hands-off resting and proofing. The actual active work only requires a few minutes at each stage.
Why this recipe is perfect for beginners
This beginner-friendly sourdough recipe is straightforward and doesn’t require fancy equipment beyond a mixing bowl, a Dutch oven, and some parchment paper. The stretch-and-fold method replaces intensive kneading, making it easier for new bakers to strengthen their dough without overworking it. The recipe also gives you flexibility—whether you prefer an overnight proof in the fridge or a shorter rise at room temperature, you can adapt the process to fit your schedule.
Step-by-step process
You’ll begin by feeding your sourdough starter so it becomes active and bubbly. This step ensures that your dough rises properly. After mixing flour, water, salt, and starter, the dough rests to hydrate. Then comes the stretch-and-fold routine, where you gently pull and fold the dough to build gluten structure. Instead of kneading for long minutes, you’ll work with the dough periodically in short rounds.
Bulk fermentation is one of the most crucial stages. The dough must double in size, and the time needed depends on the temperature of your kitchen and the strength of your starter. Once risen, shaping gives the loaf tension and structure. Placing the dough seam-side up in a floured banneton (or a bowl lined with a floured towel) helps maintain shape during the final rise.
For baking, a preheated Dutch oven mimics professional steam ovens, trapping moisture and allowing your bread to achieve that crackly golden crust. After an initial bake covered with the lid, you’ll finish baking uncovered to achieve a beautiful crust color.
Notes, tips, and tricks
- Starter readiness: Always make sure your starter is very active. If it passes the float test (a spoonful of starter floats in water), it’s ready to use.
- Handling sticky dough: If the dough feels sticky during stretching and folding, wetting your hands prevents sticking without altering hydration.
- Shaping tip: Allowing the dough to rest briefly before final shaping makes it easier to handle and prevents sticking to your towel or basket.
- Rising time: Be patient with fermentation. Depending on your kitchen’s temperature, bulk fermentation might take 6–12 hours. The refrigerator method for final proofing (12–15 hours) not only enhances flavor but also makes scoring easier.
- Measurements: Using a kitchen scale gives the most consistent results. Cup measurements are included, but grams are more precise.
This sourdough bread is worth the wait. The result is a loaf with a crisp crust, airy crumb, and rich flavor. Perfect for toasting, serving with soups, or enjoying with butter, this recipe will give beginners the confidence to continue their sourdough journey.
Sourdough Bread Beginners
12
2
hours40
minutes2
hours40
minutesA simple, foolproof sourdough bread recipe with a chewy crumb and crisp crust. Perfect for first-time bakers!
Ingredients
475 g (3 ½ cups) all-purpose flour
100 g (½ cup) active sourdough starter, bubbly and fed
325 g (1 ⅓ cups) water
10 g (2 tsp) salt
Directions
- Feed starter 4–12 hours before making dough until bubbly and active.
- Mix dough: In a large bowl, combine water, starter, salt, and flour. Mix until combined. Cover and rest 30 minutes.
- Stretch & fold: Every 30 minutes, perform a round of stretch-and-fold (3 times total). Cover dough and let bulk ferment until doubled (6–12 hours).
- Shape dough: Turn onto a lightly floured surface, fold into a ball, then shape with tension. Place in a floured banneton or towel-lined bowl, seam-side up.
- Final proof: Cover and refrigerate 12–15 hours (or rise at room temperature 3–4 hours).
- Bake: Preheat Dutch oven to 500°F (260°C) for 1 hour. Place dough on parchment, score, and transfer into Dutch oven. Bake covered 20 minutes, then uncover, reduce heat to 475°F (245°C), and bake 15–25 minutes until golden.
- Cool completely before slicing.


