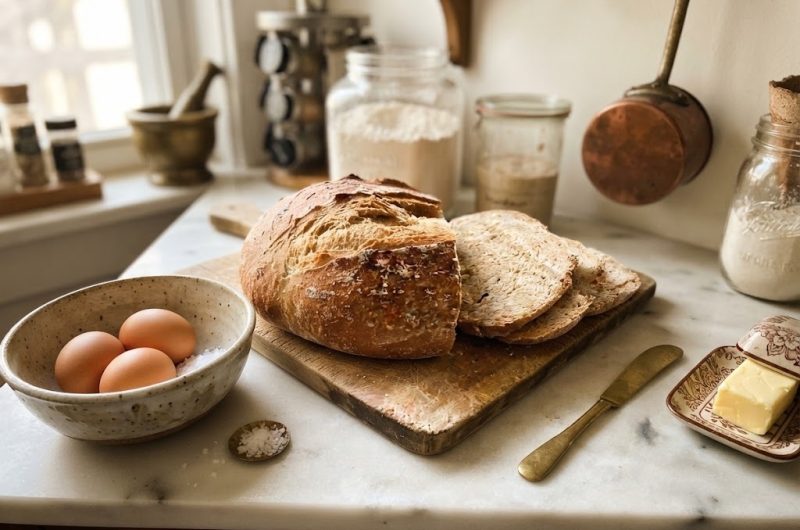
Making homemade gluten-free bread does not have to involve complicated techniques, specialty equipment, or hours of hands-on preparation. This crusty gluten-free no-knead bread is designed for exactly that kind of easy baking.
With gluten-free bread flour, instant yeast, sea salt, and warm water, you can create a beautifully risen loaf with a crisp, golden crust and a soft, tender interior. The dough requires very little handling, while the long resting period gives the bread time to develop a satisfying depth of flavor.
Why This Gluten-Free No-Knead Bread Works
The secret to this easy gluten-free bread recipe is the combination of a long rise and a covered Dutch oven bake. Unlike traditional bread recipes that require repeated kneading, this method allows time to do most of the work. The dough rests for many hours, giving the yeast plenty of opportunity to develop the structure and flavor needed for a lofty loaf. The result is a homemade bread that feels substantially different from many dense or crumbly gluten-free loaves.
A Dutch oven is especially useful because it creates a controlled baking environment. As the dough heats, the covered pot helps retain moisture and steam around the loaf. This encourages the crust to develop while helping the inside stay tender. Once the lid is removed, the bread continues baking at high heat, allowing the exterior to become deeply golden and wonderfully crisp. This simple technique is one of the most useful approaches for making bakery-style gluten-free bread at home.
A Simple Alternative to Gluten-Free Sourdough
If you enjoy the flavor and texture associated with rustic sourdough bread but do not want to maintain a sourdough starter, this recipe offers a practical alternative. The long fermentation-style rise gives the loaf time to develop a more interesting flavor than a quick bread recipe. It is not sourdough, but the finished bread has the rustic character, crisp crust, and satisfying chew that many people look for in artisan-style bread.
The method is also particularly approachable for anyone who is new to gluten-free baking. There is no complicated shaping technique, extensive kneading schedule, or starter to feed. The basic process is straightforward: mix the ingredients, allow the dough to rise, shape it gently, let it rest again, and bake it in a preheated Dutch oven. That simplicity makes this a useful recipe for regular homemade bread baking.
Choosing Gluten-Free Bread Flour
For the best results, use a gluten-free bread flour specifically designed for yeast-based bread. The flour is an important part of the recipe because gluten-free dough behaves differently from conventional wheat dough. A suitable gluten-free bread flour blend can provide a more bread-like structure and help the finished loaf hold its shape.
The original recipe uses King Arthur Gluten Free Bread flour, but the ingredient list should remain exactly as specified for this recipe. If you are using another gluten-free bread flour, remember that different blends can absorb water differently. The dough should come together into a workable mixture without becoming excessively dry. If necessary, the recipe allows a few additional tablespoons of water to be added gradually.
How the Long Rise Improves the Bread
The extended rising period is one of the most important parts of this no-knead gluten-free bread recipe. After the flour, yeast, salt, and water are combined, the dough rests for approximately 16 to 18 hours or longer. This extended resting time allows the yeast to work gradually, helping the dough develop flavor and a lighter texture.
A longer rise can also make the baking process much more convenient. You can prepare the dough well ahead of time and leave it covered while you continue with your day. The dough can be allowed to rise for up to two days according to the notes provided with the recipe. This flexibility makes the bread particularly useful when you want fresh homemade bread without needing to schedule several active preparation steps.
Preparing the Gluten-Free Bread Dough
Start by combining the gluten-free bread flour, instant yeast, and fine sea salt in a large bowl. Stir the dry ingredients together so the yeast and salt are distributed throughout the flour. Add the warm water and mix until all of the flour has been incorporated. If the mixture seems too dry to form a workable dough, add extra water one tablespoon at a time.
The exact amount of water can vary slightly because gluten-free flour blends differ in their absorption. Avoid adding a large amount of extra water at once. Gradual additions make it easier to reach the right consistency. Once the ingredients are combined into a dough, cover the bowl with a clean kitchen towel or plastic wrap and place it somewhere warm.
Let the Dough Rise
Allow the covered dough to rise for 16 to 18 hours, or longer if desired. A warm environment can help the dough rise more efficiently, particularly during colder weather. If your kitchen is cool, the rising process may take longer than expected. Instead of adding unnecessary ingredients or changing the recipe, simply give the dough additional time when needed.
The long resting period is also where much of the convenience of this recipe comes from. Once the dough has been mixed and covered, there is no need for constant attention. This makes the recipe a good choice for overnight bread baking. You can prepare the dough in the evening, allow it to rise overnight, and continue with shaping and baking the following day.
Shaping the Loaf
When the long rise is complete, prepare a large cutting board with a light dusting of gluten-free flour. Turn the dough out carefully. If it feels too sticky to handle, use a little additional flour. The goal is not to heavily knead the dough but to gently work it into a cohesive round.
Knead and roll the dough for about six turns, then shape it into a ball with the seam positioned underneath. Lightly flour the surface and cover the shaped dough with a towel. Allow it to rise again for approximately one hour. This second rise gives the loaf time to relax and prepare for its final trip into the oven.
Baking Gluten-Free Bread in a Dutch Oven
For the best crust, place the Dutch oven inside the oven while it preheats to 500°F. Starting with a very hot Dutch oven helps the bread begin baking immediately when the dough is placed inside. It also contributes to the crackly exterior that makes this loaf resemble rustic bakery bread.
Carefully transfer the risen dough into the hot Dutch oven. If desired, score the top before or after placing the dough into the pot. Put the lid on the Dutch oven and reduce the oven temperature to 450°F. Bake the loaf covered for 40 minutes. The covered stage helps maintain steam and moisture while the bread develops its internal structure.
After 40 minutes, remove the lid and continue baking for another 20 to 30 minutes. During this uncovered stage, the crust will become darker and crispier. Keep an eye on the loaf because ovens vary, and the exact baking time can depend on your oven and the characteristics of the flour blend being used.
How to Tell When Gluten-Free Bread Is Done
One of the easiest ways to judge this loaf is by looking at its crust. The finished bread should have a well-developed golden-brown exterior rather than a pale, soft surface. Gluten-free bread can require a little more baking time than conventional bread, so appearance is a useful first indicator.
For a more precise test, use an instant-read thermometer. The recipe notes that the loaf is fully cooked when the internal temperature reaches approximately 209 to 210°F, or 98 to 99°C. This can be especially helpful if you are still learning how your oven behaves or if you want to avoid an underbaked or gummy center.
Why Cooling the Bread Matters
Freshly baked bread smells irresistible, but allowing this loaf to cool completely is an important part of the recipe. Remove the bread from the Dutch oven and place it on a cooling rack for at least one hour before slicing. Ideally, allow it to rest for about two hours.
Cooling gives the starches inside the loaf time to set properly. Cutting gluten-free bread too early can leave the center feeling gummy even when the bread has otherwise baked correctly. Patience during this final stage can make a noticeable difference in the crumb and slicing quality.
Ways to Serve Gluten-Free No-Knead Bread
This rustic loaf is versatile enough for breakfast, lunch, snacks, and dinner. Thick slices can be toasted and served with butter, jam, or honey. A crisp slice also makes an excellent accompaniment to soups and stews, particularly hearty gluten-free chili. The crunchy crust and soft interior provide a satisfying contrast to creamy spreads and warm dishes.
For breakfast, try serving toasted slices with butter and blackberry jam or strawberry honey jam. The neutral flavor of the bread allows both sweet and savory toppings to work well. It can also be used as a base for simple sandwiches, provided the other ingredients are suitable for a gluten-free diet.
Storage and Make-Ahead Notes
If you are not planning to bake the bread immediately after the first long rise, the dough can be refrigerated for up to three days according to the recipe notes. After the initial room-temperature rise, cover the bowl with plastic wrap and place it in the refrigerator. When you are ready to bake, remove the dough and continue with the shaping instructions.
Because chilled dough needs time to warm up, allow it to sit at room temperature for at least two hours before baking after refrigeration. This helps the dough become easier to handle and gives it an opportunity to rise again before it enters the hot Dutch oven.
Frequently Asked Questions
Can I let the gluten-free bread dough rise overnight?
Yes. The recipe is designed around a long rise and can be left covered for approximately 16 to 18 hours or longer. The notes also indicate that the dough can rise for up to two days. An overnight rise is particularly convenient because the dough can be mixed before bed and shaped the next day.
Can the dough be refrigerated?
Yes. After the initial long rise at room temperature, the covered dough can be refrigerated for up to three days. Before baking, remove it from the refrigerator and allow it to warm at room temperature for at least two hours before continuing with shaping and baking.
Why is my gluten-free bread gummy inside?
A gummy center can be caused by insufficient baking or slicing the loaf before it has cooled properly. Gluten-free bread benefits from a thorough bake and an adequate cooling period. For additional certainty, use an instant-read thermometer and look for an internal temperature of approximately 209 to 210°F.
Do I need to knead this gluten-free bread?
This is a no-knead recipe, so it does not require the prolonged kneading associated with traditional bread recipes. After the long rise, the dough is gently kneaded and rolled for about six turns to help shape it into a ball. The process remains considerably simpler than conventional bread preparation.
Why bake the bread in a Dutch oven?
A preheated Dutch oven creates a hot, enclosed baking environment that helps retain moisture around the dough during the first part of baking. This supports the development of a crisp, crackly crust while helping the loaf maintain a tender interior. Removing the lid later allows the crust to brown and become crisp.
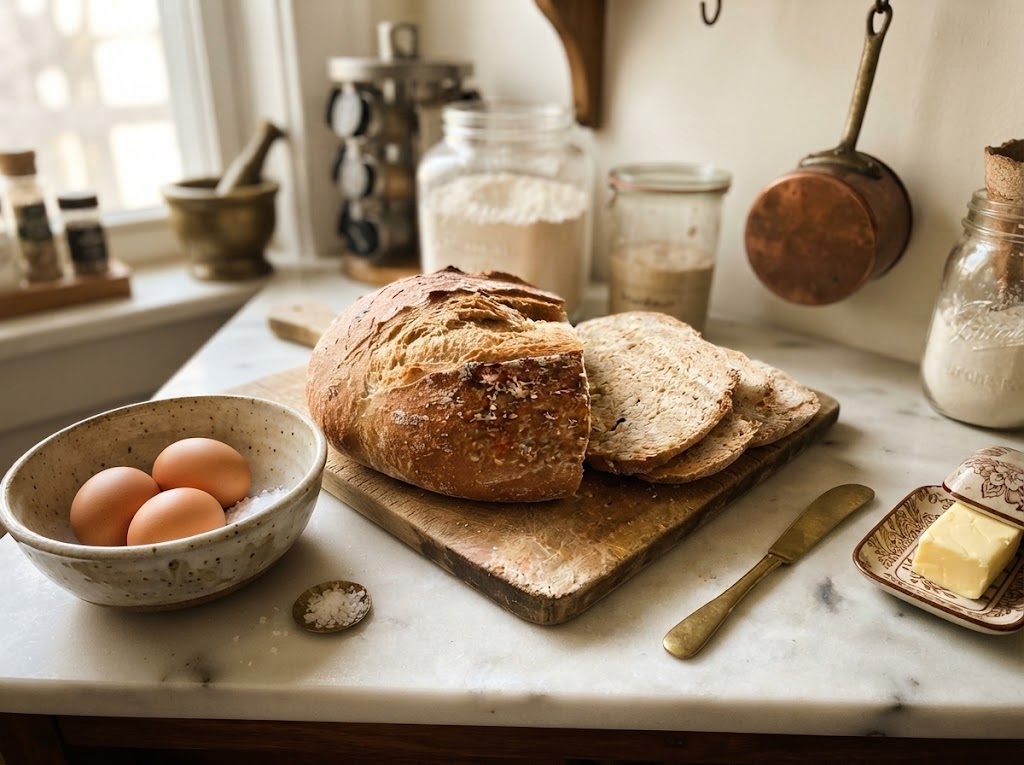
Gluten-Free No-Knead Bread
This easy gluten-free no-knead bread has a crisp, golden crust and a soft, tender interior. Made with gluten-free bread flour, instant yeast, sea salt, and warm water, it uses a long rise and Dutch oven baking method to create a rustic homemade loaf without complicated kneading.
4
servings10
minutes1
hour168
kcal18
hours19
hours10
minutesIngredients
4 cups gluten free bread flour, I used King Arthur Gluten Free Bread flour
½ teaspoon instant yeast
1–1½ teaspoons fine sea salt
1 ¾ cups warm water, plus a few more tablespoons if needed
Directions
- In a large bowl, combine the gluten-free bread flour, instant yeast, and fine sea salt. Add 1 ¾ cups of warm water and stir thoroughly until the flour is incorporated. If the dough needs additional moisture, add more water one tablespoon at a time until a workable dough forms.
- Cover the bowl with a clean kitchen towel or plastic wrap. Place it in a warm location and allow the dough to rise for 16 to 18 hours, or longer.
- When you are ready to bake, uncover the dough. Place a Dutch oven inside the oven and preheat to 500°F.
- Lightly flour a large cutting board. Transfer the dough onto the board, adding a little more flour if necessary to make it easier to handle. Gently knead and roll the dough for about six turns, then shape it into a ball with the seam underneath. Lightly flour the dough and cover it with a towel. Let it rise for 1 hour.
- Carefully transfer the dough into the hot Dutch oven. Score the top if desired. Cover with the lid and reduce the oven temperature to 450°F. Bake covered for 40 minutes.
- Remove the Dutch oven lid and continue baking for 20 to 30 minutes, or until the loaf is deeply golden brown and fully baked.
- Remove the bread from the Dutch oven and transfer it to a cooling rack. Allow the loaf to cool for at least 1 hour before slicing. For the best crumb and texture, allow it to cool completely before cutting.
Notes
- The dough can be allowed to rise for 16 to 18 hours or longer. According to the recipe notes, it can rise for up to two days.
- After the initial room-temperature rise, the covered dough can be refrigerated for up to 3 days.
- If refrigerated, allow the dough to sit at room temperature for at least 2 hours before continuing with the shaping and baking process.
- A warm location helps the dough rise more effectively. A cooler kitchen may require additional rising time.
- Preheating the Dutch oven is important for developing the crisp, crackly crust.
- The oven is initially heated to 500°F and then reduced to 450°F when the bread begins baking.
- For a precise doneness check, an instant-read thermometer should register approximately 209–210°F (98–99°C).
- Allow the loaf to cool completely before slicing because cutting gluten-free bread too early can result in a gummy crumb.
Nutrition Facts
- Total number of serves: 1
- Calories: 168kcal
- Fat: 0.4g
- Carbohydrates: 39g
- Fiber: 1g
- Sugar: 0.05g
- Protein: 3g