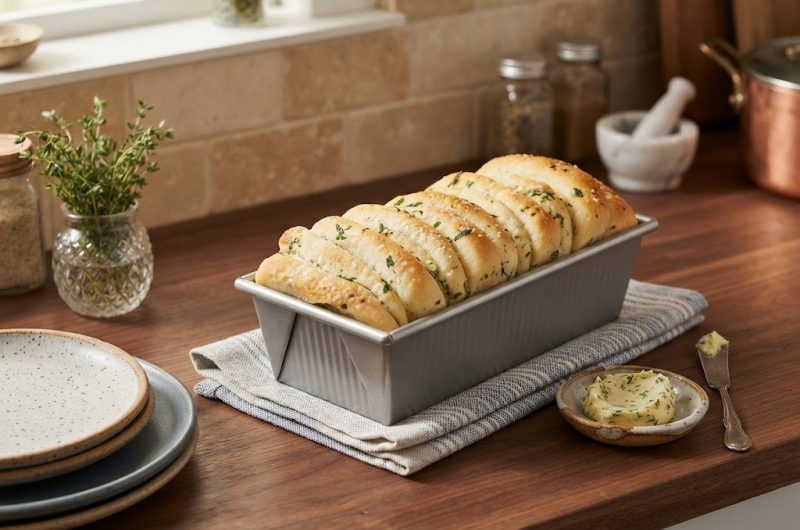
There is something especially satisfying about homemade garlic bread when it comes apart in soft, buttery layers. This Sourdough Discard Garlic Pull Apart Bread combines the mild tang of unfed sourdough discard with garlic, butter, fresh herbs, and a tender homemade dough.
Instead of slicing the finished loaf with a knife, you can simply pull away one flavorful piece at a time.The result is a rustic bread that looks impressive on the table but is surprisingly approachable to make at home.
This recipe is also a practical way to use extra sourdough discard. If you regularly maintain a sourdough starter, you may have discard left over after feeding it. Rather than throwing it away, you can turn it into something delicious. Because this recipe uses instant yeast as well as sourdough discard, the dough rises reliably while still gaining some of the pleasant flavor associated with sourdough baking.
It is an excellent choice for anyone searching for an easy sourdough discard recipe that does not require a long fermentation.
Why You Will Love This Garlic Pull Apart Bread
One of the best things about this homemade garlic bread is its relaxed, rustic character. The individual dough pieces do not need to look perfectly shaped, and the finished loaf does not have to be perfectly uniform. Once the pieces are layered with garlic butter and baked together, they create an attractive loaf with golden edges and soft centers. This makes the recipe particularly suitable for beginner bread bakers who want to make something homemade without worrying about achieving bakery-perfect results.
The texture is another reason this bread works so well. The dough becomes soft and tender as it bakes, while the butter creates rich, flavorful layers throughout the loaf. Garlic powder adds savory depth without requiring the preparation of fresh garlic, and fresh parsley or rosemary brings a bright herbal note. A final sprinkle of flaky sea salt adds a delicate finishing touch and makes the buttery garlic flavor stand out even more.
A Simple Way to Use Sourdough Discard
Sourdough discard is often removed from a starter before feeding because keeping all of the starter would cause its volume to increase rapidly. Although discard can still contain plenty of flavor, unfed discard does not have the same rising strength as an active, recently fed sourdough starter.
That is why this recipe includes instant yeast. The yeast provides the dependable lift needed to create a light, fluffy loaf while the sourdough discard contributes flavor and helps make the recipe a useful addition to your collection of sourdough discard recipes.
For this recipe, the discard should be unfed and at room temperature. Room-temperature ingredients generally combine more easily and help the dough develop consistently. You do not need an active starter that has recently doubled in size. This makes the recipe especially convenient when you have discard available in the refrigerator and want to bake something without planning a lengthy sourdough fermentation.
Choosing the Flour and Milk
Both all-purpose flour and bread flour can be used for this recipe. All-purpose flour produces a soft and tender loaf and is convenient because it is commonly available in most kitchens. Bread flour contains more protein and can produce a slightly stronger dough with a pleasantly chewy structure. Either option works, so you can use the flour you already have available rather than purchasing a special ingredient.
The recipe calls for warmed milk, and both regular dairy milk and non-dairy milk can be used. If using dairy milk, whole milk gives the dough a rich texture, while a suitable non-dairy alternative can also work well. The milk should be warmed to approximately 110°F when combined with the instant yeast. Avoid overheating it, because excessively hot liquid can negatively affect yeast activity.
Building the Garlic Butter Flavor
The garlic butter is the heart of this pull apart bread. Softened unsalted butter is mixed with fresh parsley or rosemary, garlic powder, and salt to create a spreadable mixture. As the dough bakes, the butter melts between the layers, coating the bread with rich garlic and herb flavor. Because the butter is spread over each piece of dough before it is folded, every portion of the finished loaf gets plenty of seasoning.
Fresh herbs are especially useful here because they provide a brighter flavor than dried herbs. Parsley gives the bread a fresh, mild herbal character, while rosemary creates a more aromatic and savory result. If you have either of these herbs available, use them according to the recipe. The same herb can be used in both the dough and the garlic butter topping, creating a consistent flavor throughout the loaf.
Preparing the Dough
Begin by combining the warmed milk, instant yeast, and granulated sugar in the bowl of a stand mixer or a large mixing bowl. Add the flour, room-temperature sourdough discard, lightly beaten egg, chopped herbs, kosher salt, and garlic powder. These ingredients create the base dough and give the bread its savory character even before the garlic butter is added.
Slowly incorporate the melted unsalted butter while mixing on low speed. Once the butter has been added, increase the mixer speed to medium and continue mixing until a shaggy dough forms. If you do not own a stand mixer, the dough can also be mixed by hand. Once combined, move the dough to a smooth work surface and knead it for approximately three to four minutes.
The finished dough should feel smooth and slightly tacky rather than wet or sticky. Dough can behave differently depending on flour, humidity, and the precise moisture content of the sourdough discard. If the dough feels too dry, a small amount of milk can be added. If it feels excessively sticky, a little additional flour can help. Add adjustments gradually rather than adding a large amount at once.
Letting the Dough Rise
Place the kneaded dough into a large greased bowl and cover it with plastic wrap. Allow it to rise for approximately 60 to 90 minutes, or until it has doubled in size. The exact rising time can vary depending on the temperature of your kitchen. A warmer environment may shorten the rising period, while a cooler kitchen can require more time.
While the dough rises, prepare the garlic butter topping. Combine the softened butter, chopped herbs, garlic powder, and kosher salt in a small bowl. Stir until the ingredients are evenly distributed and the mixture is easy to spread. Grease a 9×5-inch loaf pan so it is ready when the dough has finished its first rise.
Creating the Pull Apart Layers
Once the dough has doubled in size, transfer it to a smooth work surface and divide it into 12 equal-sized pieces. Try to keep the portions reasonably similar so the finished loaf bakes evenly. Each piece should then be flattened with the palm of your hand into a rough circle approximately four inches in diameter. Perfection is not necessary because the pieces will be folded and arranged together in the loaf pan.
Generously spread each flattened piece with the prepared garlic butter. A pastry brush can make this step easier, but a small spatula or the back of a spoon can also work. After adding the butter, fold the piece in half and place it in the prepared loaf pan with the folded side facing downward. Continue the process with the remaining dough pieces, arranging them so they sit comfortably together without being tightly compressed.
Save a small amount of the garlic butter mixture for the end. This reserved butter can be brushed over the warm loaf immediately after baking, giving the crust an extra layer of buttery garlic flavor. The final flaky sea salt also helps balance the richness and provides a pleasant texture on the surface.
The Second Rise and Baking
Cover the filled loaf pan with plastic wrap or a damp towel and allow the dough to rise again for approximately 30 to 45 minutes. The dough should become visibly puffed, but it should not rise above the edges of the loaf pan. Keeping an eye on the dough during this stage is more useful than relying only on the clock because room temperature can significantly affect fermentation.
When the second rise is complete, preheat the oven to 350°F. Bake the loaf for approximately 25 to 30 minutes, or until the top becomes golden brown. The aroma of garlic, butter, and fresh herbs will become noticeable as the bread bakes. Avoid judging the loaf only by its color; the center should have had enough time to cook through while the exterior develops a warm golden finish.
As soon as the bread comes out of the oven, brush the remaining garlic butter over the warm surface and sprinkle it with flaky sea salt. Allow the loaf to cool in the pan for about 10 minutes before serving. This short resting period allows the bread to settle while keeping it warm enough for the butter and herbs to remain aromatic.
Serving Suggestions
This garlic pull apart bread makes an excellent appetizer because guests can simply tear off individual pieces and enjoy them without needing a knife. It is also a natural side dish for pasta, baked dishes, soups, stews, and other comforting meals. The buttery garlic flavor pairs particularly well with tomato-based pasta sauces because the bread can be used to soak up extra sauce.
For a casual family dinner, place the warm loaf in the center of the table and allow everyone to pull off their own portion. It can also be served alongside a bowl of soup or a hearty salad. Because the bread is already seasoned with butter, garlic, herbs, and salt, it does not need an additional spread or dipping sauce to taste flavorful.
Why This Recipe Is Beginner-Friendly
Many homemade bread recipes can seem intimidating when they involve complicated shaping techniques or lengthy fermentation schedules. This recipe takes a more approachable route. Instant yeast provides reliable leavening, while sourdough discard adds flavor without requiring an active starter. The dough is divided into simple pieces, flattened, buttered, folded, and placed into a loaf pan. There is no complicated braiding or advanced shaping technique to master.
The rustic style also makes this recipe forgiving. Small differences between individual dough pieces will not ruin the finished bread. Once everything bakes together, the layers form a beautiful pull apart loaf with crisp golden areas around the edges and soft, buttery sections inside. That combination of simplicity and impressive presentation makes it a useful recipe for both new and experienced home bakers.
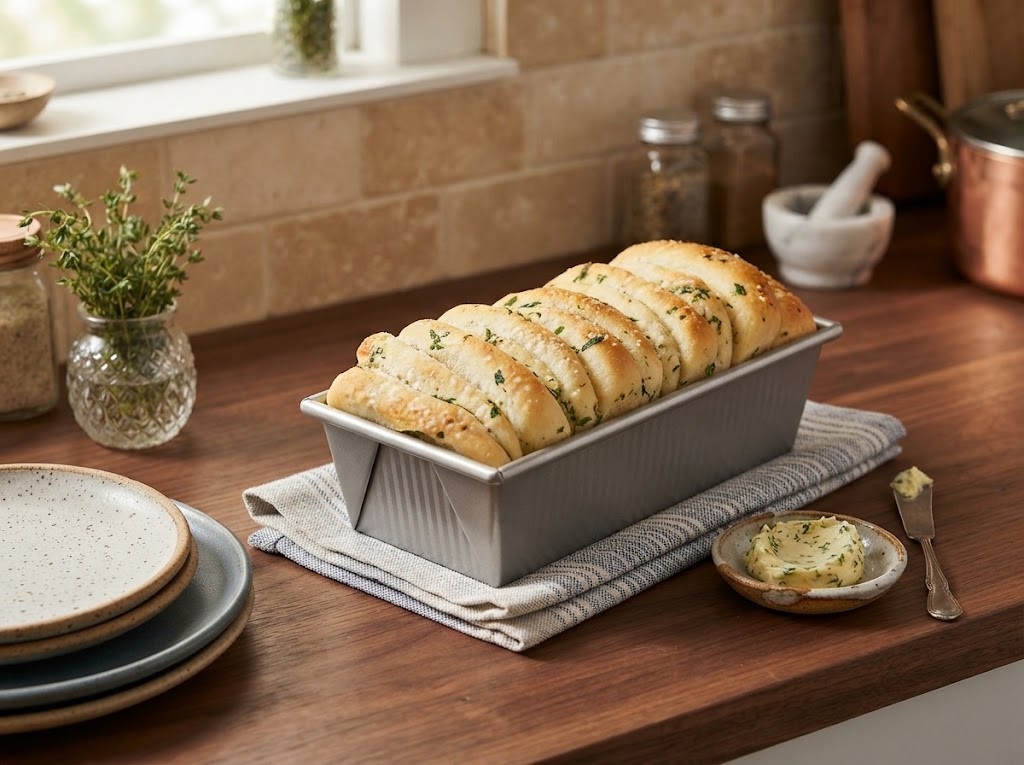
Sourdough Discard Garlic Pull-Apart Bread
A soft, buttery garlic pull apart bread made with unfed sourdough discard, instant yeast, fresh herbs, and garlic butter.
12
servings10
minutes30
minutes168
kcal60
minutes1
hour40
minutesIngredients
¼ cup non-dairy or regular dairy milk warmed to 110℉
1 ½ teaspoons instant yeast
2 teaspoons granulated sugar
2 cups all-purpose flour
200 grams (about ¾ cup) sourdough discard unfed, at room temperature
1 egg lightly beaten
1 Tablespoon fresh parsley or rosemary chopped
1 teaspoon kosher salt
1 teaspoon garlic powder
2 Tablespoons unsalted butter melted
6 Tablespoons unsalted butter softened
1 Tablespoon fresh parsley or rosemary chopped
1 Tablespoon garlic powder
½ teaspoon kosher salt
flaky sea salt for topping
Directions
- Combine the warmed milk, instant yeast, and sugar in the bowl of a stand mixer or in a large mixing bowl.
- Add the flour, sourdough discard, beaten egg, chopped herbs, salt, and garlic powder.
- With the mixer on low speed, slowly add 2 Tablespoons of melted butter. Increase the speed to medium and mix until a shaggy dough forms. You can also mix the dough by hand.
- Transfer the dough to a smooth work surface and knead until a smooth dough forms, about 3–4 minutes.
- The dough should be smooth and slightly tacky, but it should not be sticky.
- Transfer the dough to a large greased bowl and cover with plastic wrap.
- Let the dough rise for 60–90 minutes, or until doubled in size.
- While the dough rises, prepare the garlic butter topping.
- In a small bowl, combine the softened butter, chopped herbs, garlic powder, and ½ teaspoon salt. Mix until combined and set aside. Grease a 9×5-inch loaf pan.
- After the first rise, turn the dough onto a smooth work surface and divide it into 12 equal-sized pieces.
- Flatten each piece with the palm of your hand into a rough circle about 4 inches in diameter.
- Generously spread each piece with the prepared butter mixture.
- Fold each piece in half, then transfer it to the prepared baking pan with the folded side down.
- Repeat with the remaining pieces of dough, using nearly all of the butter mixture. Reserve a small amount of garlic butter for finishing the loaf after baking.
- Cover the pan with plastic wrap or a damp towel and let the dough rise for 30–45 minutes, until puffed. The dough should not rise above the edges of the loaf pan.
- Preheat the oven to 350℉.
- Bake for 25–30 minutes, or until the loaf is golden brown.
- While the bread is still warm, brush it with the remaining garlic butter and sprinkle with flaky sea salt.
- Let the loaf cool in the pan for 10 minutes, then serve warm.
Nutrition Facts
- Total number of serves: 1
- Calories: 168kcal
- Fat: 9g
- Carbohydrates: 19g
- Fiber: 1g
- Sugar: 2g
- Protein: 4g