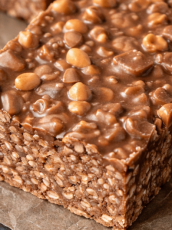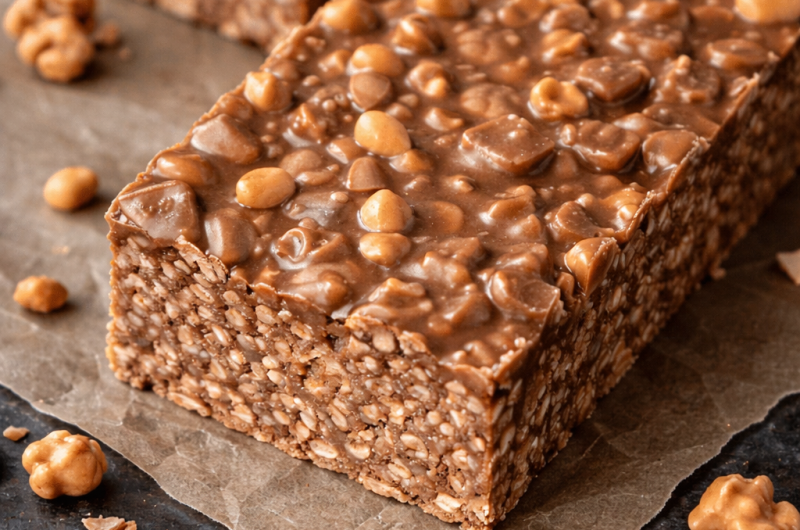
No-Bake Chocolate Peanut Butter Crunch Bars are an easy homemade dessert that combines rich chocolate, creamy peanut butter, crispy rice cereal, and the natural sweetness of maple syrup. These delicious chocolate peanut butter bars have a satisfying crunch, a smooth chocolate coating, and a firm texture that makes them easy to slice and serve. Because they require no oven, they are an excellent choice for warm days, busy afternoons, family gatherings, or whenever you want a sweet treat without spending hours in the kitchen. With just a few basic ingredients and a short preparation time, you can make a batch of homemade chocolate crunch bars that look appealing and taste delicious.
Why You Will Love These Easy No-Bake Chocolate Bars
One of the best things about this no-bake chocolate peanut butter bars recipe is how simple it is to prepare. There is no complicated baking process, no need to prepare a separate crust, and no lengthy list of ingredients. Everything comes together in a mixing bowl before being transferred to a baking dish and chilled until firm. The combination of chocolate and peanut butter creates a rich, creamy base, while crispy rice cereal adds a light texture that keeps every bite interesting. Maple syrup provides sweetness and helps bring the mixture together, while coconut oil contributes to the smooth consistency of the melted chocolate mixture.
What Makes Chocolate Peanut Butter Crunch Bars So Delicious?
The appeal of these homemade chocolate peanut butter crunch bars comes from the balance of flavors and textures. Melted chocolate brings a deep cocoa flavor, while peanut butter adds a creamy consistency and a roasted nut taste. Crispy rice cereal provides the crunch that gives these bars their distinctive character. Maple syrup adds sweetness, helping balance the richness of the chocolate and peanut butter, while coconut oil helps create a smooth mixture that coats the cereal evenly. Once chilled, the ingredients form a cohesive bar that can be cut into squares or rectangles. The result is a dessert that feels indulgent without requiring a complicated preparation method.
Ingredients for No-Bake Chocolate Peanut Butter Crunch Bars
This recipe uses five straightforward ingredients: chocolate chips, peanut butter, crispy rice cereal, maple syrup, and coconut oil. Each ingredient plays an important role in the finished texture and flavor. Chocolate chips form the rich base, while peanut butter adds creaminess and a nutty taste. Crispy rice cereal provides the light, crunchy texture that distinguishes these bars from ordinary chocolate fudge. Maple syrup adds sweetness, and coconut oil helps the melted mixture blend smoothly. Measuring the ingredients before starting makes preparation easier and helps ensure the cereal is coated evenly. For the best results, use fresh crispy rice cereal and stir natural peanut butter thoroughly before measuring if the oil has separated.
Choosing Chocolate Chips for the Best Flavor
Chocolate chips are the main source of chocolate flavor in this recipe, so choose a variety you enjoy eating on its own. Semi-sweet chocolate chips offer a balanced taste that pairs well with peanut butter and maple syrup. Dark chocolate chips create a deeper, less sweet flavor, while milk chocolate chips produce a sweeter result. The recipe calls for 1½ cups of chocolate chips, and this quantity helps create a rich coating that binds the cereal together. Whichever variety you choose, melt the chocolate slowly and stir it frequently. Chocolate can become thick or scorched when exposed to excessive heat, so gentle heating is essential for a smooth mixture.
Selecting Peanut Butter for Smooth, Creamy Bars
Peanut butter gives these no-bake bars their characteristic flavor and creamy texture. The recipe uses 1 cup of peanut butter, which combines with the melted chocolate to coat the crispy rice cereal. Conventional creamy peanut butter is a convenient choice because it generally has a consistent texture and mixes easily. Natural peanut butter can also work, but it should be stirred thoroughly before measuring so the oil and solids are evenly distributed. Peanut butter that is unusually dry or oily may change the consistency of the finished bars. For a uniform coating, make sure the peanut butter is smooth before combining it with the other ingredients.
Why Crispy Rice Cereal Matters
Crispy rice cereal provides the crunch that makes this dessert different from ordinary chocolate peanut butter squares. The recipe calls for 3 cups of cereal, enough to distribute the crisp texture throughout the chocolate mixture while allowing the ingredients to bind together. Add the cereal to a large bowl before pouring the melted mixture over it. Use a spatula or large spoon to fold the ingredients together gently, taking care to coat the cereal without crushing it. Fresh cereal is especially important because cereal that has absorbed moisture may produce softer bars. Even coating is the goal: every portion should contain a good balance of chocolate, peanut butter, and crispy rice.
The Role of Maple Syrup and Coconut Oil
Maple syrup and coconut oil help complete the chocolate mixture. The recipe uses ½ cup of maple syrup to add sweetness and contribute to the consistency of the coating. Its distinctive flavor complements the chocolate and peanut butter without overpowering them. Coconut oil, measured at ¼ cup, helps the ingredients melt together smoothly and contributes to the texture as the bars cool. Because coconut oil can soften when warm, these bars are best kept refrigerated. Use the quantities specified in the recipe to maintain a suitable balance between the liquid mixture and the crispy cereal. Changing the sweetener or fat may affect how firmly the bars set.
Essential Equipment for Making No-Bake Bars
You do not need specialized equipment to make chocolate peanut butter crunch bars. An 8 × 8-inch baking dish provides a suitable shape and depth for the mixture, while parchment paper makes it easier to remove the chilled bars. A microwave-safe bowl is useful for melting the chocolate, peanut butter, maple syrup, and coconut oil together. You will also need a large mixing bowl for the cereal, a spatula or spoon for mixing and pressing, measuring cups, and a sharp knife for slicing. Preparing your equipment before melting the chocolate helps the process move smoothly, since the warm mixture should be combined with the cereal before it begins to cool and thicken.
Step 1: Prepare the Baking Dish Properly
Begin by lining an 8 × 8-inch baking dish with parchment paper. Leave enough paper extending over two opposite sides to create handles for lifting the bars out after chilling. Press the parchment into the corners so it sits as flat as possible against the base and sides of the dish. This preparation prevents the sticky chocolate mixture from adhering directly to the pan and makes serving much easier. A properly lined dish also helps the finished bars maintain their shape when removed. Before continuing, measure the cereal into a separate large bowl and make sure your microwave-safe bowl and spatula are ready.
Step 2: Melt the Chocolate and Peanut Butter Mixture
Place the chocolate chips, peanut butter, maple syrup, and coconut oil in a microwave-safe bowl. Heat the ingredients in 30-second intervals, stirring well after each interval. Continue until the chocolate has melted and the mixture looks smooth and glossy. The total melting time will depend on the microwave and the temperature of the ingredients, so rely on the appearance of the mixture rather than using one fixed cooking time. Avoid heating the ingredients continuously for too long, as excessive heat can cause chocolate to scorch or become difficult to stir. Once the mixture is smooth, remove it from the microwave and prepare to coat the cereal.
Step 3: Coat the Crispy Rice Cereal Evenly
Place the 3 cups of crispy rice cereal in a large mixing bowl. Pour the warm chocolate and peanut butter mixture over the cereal, distributing it as evenly as possible. Gently fold the mixture with a spatula or large spoon until the cereal is coated from top to bottom. Work carefully to preserve the cereal’s crisp structure. If the mixture begins to cool and thicken, continue folding patiently until the ingredients are evenly distributed. Proper coating helps each bar hold together after chilling and ensures the flavor is consistent throughout the batch. Before transferring the mixture, check the bottom of the bowl for any cereal that remains uncoated.
Step 4: Press the Mixture into the Pan
Transfer the coated cereal mixture into the parchment-lined baking dish. Use a spatula or the back of a spoon to spread it toward the corners and edges. Press the mixture down firmly enough to help the ingredients bind together, but avoid crushing the cereal excessively. Pay particular attention to the corners and the edges, where loose cereal can make the finished bars more likely to crumble. Smooth the top into an even layer so the bars have a consistent thickness. An evenly packed mixture is easier to chill and slice, and it helps produce neat squares or rectangles when the dessert is ready to serve.
Step 5: Chill Until the Bars Are Firm
Place the baking dish in the refrigerator and chill the mixture for 60–90 minutes. This step allows the chocolate and coconut oil to firm up, helping the cereal mixture hold its shape. The bars should feel firm when gently touched and should not appear wet or loose in the center. If they still seem soft after the initial chilling period, return the dish to the refrigerator for additional time. Refrigeration is important because the chocolate mixture can soften at warmer temperatures. Avoid attempting to cut the bars too early, as the mixture may stick to the knife or fall apart before it has fully set.
Step 6: Slice and Serve the Chocolate Crunch Bars
Once the mixture is completely firm, use the parchment paper to lift it out of the baking dish and place it on a cutting board. Peel the paper away from the sides and position the slab on a stable surface. With a sharp knife, cut the bars into even squares or rectangles. For cleaner edges, wipe the blade between cuts and allow the knife to do most of the work rather than pressing down too aggressively. If the bars begin to soften while slicing, return them to the refrigerator briefly. Serve the pieces chilled for a satisfying combination of rich chocolate, creamy peanut butter, and crispy cereal.
How to Get the Best Texture Every Time
The texture of homemade no-bake chocolate peanut butter bars depends on a few simple details. First, measure the ingredients carefully so the chocolate mixture can coat and bind the cereal without leaving the bars too wet. Second, melt the ingredients gradually and stir frequently to maintain a smooth consistency. Third, fold the cereal into the mixture rather than stirring aggressively, which can crush the crisp pieces. Finally, press the mixture evenly into the pan and allow enough time for refrigeration. If the bars are too soft, they may need more chilling time. Consistent preparation and proper storage help preserve the balance between the firm chocolate coating and the crunchy cereal.
How to Store No-Bake Chocolate Peanut Butter Bars
Store the finished bars in an airtight container in the refrigerator for up to 7 days. Keeping them chilled helps maintain their shape and prevents the chocolate and coconut oil from becoming too soft. If you are stacking the bars, place parchment paper between the layers to reduce sticking. For longer storage, freeze the bars for up to 3 months in a freezer-safe container. Wrapping individual portions before freezing makes it easier to take out only the amount you need. Thaw frozen bars in the refrigerator before serving, allowing them to soften slightly while remaining cool and firm. Always return any unused portions to the refrigerator promptly.
Can You Make These Bars Ahead of Time?
Yes, these no-bake chocolate peanut butter crunch bars are well suited to advance preparation. Since they need 60–90 minutes to chill, you can prepare them earlier in the day and keep them refrigerated until dessert time. They can also be made a day before a gathering, which allows you to finish the dessert in advance instead of preparing it while guests arrive. For the neatest presentation, leave the mixture uncut until it has fully set, then slice it shortly before serving or portion it ahead and store the pieces in an airtight container. If you are preparing them several days ahead, refrigeration will help maintain their texture and freshness.
Easy Ways to Adapt the Recipe
The original recipe uses chocolate chips, peanut butter, crispy rice cereal, maple syrup, and coconut oil. If you want to adjust the flavor, choose a different variety of chocolate while keeping the other quantities unchanged. Dark chocolate can provide a stronger cocoa flavor, while milk chocolate makes the bars sweeter. For a dairy-free version, use chocolate chips labeled dairy-free and check the labels of the remaining ingredients. Maple syrup can be replaced with honey or a suitable syrup alternative, although the taste and firmness may change. These adjustments are optional; for the most predictable result, follow the original ingredient list and quantities.
Frequently Asked Questions About No-Bake Chocolate Peanut Butter Crunch Bars
Do these chocolate peanut butter bars need refrigeration?
Yes. Refrigeration helps the chocolate and coconut oil firm up, which keeps the bars easier to handle and slice. The mixture can soften at room temperature, especially in a warm kitchen, so store the bars in an airtight container in the refrigerator and remove only the portions you plan to serve. For the best texture, serve them cool rather than leaving them out for an extended period.
Can natural peanut butter be used?
Natural peanut butter is suitable for this recipe, but stir it thoroughly before measuring. Natural varieties sometimes separate, leaving oil on top and thicker solids at the bottom. If these components are not evenly mixed, the chocolate mixture may have a different consistency, and the finished bars may not set as firmly. A smooth, well-stirred peanut butter is the best choice for even coating.
How can I make the recipe dairy-free?
Choose chocolate chips that are specifically labeled dairy-free and check the ingredient labels on the other products. The recipe does not include butter or milk as separate ingredients, but chocolate chips can contain milk ingredients. Always verify the packaging if you are preparing the bars for someone who avoids dairy. If the recipe is intended for someone with a milk allergy, check for cross-contact warnings as well.
What can replace maple syrup?
Honey or a suitable sugar-free syrup alternative can be used, but the flavor and consistency may differ from the original recipe. Different sweeteners contain varying amounts of water and sugar, which can influence how the bars bind and set. If you want the most reliable result, use the specified ½ cup of maple syrup. When experimenting with alternatives, chill the bars fully before deciding whether their texture is firm enough for slicing.
Why are my no-bake bars too soft?
Bars that remain soft may need more time in the refrigerator. Allow the full 60–90 minutes and extend the chilling time if necessary. Warm ingredients, differences between peanut butter brands, and changes to the sweetener can also affect the final texture. If the mixture is still soft after thorough chilling, a small amount of additional crispy rice cereal may help absorb excess coating, although this changes the original ingredient proportions. For future batches, follow the stated measurements and avoid substituting ingredients unless necessary.
Can these chocolate crunch bars be frozen?
Yes. Cut the fully chilled bars into portions, wrap them individually if desired, and place them in a freezer-safe container. They can be frozen for up to 3 months. To serve, thaw them in the refrigerator for approximately 15–20 minutes or until they reach a pleasant eating texture. Thawing time may vary depending on the size of each piece. Keeping the bars covered helps protect them from freezer odors and reduces moisture exposure.
How do I cut the bars neatly?
Wait until the mixture is fully set before removing it from the pan. Use the parchment paper to lift the slab onto a cutting board, then slice with a sharp knife. Wiping the blade clean between cuts helps prevent chocolate from building up along the edges. If the bars become soft while cutting, chill them again briefly. Cutting at a steady pace and using even pressure will help create uniform portions that look attractive on a serving plate.
Can I double the recipe for a crowd?
Yes. You can double the ingredient quantities to make a larger batch. A 9 × 13-inch baking dish is a practical option, although the thickness may differ from that of the original recipe. Spread and press the mixture evenly, then check that the center has become firm before slicing. The larger batch may require additional chilling time, depending on its thickness and the refrigerator temperature. For consistent portions, cut the bars into evenly sized squares or rectangles after the mixture has completely set.
Helpful Notes for Consistent Results
- Prepare the pan first: Line the baking dish with parchment paper before melting the chocolate mixture so everything is ready when you need it.
- Use gentle heat: Microwave in 30-second intervals and stir between each interval to reduce the risk of scorching the chocolate.
- Mix thoroughly: Fold the cereal carefully until the pieces are evenly coated, checking the bottom of the bowl for dry cereal.
- Press evenly: Spread the mixture into all corners of the pan and smooth the surface for bars with a consistent thickness.
- Allow enough chilling time: Refrigerate for 60–90 minutes or longer if necessary, until the mixture is firm.
- Use a clean knife: Wipe the blade between slices for tidier edges and more attractive portions.
- Keep the bars chilled: Store them in an airtight container in the refrigerator for up to 7 days.
- Freeze for later: Store in a freezer-safe container for up to 3 months and thaw in the refrigerator before serving.
Serving Ideas for Chocolate Peanut Butter Crunch Bars
These bars are easy to serve as an everyday dessert, a sweet afternoon snack, or a simple addition to a dessert platter. Arrange the cut squares on a chilled serving plate alongside fresh berries or other bite-sized treats. For a casual gathering, place the bars in paper liners so guests can pick them up easily. They also make a convenient make-ahead option for parties, family celebrations, and shared lunches. Because the bars are rich, smaller portions can be satisfying. Keep the serving plate cool when possible, and return any leftovers to the refrigerator after serving to help preserve the chocolate coating and crunchy texture.
Final Guide to Making Easy No-Bake Chocolate Peanut Butter Crunch Bars
This no-bake chocolate peanut butter crunch bars recipe offers a straightforward way to prepare a rich, crunchy dessert with five basic ingredients. The method is simple: melt the chocolate mixture, coat the crispy rice cereal, press everything into a lined pan, and refrigerate until firm. The result is a batch of sliceable chocolate peanut butter bars with a creamy coating and a crisp center. Careful measuring, gentle heating, thorough mixing, and sufficient chilling make the biggest difference in the final texture. Whether you prepare them for a family dessert or keep a batch in the refrigerator for an occasional sweet treat, these bars are an easy option when you want chocolate flavor without turning on the oven.
No-Bake Chocolate Peanut Butter Crunch Bars
Description: These easy no-bake chocolate peanut butter crunch bars combine melted chocolate, creamy peanut butter, crispy rice cereal, maple syrup, and coconut oil. The mixture is pressed into a pan and chilled until firm, creating crunchy, chocolatey bars that are easy to slice and serve without baking.
Preparation Time: 15 minutes
Chilling Time: 60–90 minutes
Cooking Time: No cooking required; brief microwave heating is used to melt the ingredients.
Total Time: Approximately 1 hour 15 minutes to 1 hour 45 minutes
Serving: 13 servings, based on the supplied nutrition information
Ingredients
- 1½ cups (375 ml) chocolate chips
- 1 cup (250 ml) peanut butter
- 3 cups (750 ml) crispy rice cereal
- ½ cup (125 ml) maple syrup
- ¼ cup (60 ml) coconut oil
Step-by-Step Instructions
- Prepare the pan: Line an 8 × 8-inch baking dish with parchment paper, leaving some overhang on the sides so the bars can be lifted out easily.
- Melt the ingredients: Combine the chocolate chips, peanut butter, maple syrup, and coconut oil in a microwave-safe bowl. Heat in 30-second intervals, stirring after each interval until the mixture is smooth and fully melted.
- Add the cereal: Place the crispy rice cereal in a large mixing bowl. Pour the melted chocolate mixture over the cereal and gently stir until all the pieces are evenly coated.
- Fill the baking dish: Transfer the coated cereal mixture to the prepared pan. Spread it evenly and press down firmly with a spatula or the back of a spoon.
- Chill the mixture: Refrigerate for 60–90 minutes, or until the bars are firm and fully set.
- Remove from the pan: Lift the chilled mixture out using the parchment paper and place it on a cutting board.
- Slice and serve: Cut into even squares or rectangles using a sharp knife. Wipe the blade between cuts for clean edges, then serve the bars chilled.
Notes
- Line the pan carefully to make removing the bars easier.
- Heat the chocolate mixture gradually to prevent scorching.
- Stir gently when adding the cereal to preserve its crisp texture.
- Press the mixture evenly into the pan to help the bars hold together.
- Refrigerate longer if the center is still soft after 90 minutes.
- Store in an airtight container in the refrigerator for up to 7 days.
- Freeze in a freezer-safe container for up to 3 months and thaw in the refrigerator before serving.
- For a dairy-free variation, use dairy-free chocolate chips and check all ingredient labels.
- Natural peanut butter may be used if it is thoroughly stirred before measuring.
- Maple syrup may be replaced with honey or a suitable syrup alternative, although the flavor and texture may change.
Nutritional Information
Estimated nutrition per serving, based on the supplied nutrition information:
- Calories: 250 kcal
- Total Fat: 14 g (18% Daily Value)
- Saturated Fat: 6 g (30% Daily Value)
- Cholesterol: 0 mg (0% Daily Value)
- Sodium: 80 mg (4% Daily Value)
- Total Carbohydrates: 13 g (5% Daily Value)
- Dietary Fiber: 1 g (4% Daily Value)
- Total Sugars: 12 g
- Protein: 5 g (10% Daily Value)