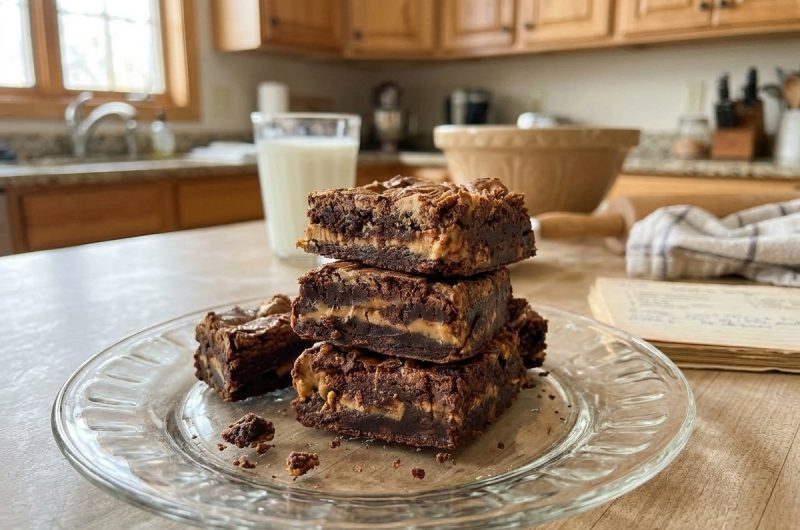
Peanut Butter Brownies are a delicious homemade dessert that brings together two classic flavors: rich chocolate and creamy peanut butter. These brownies have everything you want in a satisfying chocolate treat, including a soft, fudgy center, chewy edges, and generous swirls of peanut butter throughout the top.
Each bite delivers a wonderful balance of deep chocolate flavor and smooth peanut butter, making this recipe an excellent choice for anyone who loves homemade brownies. Whether you are preparing something sweet for your family, sharing dessert with friends, or simply satisfying a chocolate craving, these easy peanut butter brownies are sure to become a favorite.
Unlike boxed brownie mixes, this homemade recipe gives you control over the ingredients and creates a wonderfully rich texture without requiring complicated equipment. You do not need an electric mixer or any special baking skills to prepare the batter.
A saucepan, mixing bowls, a whisk, and a spatula are enough to bring everything together. The melted chocolate and butter create a smooth foundation, while cocoa powder adds extra chocolate intensity. Creamy peanut butter is added on top and gently swirled into the batter, creating an attractive appearance and delicious flavor in every slice.
These Peanut Butter Brownies
One of the best things about these homemade peanut butter brownies is their texture. They are not dry or cake-like, but instead have a dense, moist, and chewy consistency that makes every bite enjoyable. The combination of melted chocolate, butter, granulated sugar, and brown sugar helps create brownies with a rich interior and slightly crisp edges. The peanut butter adds another layer of creaminess that makes the dessert taste even more indulgent.
Another reason to try this recipe is how simple the preparation can be. Everything comes together using basic kitchen ingredients, and there is no need to prepare a complicated frosting or separate filling. The peanut butter is placed directly over the chocolate brownie batter before baking. A knife or skewer creates beautiful swirls, giving the brownies a bakery-style appearance with very little effort. This straightforward method makes the recipe suitable for beginner bakers as well as anyone who enjoys making desserts at home.
These brownies are also convenient for different occasions. You can prepare them for birthday celebrations, holiday dessert tables, family gatherings, weekend baking, or an afternoon snack. They can be served at room temperature, slightly warmed, or chilled for a firmer texture. Because the recipe makes 12 servings, it is a practical dessert to share without requiring a large batch or several baking pans.
What Makes Chocolate and Peanut Butter Such a Great Combination?
Chocolate and peanut butter are popular together because their flavors complement each other naturally. Chocolate provides a deep, slightly bitter sweetness, while peanut butter brings a creamy texture and roasted nutty taste. When these ingredients are combined in a brownie, they create a dessert that tastes similar to a classic chocolate peanut butter cup but has the soft, chewy texture of homemade chocolate brownies.
The semisweet chocolate chips help create a smooth and rich chocolate base, while unsweetened cocoa powder gives the batter a deeper chocolate flavor. Peanut butter balances that richness and adds a slightly salty, nutty element. Instead of mixing all the peanut butter directly into the batter, this recipe uses it as a topping that is gently swirled into the chocolate mixture. This technique allows both flavors to remain noticeable rather than blending into one uniform taste.
How to Make Peanut Butter Brownies
Prepare the Baking Pan and Oven
Start by preheating your oven to 350°F. Prepare an 8 × 8-inch square baking pan by lightly coating it with baking spray. Line the pan with parchment paper so that the brownies can be removed easily after cooling. Leaving a little parchment paper hanging over the sides creates convenient handles for lifting the baked brownies out of the pan. Proper preparation also helps prevent sticking and makes slicing much easier.
Melt the Butter and Chocolate
Place the unsalted butter in a small saucepan over medium heat and allow it to melt completely. Remove the saucepan from the heat and add half of the semisweet chocolate chips. Whisk until the chocolate melts and combines smoothly with the butter. Transfer this mixture to a large mixing bowl and allow it to cool for a few minutes before adding the eggs. You can also melt the butter in a microwave-safe bowl and stir in the chocolate chips afterward.
Mix the Dry Ingredients
In a separate mixing bowl, sift together the all-purpose flour and unsweetened cocoa powder. Add the salt and whisk everything until evenly combined. This step is important because cocoa powder and flour can develop small lumps during storage. Sifting helps break up those lumps and makes the dry ingredients easier to incorporate into the chocolate mixture without excessive mixing.
Combine the Wet Ingredients
Add the granulated sugar and light brown sugar to the melted chocolate and butter mixture. Whisk until the sugars are distributed throughout the mixture. Add the eggs and vanilla extract, then continue whisking until the mixture looks smooth and well combined. Room-temperature eggs are particularly helpful because they blend more easily with the chocolate mixture and help create an even batter.
Finish the Brownie Batter
Gradually fold the flour and cocoa mixture into the wet ingredients using a spatula. Mix gently until the dry ingredients are incorporated and no large patches of flour remain. Avoid overmixing because excessive stirring can affect the final texture and make the brownies tougher. Add the remaining semisweet chocolate chips and fold them into the batter. The finished mixture should be thick, rich, and evenly combined.
Add the Peanut Butter Swirls
Transfer the brownie batter into the prepared baking pan. Use a spatula to spread it evenly, making sure the mixture reaches the corners. Drop small spoonfuls of creamy peanut butter over the surface of the batter. Using the tip of a knife or skewer, gently drag through the peanut butter and chocolate mixture to create decorative swirls. Avoid stirring too much because the goal is to keep visible ribbons of peanut butter on top.
Bake Until the Brownies Are Set
Place the pan in the preheated oven and bake for approximately 40 to 45 minutes. The brownies should look set around the edges, and the center should not wobble significantly when the pan is gently shaken. If you prefer a softer, gooier center, you can begin checking around 35 minutes. If the peanut butter starts browning too quickly, loosely cover the pan with aluminum foil after approximately 25 minutes. Baking time may increase slightly when covered.
Cool and Slice Before Serving
Remove the brownies from the oven and allow them to cool completely in the baking pan. Cooling is important because the brownies continue to set as their temperature decreases. Cutting them while they are still warm can make the centers appear overly soft and cause the slices to break apart. Once cooled, lift the brownies out using the parchment paper and cut them into 12 portions with a sharp knife.
Expert Tips for Perfect Fudgy Peanut Butter Brownies
Measure the Flour Correctly
Accurate flour measurement makes a noticeable difference when baking brownies. Adding too much flour can create a dry or dense result instead of the soft, fudgy texture you want. A kitchen scale is the most reliable way to measure flour. If you are using measuring cups, first fluff the flour with a spoon, gently spoon it into the measuring cup, and level the top with a knife. Avoid dipping the measuring cup directly into the flour container.
Use Room-Temperature Eggs
Allow the eggs to reach room temperature before preparing the batter. Cold eggs can make the melted chocolate and butter mixture cool too quickly, which may affect how smoothly the ingredients combine. If you forget to remove the eggs from the refrigerator ahead of time, place them in a bowl of warm water for a short time before using them.
Avoid Overmixing the Batter
Once the flour mixture has been added, use a spatula and fold gently rather than beating the batter vigorously. Overmixing can develop more gluten in the flour, resulting in brownies that are less tender. Stop mixing as soon as the dry ingredients disappear into the chocolate mixture. This simple technique helps preserve the dense and chewy texture.
Do Not Overdo the Peanut Butter Swirls
The peanut butter topping should remain visible after baking. Use a knife or skewer to create a few gentle movements through the batter instead of mixing it completely. Too much swirling can blend the peanut butter into the chocolate mixture and remove the attractive marbled appearance that makes these brownies special.
Choose the Right Baking Pan
A light-colored aluminum baking pan is a good option for brownies because it distributes heat effectively and helps the edges bake evenly. Dark-colored pans can absorb more heat and may cause the outside of the brownies to become darker or drier. Glass and ceramic pans can also behave differently during baking, so check the brownies carefully if you use an alternative pan.
How to Store Peanut Butter Brownies
Store leftover brownies in an airtight container at room temperature for approximately 3 to 4 days. Keeping them covered helps preserve their moisture and prevents the edges from becoming dry. If your kitchen is particularly warm, refrigerating the brownies is another option. They can be stored in an airtight container in the refrigerator for approximately 4 to 5 days.
You can enjoy these brownies straight from the refrigerator if you prefer a firmer texture, or allow them to sit at room temperature before serving. A slightly warmed brownie also tastes delicious because the chocolate becomes softer and the peanut butter flavor becomes more noticeable. If you want to warm individual portions, use a microwave for a short interval and check the texture before heating further.
Can You Freeze Peanut Butter Brownies?
Yes, these homemade peanut butter brownies can be frozen for up to 3 months when properly wrapped and stored. Allow the brownies to cool completely before cutting them into individual portions. Wrap each piece separately in plastic wrap and place the wrapped brownies inside a freezer-safe container or zip-top freezer bag. You can also place parchment paper between the brownie layers to prevent them from sticking together.
When you are ready to enjoy them, remove the desired portions from the freezer and allow them to thaw at room temperature. Individual wrapping makes it easy to take out only the amount you need without thawing the entire batch. This storage method is especially useful when preparing desserts ahead of time for gatherings or keeping homemade treats available for later.
Frequently Asked Questions
How Do You Keep Peanut Butter Brownies Fudgy?
The key is to measure the flour correctly, avoid overmixing, and pay attention to the baking time. Removing the brownies from the oven when the center is just set helps preserve their soft texture. For an especially gooey center, you can try baking them for approximately 35 minutes, although the final texture will depend on your oven and pan.
Can I Use Natural Peanut Butter?
Commercial creamy peanut butter is recommended for this recipe because it usually has a smooth and consistent texture. Natural peanut butter often separates into oil and solids, which can make it difficult to create even swirls. If you decide to use natural peanut butter, make sure it is thoroughly stirred before measuring, although the final appearance may differ.
Why Should I Let Brownies Cool Before Cutting?
Brownies are delicate when they first come out of the oven. Their centers need time to settle and firm up as they cool. Cutting too early can cause the brownies to crumble or stick to the knife. For neat portions, allow them to cool completely and wipe the knife with a damp cloth or rinse it under warm water between cuts.
What Is the Best Way to Melt Chocolate?
Melt the butter first, remove it from the heat, and then whisk in the chocolate chips until smooth. You can also use a microwave-safe bowl to melt the butter before stirring in the chocolate. Keep water away from the chocolate mixture because even a small amount can cause melted chocolate to seize and become difficult to work with.
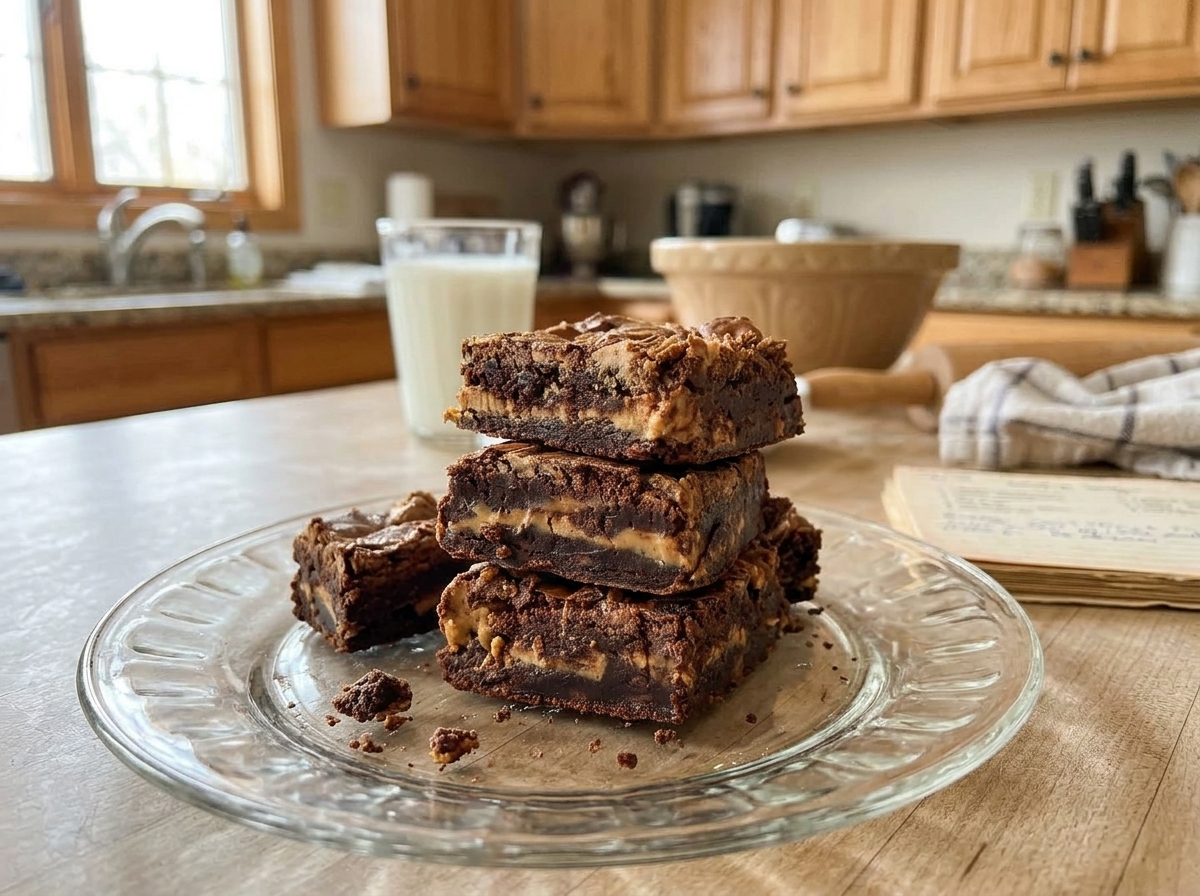
Peanut Butter Brownies Dessert
These homemade Peanut Butter Brownies are rich, fudgy, and chewy, with a delicious chocolate base and creamy peanut butter swirls.
12
servings10
minutes40
minutes494
kcal50
minutesIngredients
1 cup unsalted butter (227g)
1 cup semisweet chocolate chips, divided (175g)
1¼ cups all-purpose flour (150g)
½ cup unsweetened cocoa powder (50g)
1 teaspoon salt
1 cup granulated sugar (200g)
1 cup firmly packed light brown sugar (220g)
3 large eggs
1 tablespoon vanilla extract
½ cup creamy peanut butter
Directions
- Prepare the Oven and Pan:
Preheat the oven to 350°F. Spray an 8 × 8-inch square baking pan with baking spray and line it with parchment paper. - Melt the Chocolate and Butter:
Melt the butter in a small saucepan over medium heat. Remove from the heat and whisk in ½ cup chocolate chips until completely melted. Transfer to a large bowl and let cool briefly. - Combine the Dry Ingredients:
Sift together the flour and cocoa powder in another bowl. Whisk in the salt until evenly combined. - Prepare the Chocolate Batter:
Whisk the granulated sugar, brown sugar, eggs, and vanilla into the melted chocolate mixture until smooth. - Add the Flour Mixture:
Gently fold the dry ingredients into the chocolate mixture until combined. Fold in the remaining ½ cup chocolate chips. - Add Peanut Butter:
Pour the brownie batter into the prepared pan and spread evenly. Drop the creamy peanut butter over the surface by teaspoonfuls. Use a knife or skewer to create swirls. - Bake the Brownies:
Bake for 40–45 minutes or until the center does not wobble when gently shaken. For a gooier center, check at approximately 35 minutes. If the peanut butter starts browning, loosely cover the pan with foil after 25 minutes. - Cool and Serve:
Allow the brownies to cool completely in the pan before slicing into 12 portions.
Notes
- Use room-temperature eggs for easier mixing.
- Measure flour with a kitchen scale for the most accurate results.
- If using measuring cups, spoon flour into the cup and level it rather than packing it down.
- Avoid overmixing the batter to maintain a soft, fudgy texture.
- Keep water away from melted chocolate to prevent it from seizing.
- Sift the flour and cocoa powder to remove lumps.
- Do not over-swirl the peanut butter; gentle movements create a better marbled appearance.
- Use a light-colored aluminum baking pan for more even baking.
- Wipe the knife with a damp cloth between cuts for neat brownie slices.
- Store at room temperature for 3–4 days or refrigerate for 4–5 days in an airtight container.
- Freeze properly wrapped brownies for up to 3 months.
Nutrition Facts
- Calories: 494kcal
- Fat: 28g
- Carbohydrates: 57g
- Fiber: 3g
- Sugar: 41g
- Protein: 7g