A sourdough starter needs the right balance of warmth, moisture, flour, and time to develop properly. If your starter seems sluggish, takes too long to rise, or produces very few bubbles, temperature may be one of the reasons. A warm water bath is a simple way to create a more comfortable environment for your starter, especially when your kitchen is cold. Instead of placing the jar directly on a heating appliance or trying to warm the entire room, you can set the container in a bowl of comfortably warm water. The gentle warmth helps maintain a more favorable temperature for the wild yeast and beneficial bacteria living in the starter. These microorganisms work together to ferment the flour and water, producing carbon dioxide that creates bubbles and helps the starter expand. Although a warm water bath cannot guarantee an immediate rise, it can support more consistent fermentation when low temperatures are slowing the process.
What Is a Warm Water Bath for Sourdough Starter?
A warm water bath is a simple temperature-control method in which a jar or container of sourdough starter sits inside a larger bowl filled with warm water. The water surrounds the lower portion of the container and transfers heat gradually, helping the starter remain warmer than it might in a chilly kitchen. This technique is especially useful during winter, in homes with inconsistent indoor temperatures, or whenever your sourdough starter appears less active than usual. Unlike direct heating, which can create hot spots and damage the microorganisms if temperatures become excessive, a water bath provides a gentler source of warmth when used carefully. The water should be warm to the touch rather than hot, and the starter jar should remain stable and upright. By checking the water temperature periodically and replacing it when it cools, you can help create a suitable environment for fermentation without investing in specialized sourdough equipment.
How Temperature Affects Sourdough Starter Activity
Temperature has a major influence on how quickly a sourdough starter ferments. Wild yeast and lactic acid bacteria are living microorganisms, and their activity changes according to their environment. In a cool kitchen, fermentation generally slows down, so a starter may take much longer to develop bubbles, rise after feeding, and reach its peak. In a warmer environment, fermentation usually progresses more quickly, although excessively high temperatures can upset the balance of microorganisms or damage the culture. Many starters ferment well at ordinary room temperatures, but the ideal conditions depend on the flour, hydration, feeding schedule, and microbial community. A warm water bath can help when the surrounding air is too cool for reliable activity. However, warmth alone cannot compensate for an unsuitable feeding routine or a starter that needs more time to mature. Understanding the relationship between temperature and fermentation allows you to make sensible adjustments rather than repeatedly feeding or heating a starter that simply needs patience.
The Best Water Temperature for a Sourdough Starter Water Bath
For a gentle warm water bath, aim for water that feels comfortably warm rather than hot. Water around 30–35°C (86–95°F) is a reasonable starting point for the bath itself, provided you monitor the starter and avoid allowing its temperature to climb excessively. The temperature of the water is not necessarily the same as the temperature inside the starter, and a small jar may warm more quickly than a large one. It is therefore better to use moderately warm water and check the conditions than to rely on very hot water for faster results. Avoid boiling water, steaming water, or water that feels uncomfortably hot against your skin. Excessive heat can harm the microorganisms responsible for fermentation, particularly if the starter becomes too warm for an extended period. If you have a kitchen thermometer, use it to monitor the water and, when practical, the starter itself. Gentle, controlled warmth is much more useful than sudden temperature changes.
When to Use a Warm Water Bath for Sourdough Starter
A warm water bath is most helpful when your starter is fermenting slowly because the room temperature is low. For example, a jar left on a cold kitchen counter overnight may show only a few bubbles by morning, even when the feeding ratio and flour are suitable. Placing the jar in a warm water bath can provide a more favorable environment and may help fermentation become more active. This method can also be useful when you are maintaining a young starter that has not yet developed a predictable rising schedule. During the early stages, the microbial community is still establishing itself, so the starter may behave inconsistently from one day to the next. A water bath can help reduce the effect of a chilly room, but it should not be used automatically whenever the starter appears slow. First consider when it was fed, what flour you used, whether it has risen previously, and how warm the room actually is. These details help you decide whether additional warmth is necessary.
How to Prepare a Warm Water Bath at Home
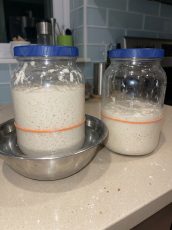
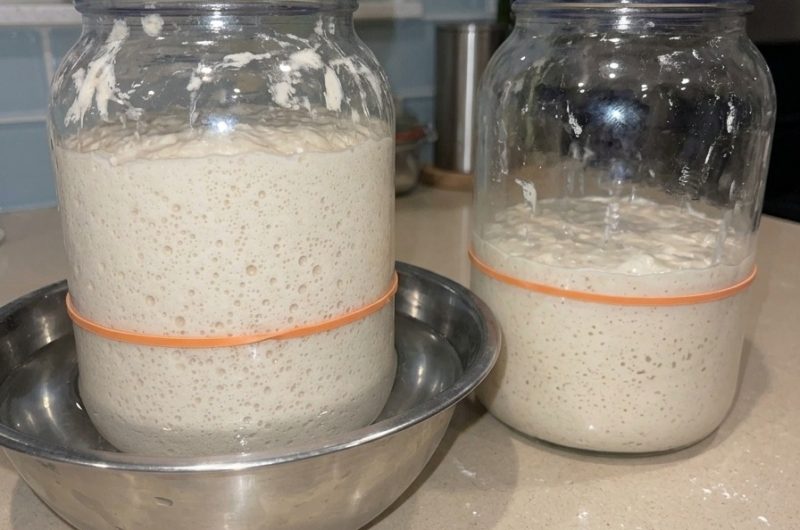
Preparing a warm water bath requires only a few household items: your sourdough starter in its jar, a bowl or container large enough to hold the jar securely, and some comfortably warm water. Begin by choosing a stable, level surface away from drafts, direct sunlight, and busy kitchen areas where the container could be knocked over. Add warm water to the larger bowl, making sure the water level will remain well below the top of the starter jar. Carefully place the jar into the bowl so that the lower portion is surrounded by water without allowing any water to enter the starter. The jar should stand upright and remain stable throughout the process. If the container is made from glass, avoid sudden temperature changes that could cause thermal shock, especially if the glass is cold. Once the bath is ready, check the starter periodically for signs of fermentation and refresh the water if it becomes cool. This simple setup can be adjusted according to the size of your jar and the temperature of your kitchen.
Step-by-Step Method for Warming Your Sourdough Starter
Start by checking your starter’s current condition. Look for bubbles, a change in volume, and any signs that it has recently peaked or begun to fall. If the starter needs feeding according to your usual schedule, feed it using your established flour-to-water ratio before setting up the bath. Keep the jar covered with a loose-fitting lid or another suitable cover that allows the starter to release fermentation gases safely. Prepare a bowl of comfortably warm water and place the jar inside, ensuring that the water remains outside the jar. Check the water after a short period to see whether it has cooled significantly, and replace it with fresh warm water when necessary. Avoid repeatedly adding very hot water, as this may create an unstable temperature around the starter. During the following hours, watch for bubbles, a gradual increase in volume, and a pleasantly tangy aroma. The time required will vary depending on the starter’s maturity, feeding ratio, flour type, and temperature, so use visible fermentation signs rather than a fixed timetable.
How Long Should a Sourdough Starter Stay in a Warm Water Bath?
There is no single amount of time that works for every sourdough starter. Some starters may show increased activity after a relatively short period in a warmer environment, while others need several hours or longer to develop noticeable bubbles and rise. The important factor is the starter’s overall fermentation progress, not the number of minutes it spends in the water bath. Begin with a short period of gentle warming, then check the temperature and the starter’s appearance regularly. If the water cools, refresh it carefully rather than allowing the jar to sit in cold water indefinitely. You do not need to keep the bath warm continuously if the room itself is already suitable for fermentation. Once the starter is rising steadily and the surrounding temperature is comfortable, you can remove the jar from the bath and let it continue fermenting at a stable room temperature. If you are using a young starter, allow extra time for development instead of trying to force a rapid rise through repeated warming.
Signs That Your Sourdough Starter Is Becoming More Active
An active sourdough starter usually shows several visible signs of fermentation. Small bubbles may appear along the sides of the jar before the surface becomes visibly bubbly. As fermentation continues, the starter may expand, develop a lighter texture, and form a rounded or slightly domed surface. Its aroma may become pleasantly tangy, mildly fruity, or yogurt-like, depending on the flour and stage of fermentation. After feeding, many established starters rise noticeably and eventually reach a peak before falling as their available food becomes depleted. The exact timing and amount of expansion depend on the starter’s maturity, consistency, temperature, and feeding ratio. A warm water bath may help these signs appear sooner when cool conditions are the main problem, but a rise is not guaranteed simply because the jar is warmer. Some starters produce bubbles before expanding significantly, while others rise more dramatically. Observing several signs together gives you a better understanding of fermentation than relying on the surface appearance alone.
Why Your Sourdough Starter May Still Be Slow After Warming
If your starter remains sluggish after using a warm water bath, temperature may not be the only issue. A newly created starter often needs several days or longer to establish a stable population of wild yeast and lactic acid bacteria. During this period, activity can fluctuate, and an early burst of bubbles does not necessarily mean the starter is mature enough to raise bread reliably. An established starter may also slow down if it has gone too long without feeding, been diluted through repeated feedings before becoming active, or been maintained at an unsuitable hydration level for your routine. Flour choice matters as well. Whole wheat and rye flour often support noticeable activity because they contain more minerals and nutrients than highly refined white flour, although white flour can also maintain a healthy starter. Check that you are using suitable water, measuring flour and water consistently, and allowing sufficient time between feedings. Correcting these basic factors is usually more effective than increasing the water bath temperature.
The Role of Feeding Your Starter Before Warming
Feeding provides fresh flour and water that the microorganisms in your starter can use during fermentation. If a starter has consumed most of its available food, it may need refreshing rather than additional warmth. Follow a consistent feeding ratio based on the starter’s current maturity and your usual maintenance routine. For example, a common equal-weight feeding uses one part mature starter, one part water, and one part flour. This is often described as a 1:1:1 feeding ratio by weight. Other ratios may be appropriate when you need a longer fermentation period or want to adjust the starter’s feeding schedule. After feeding, gently mix the ingredients until no dry flour remains, clean the inside walls of the jar if necessary, and mark the starting level with a rubber band or removable marker. Place the jar in the warm water bath if your kitchen is cool, then observe how its volume changes. Tracking the rise after each feeding helps you understand whether the starter is becoming stronger and whether your temperature adjustments are helping.
Choosing the Right Jar for a Warm Water Bath
The container you use can influence how easily you monitor fermentation and maintain a stable temperature. A clear glass jar is convenient because it allows you to see bubbles along the sides and measure the rise without disturbing the starter. A straight-sided container can make expansion easier to track than a jar that narrows significantly toward the top. Choose a jar with enough room for the starter to expand, ideally leaving substantial headspace after feeding. The outer bowl should be wide and deep enough to hold the jar securely without the risk of tipping. Water should never enter the starter, so keep the bath level below the jar’s opening and use a suitable cover on the starter container. If you use glass, avoid placing a very cold jar directly into hot water or moving a warm jar onto a very cold surface. Gradual temperature changes help reduce the risk of cracking. Clean equipment and a stable setup make the warming process easier, safer, and more predictable.
Common Mistakes to Avoid When Using a Warm Water Bath
One of the most common mistakes is using water that is too hot because you want the starter to rise quickly. Excessive heat can damage the yeast and bacteria, so the goal should be gentle warmth rather than maximum temperature. Another mistake is allowing bath water to enter the starter jar, which can change its hydration and introduce contaminants. Keep the water level low enough to avoid splashing into the opening, and make sure the container is stable. Some bakers also replace the water too frequently or repeatedly move the starter between warm and cold locations. These unnecessary changes can make the temperature less consistent instead of improving fermentation. It is equally important not to assume that a lack of dramatic expansion means the starter needs more heat. A recently fed starter may simply require additional time. Finally, avoid sealing a fermenting starter in an airtight container, because fermentation produces gas. A loosely fitted lid or an appropriate cover allows gases to escape while helping protect the starter from dust and debris.
Warm Water Bath vs. Other Ways to Keep a Starter Warm
A warm water bath is one of several ways to create a suitable fermentation environment. Other options include placing the jar in a consistently warm part of the kitchen, using a dedicated sourdough starter warmer, or using a temperature-controlled proofing box. Some bakers also use an oven with the heating function completely switched off, but this approach requires caution because ovens may retain excessive heat or be switched on accidentally. A microwave can sometimes serve as an insulated, draft-free storage space when it is not running, although it should not be treated as a heating device for the starter. The water bath is particularly useful because it is inexpensive and easy to set up, but it requires occasional attention as the water cools. A proofing box offers more precise temperature control, while a warm counter may be sufficient in a comfortable kitchen. Choose the method that fits your routine, available equipment, and ability to monitor temperature consistently.
How Flour Type Influences Sourdough Starter Fermentation
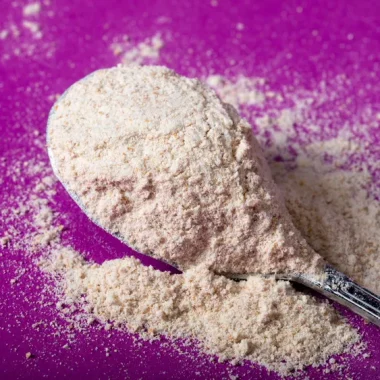
The flour you use affects how your sourdough starter develops and how quickly it may show signs of activity. Whole wheat flour contains bran and germ as well as the starchy endosperm, while rye flour provides nutrients and enzymes that can support vigorous fermentation. As a result, starters containing some whole grain flour often develop visible bubbles more readily than starters made exclusively with refined white flour. However, a white-flour starter can still become healthy, active, and reliable with consistent feeding and suitable temperature conditions. If your starter seems slow, consider whether the flour is fresh and appropriate for baking rather than immediately changing several parts of your routine. You can experiment with a portion of whole wheat or rye flour if you want to encourage activity, but any change should be made consistently enough to observe the result. The warm water bath works alongside the flour and feeding routine; it cannot replace the nutrients, water, and time needed for a thriving sourdough culture.
How to Know When Your Starter Has Reached Its Peak
A starter reaches its peak when fermentation has caused it to expand to its maximum volume before it begins to fall. For many established starters, the surface becomes rounded or slightly domed near the peak, and bubbles are visible throughout the mixture. After the peak, the surface may flatten, the starter may leave a residue line above its current level, or the center may begin to sink. The timing depends on temperature, feeding ratio, flour type, hydration, and starter strength. A warm water bath may shorten the time needed to reach the peak if low temperatures were slowing fermentation, so check the jar more often after warming it. If you plan to bake sourdough bread, learning to recognize the peak is more useful than following a rigid number of hours. A mature starter that reliably rises after feeding and reaches a predictable peak is generally easier to use in bread recipes than one that has been warmed aggressively but has not developed consistent fermentation behavior.
Can You Use a Warm Water Bath for a Brand-New Starter?
A warm water bath can be used with a new sourdough starter, but it is important to have realistic expectations. A starter made from flour and water needs time for its microbial community to establish itself. During the first several days, it may show a burst of activity followed by a quieter period. This is a normal part of development and does not automatically mean the culture has failed. Gentle warmth can help maintain favorable conditions, particularly in a cold room, but it cannot make a new starter fully mature overnight. Continue feeding according to a consistent schedule, use clean utensils, and monitor the smell and appearance of the mixture. A healthy developing starter may smell tangy, yeasty, or mildly fruity, although its aroma changes as fermentation progresses. Discard the mixture if you see fuzzy mold or unusual pink or orange discoloration, and start again with clean equipment and fresh ingredients. Do not rely on warmth alone to solve problems involving contamination or poor starter maintenance.
Using a Warm Water Bath During Cold Weather
Cold weather can make sourdough baking less predictable because the temperature of a kitchen may fall considerably overnight. A starter that rises reliably during warmer months may take much longer to reach its peak when the room becomes cold. A warm water bath can help bridge this difference by gently warming the container without requiring you to heat the whole kitchen. Begin with comfortably warm water and check it periodically, especially if the room is very cold. You may need to refresh the bath as it cools, but avoid creating a cycle of extreme temperature changes. If your starter consistently needs too much attention, consider choosing a more stable location or using a temperature-controlled proofing device. You can also adjust your feeding schedule to match the slower fermentation rate, provided the starter remains healthy and receives fresh food as needed. Paying attention to seasonal temperature changes makes it easier to maintain a reliable culture throughout the year.
How to Maintain Consistent Starter Temperature
Consistency is one of the most useful habits for maintaining a strong sourdough starter. Rather than moving the jar between a cold counter, a warm water bath, and a heated appliance throughout the day, try to provide a stable environment that suits your feeding schedule. Keep the jar away from cold windows, air-conditioning vents, direct sunlight, and strong sources of heat. If you use a water bath, check its temperature occasionally and replace the water when it cools. A kitchen thermometer can help you understand how much the temperature changes during the day and whether the starter is warming more quickly than expected. It is also helpful to record feeding times, room temperature, the approximate peak time, and how much the starter rises. These simple observations make it easier to recognize patterns and adjust your routine without guesswork. Over time, a consistent temperature and feeding schedule can help you maintain a starter that is more predictable and easier to use for homemade sourdough bread.
Why a Warm Water Bath Is Better Than Direct Heat
Direct heat may seem like the quickest way to warm a slow sourdough starter, but it can create uneven temperatures that are difficult to control. Placing a jar on a hot surface, next to a radiator, or against a heating element may warm one part of the container much more than another. These hot spots can expose the culture to excessive temperatures even when the surrounding room feels cool. A warm water bath transfers heat more gradually, which can make temperature management easier when the water is kept within a moderate range. It also provides a simple visual reminder to check the jar and the surrounding conditions. Nevertheless, a water bath is not automatically safe if the water is too hot or the jar is unstable. The method works best when you use moderate warmth, avoid sudden changes, and observe the starter regularly. If your kitchen is already warm enough, there may be no need to use a bath at all.
How to Tell Whether the Warm Water Bath Is Working
The best way to assess a warm water bath is to compare your starter’s behavior before and after warming it under similar feeding conditions. Mark the starter’s level immediately after feeding, then observe whether bubbles develop and whether the mixture expands over time. Record how long it takes to reach its highest point, along with the room temperature and any changes to the feeding ratio or flour. If the starter becomes active more quickly in a gently warmed environment, the bath may be helping overcome low-temperature fermentation. However, a single observation is not enough to establish a reliable pattern. Differences in flour, feeding quantity, starter maturity, and hydration can all affect the results. Try to keep these variables as consistent as possible when comparing results. Remember that a successful starter does not need to double within a specific number of hours in every kitchen. Reliable activity, a healthy aroma, and repeatable rising behavior are more useful indicators of progress than speed alone.
Keeping Your Sourdough Starter Healthy After Warming
Once your starter becomes active, continue to care for it according to your usual feeding and storage routine. If you bake frequently, you may prefer to keep it at room temperature and feed it regularly. If you bake less often, refrigeration may be more convenient, although a refrigerated starter generally needs time and one or more feedings to become fully active again. After removing a starter from a warm water bath, place it in a stable location where it can continue fermenting without excessive heat. Observe its rise and fall so you can identify when it needs fresh flour and water. Avoid leaving the starter warm indefinitely without checking its condition, because increased warmth can accelerate fermentation and cause it to consume its food sooner than expected. Clean the outside of the jar, keep utensils clean, and use a container with sufficient headspace. With consistent care, a mature starter can be maintained for a long time and used for a wide range of sourdough recipes, from crusty loaves to pancakes, crackers, and other baked goods.
Title: Warm Water Bath for Sourdough Starter
Description: A simple method for gently warming a sourdough starter when a cold kitchen slows fermentation. Using a bowl of comfortably warm water can help create favorable conditions for wild yeast and beneficial bacteria, encouraging more consistent bubbling and rising without specialized equipment.
Preparation & Cooking Duration:
- Preparation time: 5 minutes
- Warming time: Approximately 30 minutes to several hours, depending on conditions
- Total time: Variable; fermentation time depends on starter maturity, feeding schedule, and temperature
- Cooking time: Not applicable
Serving: 1 sourdough starter jar
Ingredients:
- 1 jar of sourdough starter
- Warm water, enough to partially surround the starter jar
- Flour and water for feeding the starter, if feeding is due, using your usual quantities and ratio
Step-by-Step Instructions:
- Check the starter: Examine the starter for bubbles, expansion, aroma, and signs of recent fermentation. Determine whether it needs feeding before warming.
- Feed if necessary: If your starter is due for feeding, add flour and water according to your regular feeding ratio. Mix until fully combined.
- Prepare the bath: Fill a bowl with comfortably warm water, approximately 30–35°C (86–95°F), as a starting point for the bath.
- Position the jar: Carefully place the starter jar in the bowl. Keep the water below the jar’s opening so none enters the starter.
- Maintain gentle warmth: Leave the jar in a stable location and check the water temperature periodically. Replace cooled water with fresh, moderately warm water when needed.
- Monitor fermentation: Look for bubbles, increased volume, and a change in texture. Use a rubber band or marker to track the starter’s rise.
- Remove the jar: Once the starter is fermenting in a suitable environment, remove it from the bath and continue monitoring it at a stable temperature.
- Use when ready: If baking bread, use the starter when it has developed reliable activity and is appropriately risen for your recipe.
Nutritional Information:
Not applicable to the warming method itself. The nutritional value of a sourdough starter depends on the flour and water used, the feeding ratio, and the amount consumed. Since sourdough starter is generally used as an ingredient rather than eaten on its own, nutrition should be calculated for the finished recipe.