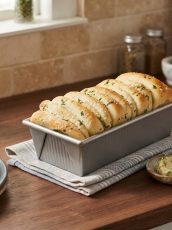
Homemade English muffins have a texture that is difficult to match with packaged versions. They are soft and chewy inside, lightly crisp on the outside, and develop those familiar nooks and crannies that are perfect for holding melted butter, jam, cream cheese, or other favorite toppings. This easy English muffin recipe uses simple pantry ingredients and a straightforward dough-making process, making it a practical choice for a homemade breakfast. Instead of relying on an oven, these muffins are cooked on a greased griddle, which gives them an attractive golden surface while keeping the center tender. Once you learn the basic method, you can make a batch for breakfast, brunch, sandwiches, or snacks. The dough does require rising time, but most of that time is hands-off, allowing the yeast to create the airy structure that makes traditional English muffins so enjoyable.
What Makes These English Muffins Different
The appeal of these homemade English muffins comes from their combination of a crisp exterior and soft interior. The dough is enriched with milk and melted shortening, while yeast provides the lift needed to create a light texture. Cornmeal is used during shaping and cooking, giving the muffins their classic slightly grainy coating and helping prevent the dough from sticking. Unlike many breads that are baked in an oven, English muffins are traditionally cooked on a griddle, so the heat gradually colors both sides while the center cooks through. When the finished muffins are split open, the interior should have an open, tender texture rather than being dense or cake-like. Their mild flavor also makes them extremely versatile. They can be served simply with butter or turned into a more substantial breakfast with eggs, cheese, breakfast meats, or fresh fruit preserves.
Ingredients You Need for This Recipe
The ingredient list is intentionally simple, which is one reason this recipe works well for home bakers. Milk contributes tenderness and a gentle richness, while white sugar adds a little sweetness and helps create favorable conditions for the yeast. Warm water is combined with active dry yeast before being incorporated into the dough. All-purpose flour provides the main structure, and melted shortening contributes tenderness. Salt balances the flavor and keeps the finished muffins from tasting flat. Cornmeal is used on the shaped dough rounds and gives the exterior a traditional English muffin finish. Because the ingredient quantities are carefully balanced, measuring them accurately is important. In particular, avoid adding large amounts of extra flour while kneading, because an overly stiff dough can result in English muffins that are heavier and less tender than intended.
How the Yeast Creates a Light Texture
Yeast is an important part of the recipe because it gives the dough its characteristic rise. Active dry yeast is first combined with warm water and allowed to stand until it becomes creamy. This short resting period allows the yeast to hydrate and become active. The water should be warm rather than extremely hot; water that is too hot can damage the yeast and interfere with fermentation. Once the yeast mixture is ready, it is combined with the cooled milk mixture, flour, and melted shortening. As the dough rests in a warm environment, the yeast produces gases that become trapped within the developing dough structure. This is what allows the dough to expand and become lighter. Giving the dough enough time to rise is therefore not simply an optional step. It is an important part of achieving the soft, airy texture associated with good homemade English muffins.
Preparing the Milk Mixture
Begin by warming the milk gently in a small saucepan. The goal is to heat it until it begins to bubble, rather than allowing it to boil aggressively. Once heated, remove the milk from the heat and stir in the white sugar until it has dissolved. The milk mixture then needs time to cool until it is lukewarm. This step matters because extremely hot liquid can negatively affect yeast when the two mixtures are eventually combined. Allowing the milk to cool also makes it easier to create a dough with the correct consistency. While the milk cools, you can prepare the yeast mixture separately. Keeping these two stages distinct gives you better control over the temperature and makes the dough preparation more reliable.
Activating the Active Dry Yeast
Place the warm water in a small bowl and add the active dry yeast. Let the mixture stand for about 10 minutes, or until it becomes creamy. This is a useful point in the recipe to check that the yeast is active before committing all of the ingredients to the dough. The water should be comfortably warm rather than hot. If the mixture develops a creamy appearance after resting, it is ready to use. If the yeast does not appear to activate, the water temperature or the freshness of the yeast may be the issue. Once the yeast mixture is ready, it can be combined with the cooled milk mixture. This simple activation stage helps set up the fermentation process that later gives the English muffins their characteristic lightness.
Mixing the English Muffin Dough
Once both liquid mixtures are ready, combine them in a large bowl with 3 cups of the all-purpose flour and the melted shortening. Beat the mixture until it becomes smooth. At this stage, the dough will begin developing its structure but will not yet contain all of the flour. Add the salt and the remaining 3 cups of all-purpose flour, then knead until a soft dough forms. The aim is a dough that feels cohesive and workable without becoming excessively firm. Kneading helps develop the gluten that gives the muffins enough structure to hold the gases produced by the yeast. Take care not to compensate for stickiness by adding excessive flour. A slightly soft dough is preferable to one that becomes dry and stiff.
Giving the Dough Time to Rise
Transfer the prepared dough to a greased bowl and cover it. Place the bowl somewhere warm and allow the dough to rise until it has doubled in volume, which should take about 1 hour. The exact timing can vary depending on the temperature of the room, the activity of the yeast, and the conditions in your kitchen, so the dough’s appearance is more useful than the clock alone. When it has expanded significantly and looks noticeably fuller, it is ready for the next stage. This first rise is responsible for much of the texture inside the finished muffins. Rushing this step can leave the dough underdeveloped, while giving it sufficient time allows the yeast to work and the dough to become lighter.
Rolling and Cutting the Dough
After the first rise, gently punch down the dough to release some of the accumulated gas. Turn it onto a lightly floured surface and roll it to approximately 1/2 inch thick. Try to maintain an even thickness across the dough so that all of the muffins cook at a similar rate. Use a biscuit cutter, drinking glass, or empty tuna can to cut the dough into rounds. The cutting tool should create clean shapes without excessively compressing the edges. Arrange the cut rounds carefully because they will need another period of rising before they reach the griddle. If scraps remain after cutting, gather them gently and roll them again rather than repeatedly working the dough, which can make the texture tougher.
Using Cornmeal for the Classic Finish
Sprinkle cornmeal over a sheet of waxed paper and place the cut dough rounds on top. Dust the upper surfaces with additional cornmeal as well. The cornmeal serves several purposes in this English muffin recipe. It helps keep the dough from sticking to the surface, contributes a pleasant texture to the exterior, and gives the finished muffins the familiar appearance associated with traditional English muffins. Make sure the rounds have enough room around them because they will expand during the second rise. Cover the shaped dough and allow it to rise for about 30 minutes. This shorter rise gives the muffins another opportunity to become light and puffy before they are transferred to the hot griddle.
Cooking English Muffins on a Griddle
Heat a greased griddle over medium heat before beginning to cook the muffins. Medium heat is important because the exterior needs enough time to brown while the interior cooks completely. If the griddle is too hot, the outside may become dark before the center has finished cooking. If the heat is too low, the muffins can take excessively long to brown and may lose some of their characteristic surface texture. Place the risen dough rounds carefully on the heated griddle and cook until lightly browned, approximately 10 minutes per side. Keep an eye on the color and adjust the heat if necessary. Because the muffins are relatively thick, patience during this stage is helpful. The finished surface should be lightly golden rather than deeply browned.
How to Know When the Muffins Are Ready
Knowing when English muffins are properly cooked is mostly a matter of observing their appearance and texture. Both sides should be lightly browned, and the muffins should feel set rather than soft and doughy when handled carefully. Because the cooking process takes place on a griddle, the surface color provides an especially useful indication of progress. If the exterior is becoming dark very quickly, reduce the heat so the middle has more time to cook. Conversely, if the muffins remain pale after a long cooking period, the griddle may not be hot enough. Once cooked, allow the muffins to cool enough to handle comfortably before splitting them. This makes them easier to cut without crushing their delicate interior.
Getting the Best Nooks and Crannies
One of the most recognizable features of a traditional English muffin is its uneven interior, often described as nooks and crannies. These small pockets are especially useful because they catch melted butter, jam, cream cheese, or other toppings. The yeast-based dough and two-stage rising process help create this texture. Handling the dough gently after it has risen is also useful because excessive pressing can remove too much of the trapped air. When you split the finished muffins, using a fork can help create a more irregular interior than slicing completely through with a knife. The resulting surface provides plenty of small spaces for toppings to settle into. For a classic breakfast experience, toast the split muffins after cooking and serve them warm.
Easy Ways to Serve Homemade English Muffins
There are countless ways to serve homemade English muffins, making them useful beyond a single breakfast. A simple combination of butter and fruit jam highlights their mild flavor and crisp toasted surface. Cream cheese is another natural pairing, especially when combined with strawberry, raspberry, blueberry, or other fruit preserves. For a savory breakfast, use toasted English muffin halves as the base for eggs and cheese. They can also be topped with avocado, tomato, or other breakfast ingredients. Because the muffins are sturdy enough to hold toppings while remaining soft inside, they can also become the foundation for quick breakfast sandwiches. Their versatility makes a homemade batch useful throughout the week rather than something reserved only for special occasions.
English Muffins for Breakfast and Brunch
A basket of warm homemade English muffins can easily become the centerpiece of a breakfast or brunch spread. They pair naturally with eggs, fresh fruit, yogurt, butter, jams, and creamy spreads. For a casual family breakfast, set out toasted muffin halves along with several toppings so everyone can create their own combination. For brunch, the muffins can be served alongside scrambled eggs or used as a base for savory breakfast sandwiches. Their neutral flavor works with both sweet and savory ingredients, so there is no need to prepare multiple types of bread. Making them at home also gives you control over how deeply they are toasted and which toppings you serve.
Common Mistakes to Avoid
A few simple mistakes can affect the final texture of homemade English muffins. One common issue is using water or milk that is too hot when working with yeast. Excessive heat can interfere with yeast activity, so lukewarm conditions are important. Another mistake is adding too much flour during kneading. While additional flour may make sticky dough easier to handle, it can also produce a dense final result. Skipping or shortening the rising periods can have a similar effect because the dough needs time to develop its airy structure. Cooking over excessively high heat is another problem because the muffins may brown before their centers are fully cooked. Maintaining moderate heat and allowing enough time at each stage will give you more consistent results.
Notes for Better Results Every Time
For the best homemade English muffins, pay attention to the dough rather than relying entirely on exact timing. Rising times can change depending on room temperature, so look for a noticeable increase in volume before moving forward. When rolling the dough, aim for an even thickness so the rounds cook consistently. Keep the griddle at medium heat and allow the muffins to brown gradually. Cornmeal should cover the surface without becoming excessively thick. If you plan to toast the muffins after cooking, avoid over-browning them on the griddle because they will continue to develop color when toasted. Finally, allow the cooked muffins to cool enough to handle before splitting them. These small details can make the difference between ordinary homemade bread and English muffins with a pleasingly soft center and crisp, golden exterior.
Storing Homemade English Muffins
Once the English muffins have cooled, store them in an airtight container or suitable bread-storage bag at room temperature for short-term use. Keeping excess air away from the muffins helps prevent them from drying out. If you have made a large batch and do not expect to eat them quickly, freezing is a practical option. Split the muffins before freezing if you want them to be especially convenient for future breakfasts. They can then be taken out as needed and toasted from thawed or appropriately reheated. The toasted surface helps restore some of the crispness while warming the center. Proper storage makes this recipe particularly useful for meal planning because a single batch can provide several easy breakfast portions.
Why This Recipe Works for Beginners
This English muffin recipe is approachable because it does not require complicated shaping techniques or specialized bread-baking equipment. The dough is mixed, kneaded, allowed to rise, rolled, cut into rounds, given another short rise, and cooked on a griddle. Each stage has a clear purpose, and the ingredients are easy to find. The recipe also provides an excellent introduction to working with yeast dough because it teaches several fundamental skills: activating yeast, managing dough consistency, kneading, judging fermentation, shaping, and cooking bread on a stovetop surface. Beginners can therefore gain useful bread-making experience while producing something practical and delicious. Once the basic process becomes familiar, the same techniques can help with many other homemade yeast breads.
Frequently Asked Questions About English Muffins
Can I use a drinking glass to cut the dough? Yes. A drinking glass can be used in place of a biscuit cutter as long as the opening is suitable for creating evenly sized rounds. An empty tuna can is another option mentioned in the original method. Whatever tool you use, try to cut the rounds cleanly without repeatedly twisting or flattening the dough.
Why do English muffins need two rising periods? The first rise allows the main dough to ferment and increase in volume. After shaping, the second rise gives the individual rounds additional time to become lighter before they reach the griddle. Both stages contribute to the final texture.
Can I cook English muffins in a frying pan? A griddle is specified in this recipe, but a suitable heavy skillet can serve a similar purpose if needed. The key is maintaining moderate heat so the exterior browns gradually while the inside has enough time to cook.
Why are my English muffins dense? Dense muffins can result from several factors, including inactive yeast, insufficient rising time, excessive flour, or handling the dough too aggressively after it has risen. Allowing the dough to become visibly puffy during both rising stages is important.
How should I split English muffins? You can use a knife, but splitting them with a fork can help create the rough, uneven interior commonly associated with English muffins. Those irregular surfaces are excellent for catching butter, jam, and other toppings.
Homemade English Muffins
Description:
Soft, chewy homemade English muffins with lightly golden, crisp surfaces and tender interiors. These yeast-raised muffins are cooked on a griddle and finished with cornmeal for a classic texture. Serve them toasted with butter, cream cheese, jam, or use them for breakfast sandwiches and brunch.
Preparation & Cooking Duration:
Prep Time: 25 minutes
Cook Time: 20 minutes
Additional Rising Time: 1 hour 30 minutes
Total Time: 2 hours 15 minutes
Serving:
18 English muffins
Ingredients:
- 1 cup milk
- 2 tablespoons white sugar
- 1 cup warm water (110 degrees F/45 degrees C)
- 1 (.25 ounce) package active dry yeast
- 6 cups all-purpose flour
- ¼ cup melted shortening
- 1 teaspoon salt
- ¼ cup cornmeal, or more as needed
Step-by-Step Instructions:
- Warm the milk in a small saucepan until it begins to bubble. Remove it from the heat and stir in the white sugar until dissolved. Set aside and allow the mixture to cool until lukewarm.
- Pour the warm water into a small bowl and add the active dry yeast. Leave the mixture undisturbed for about 10 minutes, until the yeast becomes creamy.
- In a large mixing bowl, combine the cooled milk mixture, activated yeast mixture, 3 cups of the all-purpose flour, and melted shortening. Beat until the mixture is smooth.
- Add the salt and remaining 3 cups of all-purpose flour. Knead the mixture until it develops into a soft dough.
- Place the dough in a greased bowl and cover it. Leave it in a warm location until it doubles in volume, approximately 1 hour.
- Gently punch down the risen dough. Transfer it to a lightly floured work surface and roll it to approximately 1/2 inch thick.
- Cut the dough into rounds using a biscuit cutter, drinking glass, or empty tuna can.
- Spread cornmeal over waxed paper and arrange the dough rounds on top. Sprinkle additional cornmeal over the tops of the rounds.
- Cover the shaped dough and allow it to rise for approximately 30 minutes.
- Heat a greased griddle over medium heat.
- Place the risen dough rounds on the heated griddle. Cook until lightly browned, approximately 10 minutes on each side.
- Allow the muffins to cool enough to handle, then split them and toast as desired. Serve warm with your favorite toppings.
Nutritional Information:
Nutritional values can vary depending on ingredient brands, exact portion sizes, and preparation. For the most accurate nutritional information, calculate the recipe using the specific products and quantities used.