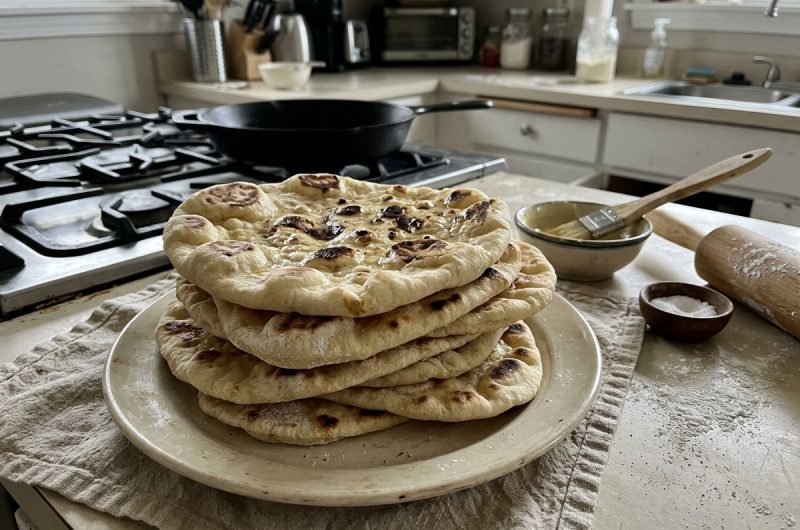
Easy sourdough flatbread is a simple homemade bread recipe that produces soft, flexible, slightly chewy flatbreads with a deliciously mild sourdough flavor. Made with all-purpose flour, active sourdough starter, warm water, olive oil, and salt, this recipe uses a handful of everyday ingredients to create bread that works beautifully for wraps, sandwiches, tacos, and family meals.
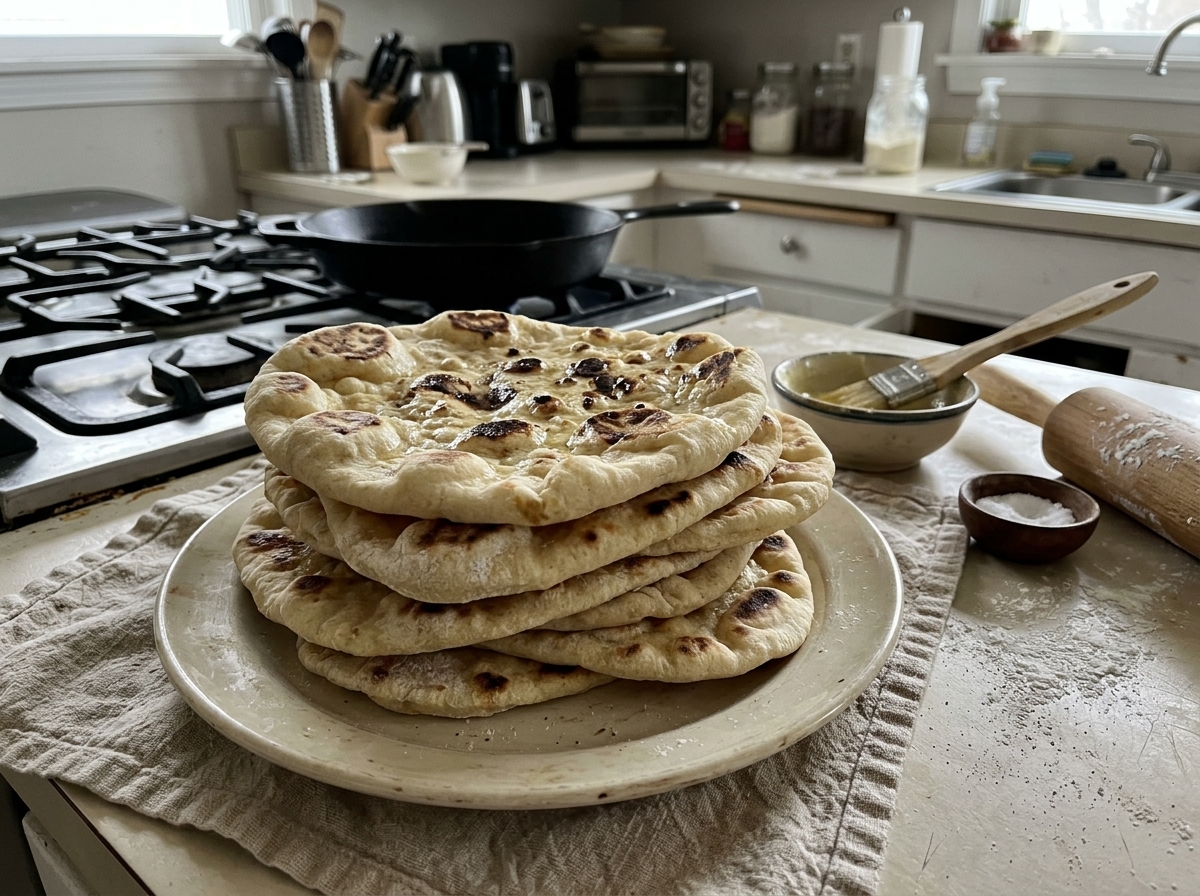
Each flatbread cooks in a hot skillet, developing golden-brown spots while remaining soft enough to fold and roll without breaking.
If you enjoy baking with sourdough, this recipe is an excellent way to make something practical and delicious without using a traditional oven. It is also a useful option for home bakers who want to explore sourdough recipes beyond loaves of bread.
The dough comes together by hand, requires only a few minutes of active preparation, and becomes smooth and pliable as it rises. Although the dough needs time to ferment, the actual cooking process is quick and straightforward.
One of the best features of homemade sourdough flatbread is its versatility. You can roll the dough thin for tortilla-style wraps or leave it slightly thicker for a soft, naan-style bread. Serve it alongside curry, use it as a base for quick flatbread pizza, or fill it with your favorite sandwich ingredients.
Because the finished bread stays tender for several days when stored correctly, it is also convenient for preparing lunches and planning meals ahead.
What Makes This Sourdough Flatbread Special?
This easy sourdough flatbread recipe stands out because of its soft texture, pleasant flavor, and straightforward preparation. Unlike some bread recipes that require complicated shaping or special equipment, these flatbreads are rolled into simple circles and cooked directly on the stovetop. A cast-iron skillet works particularly well because it retains heat and creates attractive golden spots across the surface of the bread.
The dough is another reason this recipe is worth making. When the ingredients are measured correctly and the dough has enough moisture, it feels soft, flexible, and easy to handle. You do not need to work it aggressively or add large amounts of flour during kneading. After fermentation and a short resting period, the individual portions roll out easily, helping you achieve thin, even flatbreads without struggling with dough that keeps shrinking back.
The flavor is also appealing because the active sourdough starter contributes a gentle tang that complements both savory and sweet foods. The bread has more character than a basic flour-and-water flatbread, but the sourdough taste does not need to dominate the meal. You can enjoy it with seasoned meat, vegetables, cheese, soups, and sauces, or serve a warm piece with butter and honey for a simple snack.
Another advantage is that this recipe makes ten flatbreads from one batch of dough. That quantity is useful for feeding a family, preparing several lunches, or keeping homemade bread available throughout the week. Any extras can be frozen for later use, making sourdough flatbread a practical addition to your regular bread-making routine.
Understanding Active Sourdough Starter
The most important ingredient in this recipe is active sourdough starter. Unlike recipes specifically developed for sourdough discard, these flatbreads rely on a starter that has been fed and has developed enough activity to help the dough rise. Using a ripe, bubbly starter gives the dough a better chance of fermenting properly and developing the soft texture expected from homemade sourdough bread.
A healthy active starter generally shows visible bubbles and has increased in volume after feeding. Depending on the flour, feeding ratio, room temperature, and starter strength, it may take several hours to reach its peak. For the most reliable results, observe your starter rather than relying exclusively on a fixed timetable. A starter that is active and ready to use will usually provide more predictable fermentation than one that has been sitting unfed in the refrigerator.
Sourdough discard is the portion of starter removed during feeding, often before fresh flour and water are added. Although discard works well in many pancakes, crackers, and quick breads, it is not the recommended choice for this particular flatbread recipe. Because the dough depends on active fermentation, using ripe starter is an important part of the preparation process.
If you are new to sourdough baking, prepare your starter ahead of time so it is bubbly and ready when you want to mix the dough. This simple step helps prevent unnecessary delays and makes it easier to plan the rising period, shaping, and skillet cooking around your daily schedule.
How to Make the Flatbread Dough
Begin by measuring the flour, warm water, active sourdough starter, olive oil, and salt into a large mixing bowl. Stir the ingredients together with a wooden spoon or spatula until they start forming a rough dough. As the mixture becomes harder to stir, use your hands to bring the remaining flour and moisture together. Knead gently for a few movements until the dough forms a soft ball.
The dough may look slightly shaggy during the initial mixing stage, which is normal. Give the flour time to absorb the water before deciding whether anything needs to be adjusted. Avoid adding extra flour immediately simply because the dough feels a little sticky. A soft dough is easier to roll into thin circles later, and adding too much flour at the beginning can make the finished bread tougher.
Once the dough comes together, cover the bowl and place it in a warm, draft-free location. Leave it to rise until it has approximately doubled in size. Depending on the strength of your starter and the temperature of the room, this may take around two to six hours. Cooler conditions generally slow fermentation, while a comfortably warm environment can help the dough rise more quickly.
Rather than watching the clock alone, check the dough periodically for visible expansion. A properly fermented dough should look fuller and feel lighter than it did immediately after mixing. Avoid placing it somewhere excessively hot to speed up the process. A steady, moderate temperature encourages a more controlled rise and gives you a better chance of achieving soft, flavorful flatbreads.
Dividing and Resting the Dough
After the dough has doubled in size, prepare a baking sheet lined with parchment paper and dust it lightly with flour. Transfer the dough to a clean work surface and divide it into ten equal portions. Each portion should weigh approximately 65 to 75 grams, depending on the total dough weight and how evenly you divide it. Keeping the pieces similar in size helps them cook at roughly the same rate.
Shape each portion into a small ball by gently folding the edges underneath. Place the dough balls on the prepared baking sheet, leaving several inches between them so they have room to rest without sticking together. Cover them lightly if the surface appears likely to dry out, then allow them to rest for approximately 30 minutes.
This resting period makes a noticeable difference when you begin rolling the flatbreads. Dough that has just been divided can feel elastic and resist being stretched into a circle. Resting relaxes the gluten, allowing each portion to spread more easily under the rolling pin. As a result, you can shape the bread with less effort and are less likely to end up with dough that repeatedly shrinks back.
Keep the portions covered while you work with the others, especially if your kitchen is warm or dry. A dry outer layer can create rough patches and make the dough harder to roll evenly. With a little patience during this stage, the flatbreads will be easier to shape and more consistent in thickness.
Rolling the Flatbreads to the Right Thickness
Lightly flour your countertop and place one rested dough ball on the surface. Using a rolling pin, roll it into a circle approximately six to seven inches across. The edges do not need to be perfectly round, so do not spend too much time trying to create identical shapes. Homemade flatbreads often have slightly irregular edges, which is perfectly fine and does not affect their flavor.
The thickness you choose depends on how you plan to serve the bread. For tortilla-style wraps and tacos, roll the dough quite thin so it remains flexible and can hold fillings comfortably. For a thicker, naan-style flatbread, leave a little more thickness in the dough. The bread may puff more noticeably during cooking and develop a softer, airier center.
Try to use only a small amount of flour on the counter and rolling pin. Although a light dusting prevents sticking, excessive flour can accumulate on the dough and burn in the skillet. It can also make the flatbread less tender. If a portion is difficult to roll, allow it to rest for a few more minutes instead of forcing it into shape.
Roll the portions one at a time and keep the remaining dough covered. If you are cooking a large batch, prepare a few flatbreads ahead while keeping the others protected from drying out. This approach makes the process more manageable, particularly when using a skillet that accommodates only one flatbread at a time.
Cooking Sourdough Flatbread in a Skillet
A hot cast-iron skillet is an excellent choice for cooking these homemade flatbreads. Its ability to retain heat helps the dough cook quickly and develop the attractive brown patches that give skillet flatbread its familiar appearance. A heavy frying pan or large griddle can also work well, especially if you want to prepare several flatbreads more efficiently.
Allow the skillet to heat before adding the first rolled portion. Place the dough in the hot, dry cooking surface and cook it for approximately one to two minutes on the first side. Watch for small bubbles, puffed areas, and golden-brown spots. Turn the flatbread and cook the other side until it is cooked through and lightly browned.
The dough may form large bubbles as it heats. These pockets of steam help create the bread’s soft, airy texture, so avoid piercing them during cooking. When the flatbread is flipped, the raised areas may press against the hot skillet and develop darker golden patches. This natural variation is part of what makes homemade flatbread look and taste appealing.
Cooking time can vary depending on the thickness of the dough and the heat of your pan. If the bread develops dark spots almost immediately while the inside remains doughy, reduce the heat slightly. If it stays pale and takes too long to cook, allow the skillet to heat more thoroughly before cooking the next portion. Aim for a surface with scattered golden spots and a tender interior.
Transfer each cooked flatbread to a clean plate and cover it loosely with a clean kitchen towel while you finish the batch. Keeping the bread covered helps retain warmth and moisture, preventing the edges from becoming dry or brittle. Serve the flatbreads warm for the softest texture, or let them cool before packing them for later meals.
Delicious Ways to Serve Sourdough Flatbread
One reason to keep this recipe on hand is that it works with a wide range of meals. Thin sourdough flatbreads can replace tortillas for tacos, wraps, and other handheld dishes. Fill them with cooked chicken, seasoned beef, roasted vegetables, beans, cheese, or salad ingredients for an easy lunch. Their flexible texture makes them suitable for rolling around fillings without requiring complicated preparation.
For dinner, serve thicker flatbreads with curries, soups, stews, or saucy skillet meals. The bread is useful for scooping up sauces and adds a satisfying homemade element to an ordinary weeknight dinner. It also pairs nicely with grilled vegetables, roasted meat, and simple dips. Since the sourdough flavor is relatively mild, it complements strongly seasoned foods without overwhelming them.
These flatbreads can also serve as a quick pizza base. Roll the dough into individual rounds, cook them briefly in the skillet, then add your preferred sauce, cheese, and toppings. Finish them in a hot oven, on a pizza stone, or in an air fryer if the flatbread size suits your equipment. Watch carefully as the toppings cook, since a thin base may brown faster than a conventional pizza crust.
For sandwiches, allow the bread to cool slightly before adding fillings. Ham and Swiss cheese with a little mustard make a straightforward combination, while grilled chicken, fresh vegetables, hummus, or cheese can create other satisfying options. If you prefer a sweet snack, serve a warm flatbread with butter and honey. The bread is versatile enough to move from breakfast to lunch or dinner without changing the basic recipe..
Sourdough Easy Flatbread
This easy sourdough flatbread is soft, flexible, and slightly chewy, with a mild sourdough flavor.
10
servings15
minutes25
minutes154
kcal240
1
hour10
minutesIngredients
2 ½ cups (355 g) all-purpose flour
¾ cup (175 g) warm water
⅔ cup (175 g) fed/active sourdough starter
2 tablespoons (25 g) olive oil
2 teaspoons (10 g) salt
Directions
- Prepare the Dough
Combine the all-purpose flour, warm water, active sourdough starter, olive oil, and salt in a large mixing bowl. Mix with a wooden spoon or spatula until the ingredients come together. Use your hands to finish mixing and knead a few times until a soft ball forms. Avoid adding extra flour unless the dough is too sticky to handle. - Let the Dough Rise
Cover the bowl and leave the dough in a warm, draft-free place until it doubles in size. This usually takes 2 to 6 hours, depending on the activity of your sourdough starter and the room temperature. - Divide the Dough
Line a baking sheet with parchment paper and dust it lightly with flour. Divide the risen dough into ten equal portions, approximately 65 to 75 grams each. Shape each portion into a ball by folding the edges underneath, then place the balls several inches apart on the prepared baking sheet. - Rest the Dough Balls
Allow the dough portions to rest for 30 minutes. This helps relax the gluten and makes the dough easier to roll into thin flatbreads. - Roll Out the Flatbreads
Lightly flour your countertop and roll each dough ball into a thin circle approximately 6 to 7 inches in diameter. The circles do not need to be perfectly shaped. Use only a small amount of flour to keep the dough soft and pliable. - Cook the Flatbreads
Heat a cast-iron skillet or griddle over medium-high heat. Place one flatbread in the hot skillet and cook for 1 to 2 minutes on each side, until cooked through with golden-brown spots. Allow the bread to bubble and puff naturally without piercing the bubbles. Repeat with the remaining portions. - Serve and Store
Serve the flatbreads warm or at room temperature. Store completely cooled flatbreads in a sealed bag or airtight container for several days, or freeze them for longer storage.
Notes
- Sourdough starter: Use fed, active, bubbly sourdough starter rather than discard. The recipe assumes a starter made with equal weights of flour and water.
- Dough consistency: If your starter is thicker or thinner than expected, adjust the water or flour slightly as needed to achieve a soft, workable dough.
- Fermentation: Rising time varies with starter activity and room temperature. Wait until the dough has doubled rather than relying only on the clock.
- Make-ahead option: Cover and refrigerate the dough for 1 to 2 days if you prefer a deeper sourdough flavor.
- Cooking tip: A well-heated cast-iron skillet helps create golden spots while keeping the flatbreads soft.
- Serving ideas: Use these flatbreads for wraps, tacos, sandwiches, curry, or quick flatbread pizzas.
Nutrition Facts
- Calories: 154kcal
- Fat: 3g
- Carbohydrates: 27g
- Fiber: 1g
- Sugar: 0.1g
- Protein: 4g