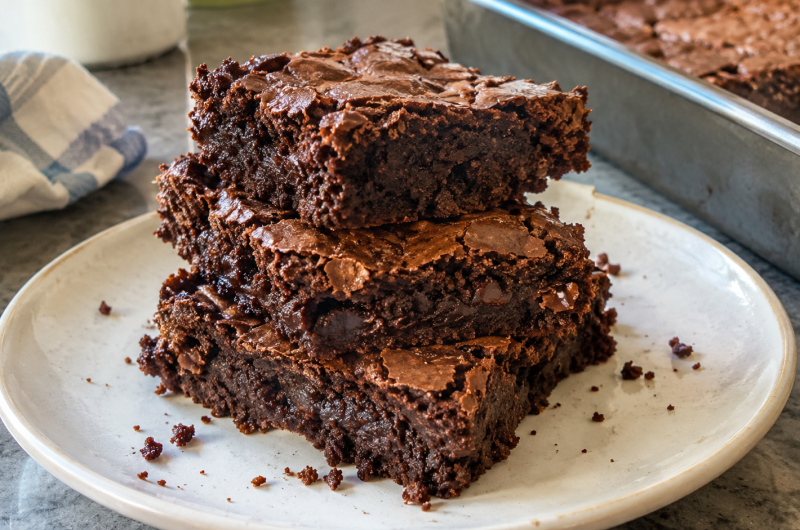
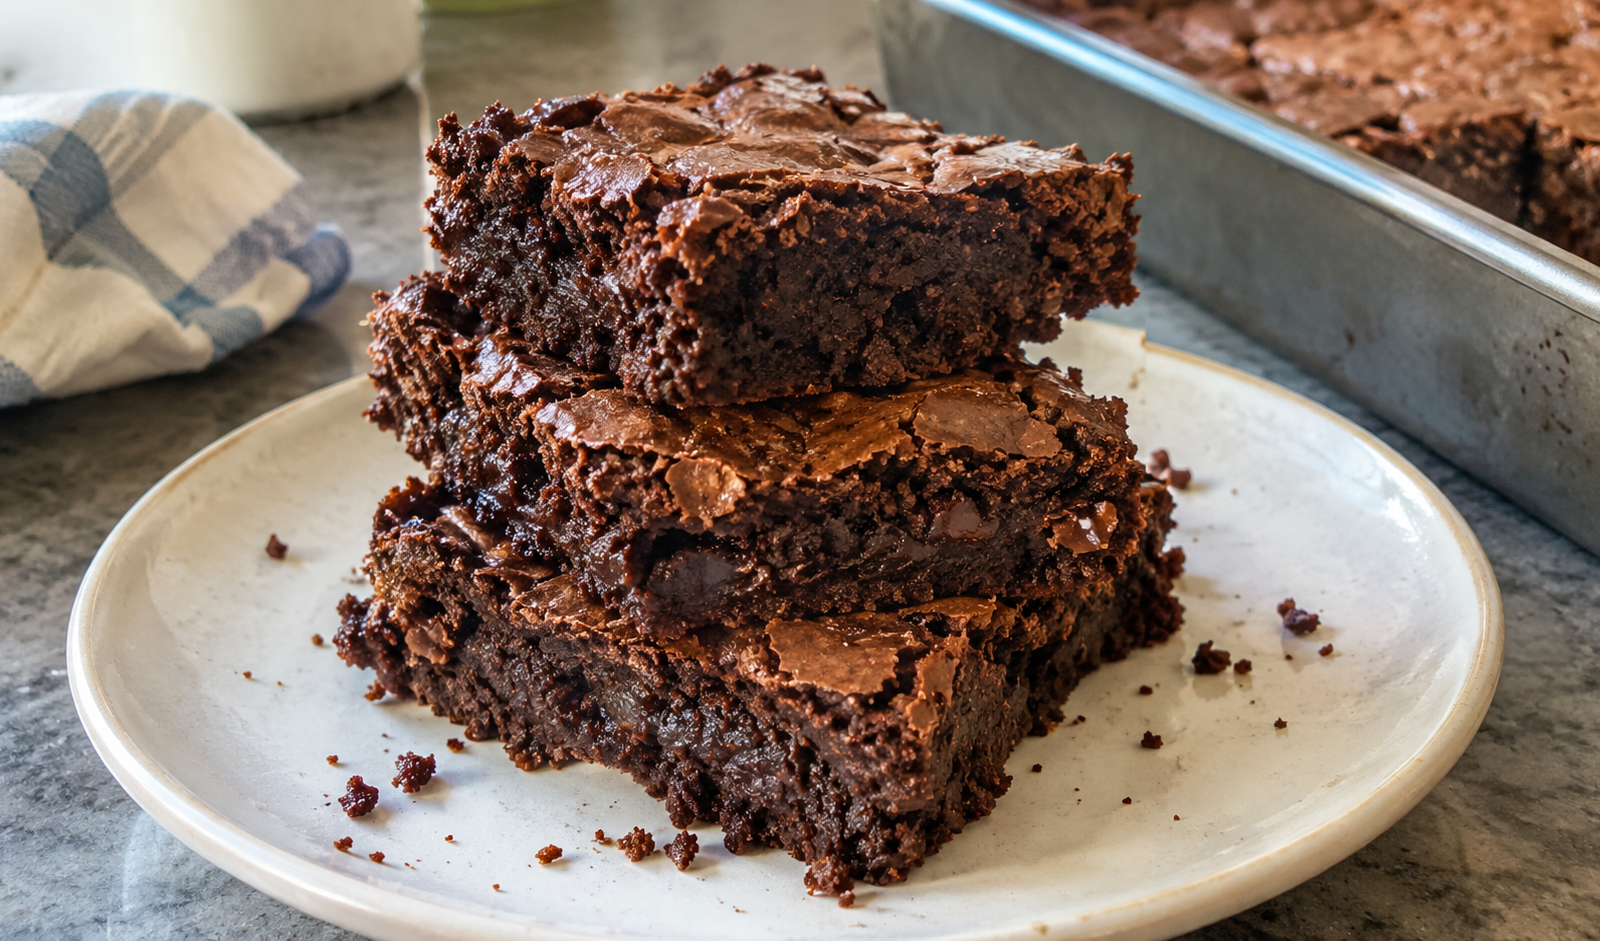
Fudgy dark chocolate brownies are a wonderful treat for anyone who loves rich chocolate desserts. These homemade brownies have a deep chocolate flavor, a soft and dense center, and a delicious texture that makes every bite satisfying. Made with melted bittersweet chocolate, butter, cocoa powder, and a few everyday baking ingredients, this recipe creates a classic chocolate dessert that is perfect for sharing with family and friends.
Unlike light and cake-like brownies, these dark chocolate brownies are designed to have a moist, fudgy texture with plenty of chocolate flavor. The combination of melted chocolate and unsweetened cocoa powder gives the batter a rich taste, while the eggs help bind everything together. With the right balance of ingredients and a little patience while the brownies cool, you can make a batch of homemade brownies that looks inviting and tastes delicious.
One of the best things about this recipe is its simplicity. You do not need special equipment, complicated techniques, or unusual ingredients to achieve a satisfying result. A saucepan, mixing bowls, a whisk, and a 9×13-inch baking pan are enough to get started. Whether you are preparing a dessert for a celebration, baking for the weekend, or simply craving something chocolatey, these brownies are a reliable choice.
What Makes These Dark Chocolate Brownies Special?
A Rich and Deep Chocolate Flavor
The secret to rich dark chocolate brownies is using more than one source of chocolate flavor. Bittersweet chocolate provides the smooth, concentrated taste that forms the base of the batter, while unsweetened cocoa powder adds another layer of chocolate intensity. Together, these ingredients create brownies that taste deeply chocolatey without relying on cocoa powder alone.
Choosing bittersweet chocolate with approximately 60% cacao is a good option for this recipe. It provides a balance between bitterness and sweetness, allowing the chocolate flavor to stand out while working well with the granulated sugar. The butter helps melt the chocolate into a smooth mixture, giving the finished brownies a rich mouthfeel and a soft interior.
A Soft, Dense, Fudgy Texture
Texture is an important part of a successful brownie recipe. These brownies contain enough butter and melted chocolate to create a moist, dense crumb rather than a dry or airy cake-like texture. The eggs provide structure, while the flour gives the batter enough support to hold together once baked. Using the ingredients in the correct proportions helps preserve the fudgy consistency.
The baking time also plays a major role in the final result. Brownies that remain in the oven too long can become dry, especially around the edges. Checking them toward the earlier end of the recommended baking window helps you avoid overbaking. After baking, allowing the brownies to cool completely makes them easier to cut and helps their centers settle into a firm but tender texture.
Tips for Perfect Fudgy Brownies
Choose Good-Quality Chocolate
The chocolate is one of the main sources of flavor in this recipe, so choose a bittersweet variety that you enjoy eating. Chocolate around 60% cacao is a suitable option because it provides a strong cocoa flavor with enough sweetness to complement the sugar. A smooth-melting baking chocolate or suitable chocolate chips can both be convenient choices.
Measure Ingredients Carefully
Accurate measurements help maintain the balance between richness, sweetness, and structure. Too much flour can make brownies dry, while changing the quantities of butter or chocolate may affect the consistency. Use the stated amounts for each ingredient, especially when making the recipe for the first time, and avoid adding extra flour simply because the batter appears thick.
Do Not Overheat the Chocolate
Melt the butter and chocolate slowly over low heat, stirring until smooth. High heat can cause chocolate to scorch or turn grainy, making it harder to create a consistent batter. Removing the saucepan from the heat as soon as the mixture has melted and allowing it to cool before adding the eggs will help you achieve a better result.
Avoid Overbaking
The difference between a moist brownie and a dry one can be only a few minutes. Since ovens vary, begin checking the brownies after about 25 minutes. Look for set edges and a center that is no longer liquid. A few moist crumbs on a toothpick are preferable to a completely dry test when you want a fudgy texture.
Let the Brownies Cool Before Cutting
Cooling is not just a serving detail; it helps determine how well the brownies hold together. The chocolate and butter firm up as the pan cools, making it easier to create clean slices. If you cut the brownies while they are still hot, the center may stick to the knife and the squares may break apart.
Serving Ideas for Dark Chocolate Brownies
Serve Them Plain
These brownies have a rich chocolate flavor that makes them satisfying without extra toppings. Cut them into squares and serve them on a dessert plate for an easy treat after lunch or dinner. Their dense texture and concentrated chocolate taste also make them a good choice for afternoon snacks or casual gatherings.
Add a Simple Topping
A light dusting of powdered sugar can give the brownies a finished appearance without changing their main flavor. For a more indulgent dessert, serve a square with a scoop of vanilla ice cream or a small spoonful of whipped cream. Keep the toppings simple so the dark chocolate remains the main attraction.
Pair Them With Coffee or Milk
A cup of coffee can complement the deep cocoa flavor, while a glass of milk offers a creamy contrast to the richness of the brownies. These simple pairings work well when serving the brownies as an afternoon treat or after a meal. Because the brownies are rich, small portions can still feel satisfying.
How to Store Dark Chocolate Brownies
Storing Brownies at Room Temperature
Allow the brownies to cool completely before storing them. Cover the pan tightly with plastic wrap or transfer the squares to an airtight container. Keep them at room temperature in a cool, dry place for up to five days. Proper covering helps prevent the brownies from drying out and protects them from absorbing other odors.
For the best texture, avoid leaving the brownies uncovered on the counter. Exposure to air can cause the edges to become dry and firm. If you have already cut the brownies into squares, arrange them in an airtight container and keep the lid securely closed between servings.
Can You Freeze Dark Chocolate Brownies?
Yes, these brownies can be frozen for up to three months. Allow them to cool completely first, then either leave them in a freezer-safe baking dish or cut them into individual portions. Wrap them tightly in plastic wrap and then aluminum foil to help protect against freezer odors and freezer burn.
When you are ready to serve them, thaw the brownies overnight in the refrigerator. Individual squares are convenient because you can take out the amount you need without thawing the entire batch. Allow the thawed brownies to come closer to room temperature before serving if you prefer a softer texture.
Frequently Asked Questions
Can I Make These Dark Chocolate Brownies Gluten-Free?
Yes, you can make a gluten-free version by replacing the all-purpose flour with a suitable gluten-free flour blend. Choose a blend intended for baking, such as an appropriate product from Bob’s Red Mill or King Arthur Baking. Since different blends can behave differently, follow the package guidance and check the texture as the brownies bake.
The original recipe uses all-purpose flour, so changing to a gluten-free blend is a substitution rather than the standard method. If you are baking for someone with celiac disease or a serious gluten sensitivity, check that the chocolate, cocoa powder, and other ingredients are also labeled gluten-free and avoid cross-contact with gluten-containing foods.
Can I Use a Smaller Baking Pan?
A smaller pan can be used if you prefer thicker brownies, but the baking time will need to increase. Because the batter will be deeper, the center may take longer to set than it would in a 13×9-inch pan. Check the brownies regularly rather than relying on the original baking time alone.
For the most predictable result, use the recommended 13×9-inch pan. It provides a broad surface that helps the batter bake in a relatively even layer. If you choose another pan size, avoid filling it too close to the top and allow enough room for safe handling.
How Do I Know When the Brownies Are Ready?
Start checking the brownies after approximately 25 minutes. The edges should appear set, and the center should no longer look like liquid batter. A toothpick inserted into the middle may have a few moist crumbs attached. If it comes out with a large amount of wet batter, bake for a little longer and test again.
Remember that the brownies will continue to settle as they cool. Waiting until the entire surface looks completely dry in the oven can lead to a firmer, less fudgy result. The goal is to bake them until the structure is set while preserving moisture in the center.
Why Should I Let the Chocolate Mixture Cool Before Adding Eggs?
The melted butter and chocolate mixture can retain considerable heat even after it has been removed from the stove. Adding eggs too soon may cause them to partially cook, resulting in small pieces of egg and an uneven batter. Letting the mixture cool reduces this risk and helps the ingredients combine smoothly.
You do not need to refrigerate the chocolate mixture until it becomes hard. Simply allow it to cool enough that it is no longer hot before whisking in the sugar, vanilla, and eggs. It should remain fluid and easy to stir.
Can I Prepare the Brownies Ahead of Time?
Yes, these brownies are convenient to prepare ahead because they need time to cool before slicing. You can bake them the day before serving, let them cool completely, and store them in an airtight container at room temperature. This makes them useful for parties, family gatherings, and occasions when you want dessert ready in advance.
For longer storage, freeze the cooled brownies using the wrapping method described above. Thaw them in the refrigerator overnight before serving. Preparing them ahead also allows you to cut the squares neatly without rushing the cooling process.
Gluten-Free Fudgy Dark Chocolate Brownies
These fudgy dark chocolate brownies combine melted bittersweet chocolate, butter, and unsweetened cocoa powder for a rich, chocolate-filled dessert.
24
servings5
minutes40
minutes216
kcal45
minutesIngredients
1 cup unsalted butter
8 oz bittersweet chocolate (such as Ghirardelli 60% cacao baking chips)
2 cups granulated sugar
2 teaspoons vanilla extract
5 large eggs
1/3 cup unsweetened cocoa powder
2/3 cup all-purpose flour
1/2 teaspoon salt
Directions
- Preheat the oven:
Preheat to 350°F. Grease and flour a 13×9-inch baking pan. - Melt the chocolate and butter:
Place the butter and bittersweet chocolate in a 3-quart saucepan. Melt over low heat, stirring until smooth. Remove from the heat and allow the mixture to cool. - Add sugar and vanilla:
Whisk the granulated sugar and vanilla extract into the cooled chocolate mixture until combined. - Incorporate the eggs:
Add the eggs one at a time, whisking after each addition until the mixture is smooth. - Mix the dry ingredients:
Sift the cocoa powder, all-purpose flour, and salt together in a separate bowl. - Make the batter:
Add the dry ingredients to the chocolate mixture and whisk until thoroughly combined. - Fill the pan:
Spread the brownie batter evenly into the prepared baking pan. - Bake:
Bake for approximately 25–35 minutes, checking for set edges and a center that is no longer liquid. The exact time may vary by oven. - Cool and serve:
Allow the brownies to cool completely before cutting into 24 squares.
Notes
- Best Baking Pan: Use a 9×13-inch baking pan for evenly baked brownies with the recommended thickness. A smaller pan can be used for thicker brownies, but the baking time will need to increase.
- Optional Topping: These brownies are delicious on their own. For a simple finishing touch, dust the cooled brownies with a little powdered sugar before serving.
- Storage: Allow the brownies to cool completely, then cover tightly with plastic wrap or place them in an airtight container. Store at room temperature for up to five days.
- Gluten-Free Option: Replace the all-purpose flour with a suitable gluten-free flour blend, such as one from Bob’s Red Mill or King Arthur Baking. Check the product instructions to ensure the blend is appropriate for brownies.
- Freezing Instructions: Let the brownies cool completely before freezing. Cut them into individual squares or leave them in a freezer-safe baking dish. Wrap tightly with plastic wrap and aluminum foil, then freeze for up to three months. Thaw overnight in the refrigerator before serving.
Nutrition Facts
- Calories: 216kcal
- Fat: 12g
- Carbohydrates: 25g
- Fiber: 1g
- Sugar: 20g
- Protein: 2g