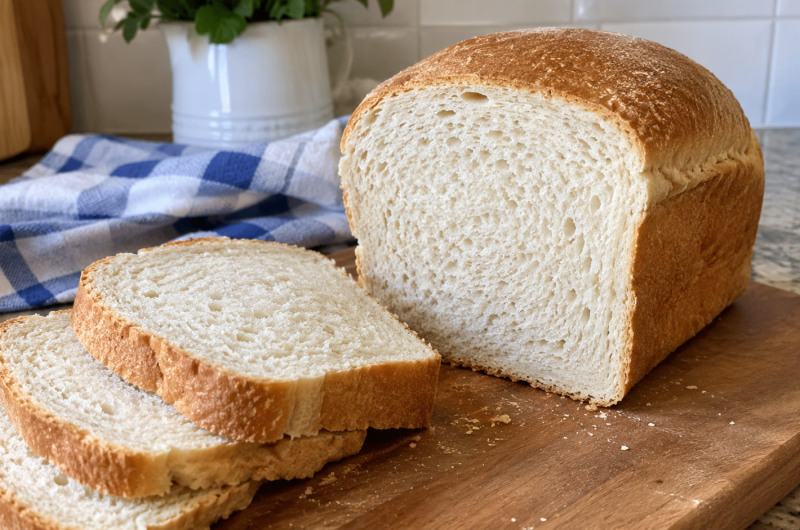
Soft sourdough sandwich bread is an excellent choice for anyone who enjoys homemade bread with a tender texture, a light crumb, and a mild sourdough flavor. Made with all-purpose flour, active sourdough starter, olive oil, honey, water, and sea salt, this loaf is suitable for everyday meals. Its soft interior makes it easy to slice, while its structure holds up well to sandwich fillings, spreads, and breakfast toppings.
Unlike crusty artisan sourdough loaves, this sourdough sandwich bread is baked in a loaf pan to create a familiar shape with even slices. The olive oil helps keep the crumb soft, and the honey adds a gentle sweetness that complements the natural flavor of the fermented dough.
The result is a versatile homemade loaf that works just as well for morning toast as it does for packed lunches, grilled sandwiches, or a simple slice served alongside soup.
One of the best features of this recipe is that it uses everyday ingredients rather than specialty bread-making products. All-purpose flour keeps the recipe accessible, while a stand mixer makes kneading easier and more consistent.
Although the process takes time because sourdough requires fermentation, the actual hands-on work is relatively straightforward. With a healthy starter, a little patience, and attention to the dough’s rise, even a beginner can work toward a soft, satisfying loaf.
What Makes This Sourdough Sandwich Bread Different?
Traditional sourdough bread is often associated with a thick, crisp crust and an open crumb filled with large holes. Those characteristics are wonderful for rustic loaves, but sandwich bread benefits from a different texture. This recipe aims for a closer crumb, a softer crust, and a shape that makes slicing convenient. The dough is placed in a loaf pan, allowing it to rise upward and develop the familiar rectangular form used for everyday sandwiches.
Olive oil is an important part of the recipe because it contributes to the tenderness of the finished bread. Honey provides mild sweetness without making the loaf taste like dessert, while sea salt balances the flavor and improves the overall taste of the dough. Active sourdough starter supplies the fermentation needed to raise the bread gradually. Together, these ingredients create a loaf that is flavorful without being overpowering and soft without losing its ability to hold sandwich fillings.
Another advantage is the overnight fermentation schedule. Instead of relying on a quick rise, the dough develops over several hours at room temperature. This makes it possible to prepare the dough in the evening, allow it to rise overnight, and shape and bake it the following morning. The exact timing depends on your starter and kitchen temperature, so watching the dough is more reliable than following the clock alone.
Understanding Sourdough Fermentation
Why the First Rise Takes So Long
The first rise, also called bulk fermentation, is the period when the mixed and kneaded dough rests while the sourdough starter produces gas and develops flavor. For this recipe, bulk fermentation usually takes around 10 to 12 hours in a kitchen maintained at approximately 68–72°F (20–22°C). During this time, the dough should gradually expand and become lighter. The actual duration depends on the starter’s activity, the room temperature, and the dough itself.
Rather than relying entirely on a timer, look for visible changes in the dough. It should increase in volume, appear airier, and show signs of fermentation. Depending on the flour and the strength of the starter, the dough may not behave exactly as expected. Avoid shaping it too early simply because the scheduled time has passed. Proper fermentation is one of the most important steps in making soft sourdough sandwich bread with a good rise.
How Kitchen Temperature Affects the Dough
Temperature has a significant effect on sourdough fermentation. In a cooler kitchen, the dough may need more time to rise, and both the first and second rises can take longer than the suggested schedule. If your kitchen is below 68°F (20°C), a suitable proofing box can provide a more consistent environment. An oven with its light on may also offer warmth, but check the temperature carefully and never allow the dough to become too hot.
In a warmer kitchen, fermentation happens more quickly, which means the dough can rise sooner than expected. Temperatures above 72°F (22°C) may shorten the overnight rise considerably. If you know your kitchen gets warm overnight, consider mixing the dough in the morning so you can monitor its progress. A dough that rises too far can become sticky and difficult to shape, so checking its condition periodically is more helpful than following a fixed timetable.
How to Make Soft Sourdough Sandwich Bread
Step 1: Prepare the Active Starter
Feed your sourdough starter approximately 12 hours before you plan to mix the dough, adjusting the timing to suit your kitchen conditions. To prepare the specified 50 grams of active starter, combine 10 grams of existing sourdough starter with 25 grams of all-purpose flour and 25 grams of water. Stir everything together in a clean jar, cover loosely, and leave it at room temperature until it rises and becomes bubbly.
The suggested feeding ratio is intended to support a gradual rise overnight in a moderately cool kitchen. Your starter may become active sooner or later, depending on its condition and the surrounding temperature. Before proceeding, make sure it has developed visible bubbles and increased in volume. Using a lively starter gives the dough a better chance of rising successfully during the long fermentation period.
Step 2: Mix and Rest the Dough
Place the active starter, water, olive oil, honey, all-purpose flour, and sea salt in the bowl of a stand mixer. Begin combining the ingredients with a dough whisk or sturdy spatula. You can finish bringing the mixture together with your hands, making sure no dry flour remains at the bottom or around the sides of the bowl. At this stage, the dough may look rough and uneven, which is normal.
Cover the bowl and allow the dough to rest for one hour before kneading. This resting period gives the flour time to absorb the water and helps the dough become easier to work with. Avoid skipping this step, as the initial rest supports dough development without requiring constant mixing. Once the hour has passed, the mixture should be more cohesive and ready for kneading.
Step 3: Knead Until Smooth
Fit the stand mixer with its dough hook and knead the dough on low speed for eight to ten minutes. During kneading, the flour’s proteins form a gluten network that helps the dough hold the gas produced during fermentation. This structure is particularly important for sandwich bread because it allows the loaf to rise evenly and develop a soft interior that can be sliced without falling apart.
If you are kneading by hand, transfer the dough to a clean work surface and knead for approximately eight to ten minutes after the initial rest. Work patiently until the dough becomes smoother, more elastic, and supple. It may remain slightly tacky because of the olive oil and hydration, but it should become easier to handle as the gluten develops. Avoid adding large amounts of extra flour, which can make the finished bread dry or dense.
Step 4: Complete the First Rise
Return the kneaded dough to its bowl, cover it, and leave it at room temperature for approximately 10 to 12 hours. During this bulk fermentation, the starter gradually raises the dough and helps develop its flavor. Keep the bowl away from direct heat and strong drafts. The goal is to create a dough that has expanded substantially and looks aerated, rather than one that is simply following a predetermined schedule.
If your kitchen is particularly cool and fermentation is progressing very slowly, the recipe notes suggest using 100 grams of active starter and 255 grams of water to encourage a faster rise. This is an adjustment to the original formula, not the standard ingredient quantity. If you make this change, expect the dough’s consistency and fermentation timing to differ slightly. In a warmer environment, check the dough earlier to avoid allowing it to ferment too far.
Step 5: Shape the Sandwich Loaf
Once the first rise is complete, lightly flour your work surface and gently turn out the dough. Press it into a rectangle with the shorter end facing you. Fold the left and right sides toward the middle, then roll the dough from the far end toward yourself to form a log. Keep the shaping movements controlled rather than pressing out all the air that developed during fermentation.
Cup your hands around the dough and gently draw it toward yourself to create some surface tension. Pinch the seams and ends closed so the loaf maintains its shape during the second rise. Transfer it seam-side down into a greased 9-by-5-inch loaf pan, using parchment paper if desired. Even shaping helps the loaf rise more uniformly and gives you a neat shape for slicing after it has cooled.
Step 6: Allow the Second Rise
Leave the shaped dough at room temperature until it rises approximately one inch above the rim of the loaf pan. This stage usually takes around two to three hours, although temperature and starter activity can change the timing. Keep the pan in a suitable place where the dough can rise undisturbed. Watch its height and appearance rather than assuming it will be ready at exactly the same time every day.
The second rise is important because it allows the shaped dough to expand before baking. If the dough has not risen enough, the loaf may turn out compact and heavy. If it rises too far, it may lose strength and collapse during baking. A gradual rise to the recommended height is a useful visual guide for this recipe.
Step 7: Bake Until Golden
Preheat your oven to 450°F (232°C). Place the loaf pan in the oven, then reduce the temperature to 375°F (190°C) and bake for 45 to 50 minutes. The initial high temperature is part of the specified baking method, while the lower temperature allows the loaf to continue baking through. Watch the crust as it develops, and make sure the center has had enough time to bake rather than judging doneness by color alone.
When the crust is golden brown and the loaf is baked through, remove the pan from the oven. Let the bread rest in the pan for 10 to 15 minutes before carefully transferring it to a wire rack. The loaf will still be releasing steam during this period, so avoid cutting into it immediately. Allowing it to cool properly helps the crumb set and makes the slices easier to cut cleanly.
Serving, Storage, and Troubleshooting
How to Serve Homemade Sourdough Sandwich Bread
This soft sourdough loaf is suitable for a wide range of everyday meals. Use it to prepare classic sandwiches with vegetables, cheese, eggs, or your preferred fillings. It also makes excellent breakfast toast when served with olive oil, jam, nut butter, or other favorite toppings. Because the crumb is relatively tight, it is easier to spread ingredients across each slice without the bread tearing as readily as a very open-crumb artisan loaf might.
For grilled sandwiches, the bread provides a tender center with a lightly toasted exterior. It can also accompany soups and salads or be used for simple lunchtime snacks. For the best texture, slice the bread only after it has cooled completely, ideally allowing one to two hours on a wire rack. Cutting it while warm can compress the crumb and make the center seem gummy, even when the bread has baked properly.
How to Store and Freeze the Bread
Once completely cool, store the loaf in a bread bag, beeswax wrap, or a clean kitchen towel at room temperature. These options help protect the bread while avoiding unnecessary moisture buildup. Homemade bread generally stays pleasant for a few days, although the exact freshness depends on the room temperature, humidity, and storage method. Keep it away from direct sunlight and excessive heat, and always use clean hands or utensils when handling the loaf.
For longer storage, freeze the cooled bread in a freezer-safe container or wrap individual slices before placing them in a freezer bag. Freezing slices is convenient because you can remove only what you need for breakfast or a sandwich. Let the bread cool fully before wrapping to reduce condensation. Individual slices can usually be toasted directly from frozen, while larger portions can be thawed before serving.
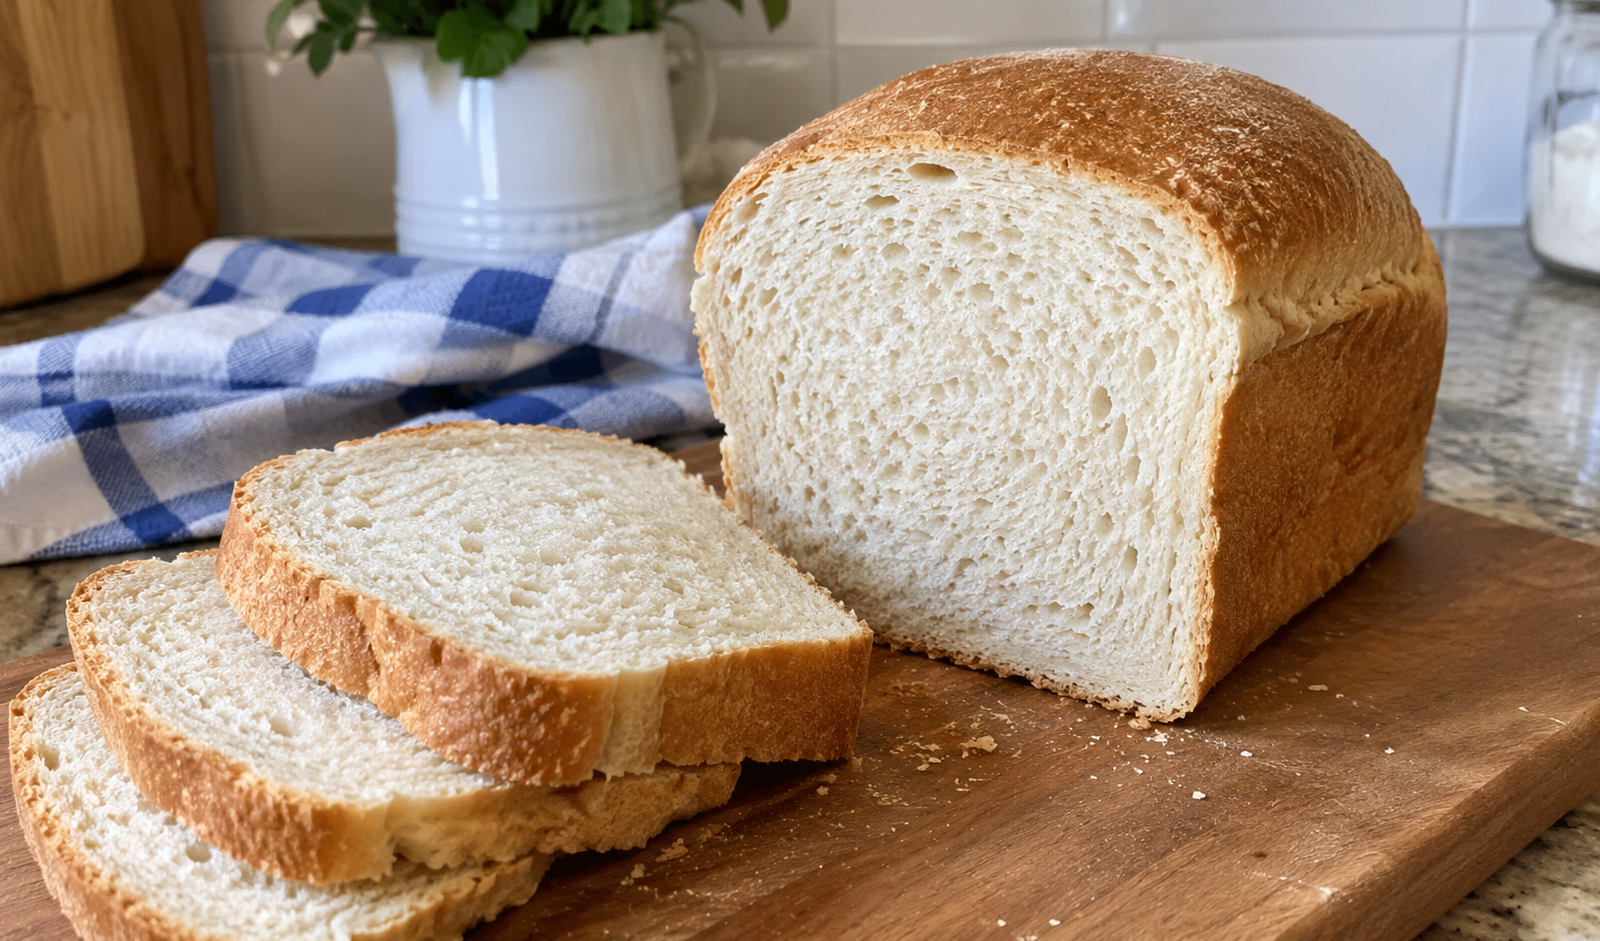
Sourdough Soft Sandwich Bread
This soft sourdough sandwich bread has a light, fluffy texture, a tender crumb, and a mild sourdough flavor.
12
servings20
minutes45
minutes198
kcal600
minutes11
hours5
minutesIngredients
- For the Active Sourdough Starter
2 teaspoons (10 g) sourdough starter
3 tablespoons (25 g) all-purpose flour
5 teaspoons (25 g) water
- For the Bread Dough
¼ cup (50 g) active sourdough starter
1 cup + 2½ tablespoons (275 g) water
4 tablespoons (60 g) olive oil
1 tablespoon honey
4 cups + 2 tablespoons (500 g) all-purpose flour
2 teaspoons (10 g) sea salt
Directions
- Feed the starter.
Approximately 12 hours before mixing the dough, combine the sourdough starter, all-purpose flour, and water in a clean jar. Stir well, cover loosely, and leave at room temperature (68–72°F or 20–22°C) until bubbly and doubled in size. - Mix the ingredients.
Add the active sourdough starter, water, olive oil, honey, flour, and sea salt to a large mixing bowl or stand mixer bowl. Stir with a dough whisk or sturdy spatula until a rough dough forms and no dry flour remains. - Rest the dough.
Cover the bowl and let the dough rest for 1 hour. This allows the flour to absorb the water and helps prepare the dough for kneading. - Knead the dough.
Using a stand mixer fitted with a dough hook, knead on low speed for 8–10 minutes until the dough becomes smooth and elastic. Alternatively, knead by hand for the same amount of time on a clean work surface. - Complete the first rise.
Cover the bowl and leave the dough at room temperature for approximately 10–12 hours, or until it has doubled in size. Fermentation time may vary depending on your starter’s strength and kitchen temperature. - Shape the loaf.
Turn the dough onto a lightly floured surface and gently press it into a rectangle. Fold both sides toward the center, then roll the dough from the far end toward yourself to create a log. Pinch the seams closed. - Transfer to the loaf pan.
Place the dough seam-side down in a greased 9 × 5-inch loaf pan. Line the pan with parchment paper if desired for easier removal. - Complete the second rise.
Leave the dough at room temperature for approximately 2–3 hours, or until it rises about 1 inch above the rim of the pan. Adjust the timing according to the dough’s appearance and room temperature. - Preheat the oven.
Preheat the oven to 450°F (232°C). - Bake the bread.
Place the loaf pan in the oven and immediately reduce the temperature to 375°F (190°C). Bake for 45–50 minutes, until the crust is golden brown and the loaf is baked through. - Cool before slicing.
Let the bread cool in the pan for 10–15 minutes, then transfer it to a wire rack. Allow it to cool completely for 1–2 hours before slicing.
Notes
- Starter activity: Use an active, bubbly starter for the best rise and texture.
- Cool kitchens: If your kitchen is below 68°F (20°C), fermentation may take longer. The recipe notes suggest an adjusted formula of 100 g active starter and 255 g water to encourage faster fermentation.
- Warm kitchens: If your kitchen is above 72°F (22°C), check the dough more frequently because it may rise faster than expected.
- Over-proofed dough: If the dough becomes excessively sticky after rising too long, consider using it to make sourdough focaccia.
- Storage: Keep the completely cooled bread in a bread bag, beeswax wrap, or clean kitchen towel at room temperature for a few days.
- Freezing: Wrap cooled slices individually and store them in a freezer-safe container or bag. Toast slices directly from frozen when needed.
Nutrition Facts
- Calories: 198kcal
- Fat: 5g
- Carbohydrates: 33g
- Protein: 4g