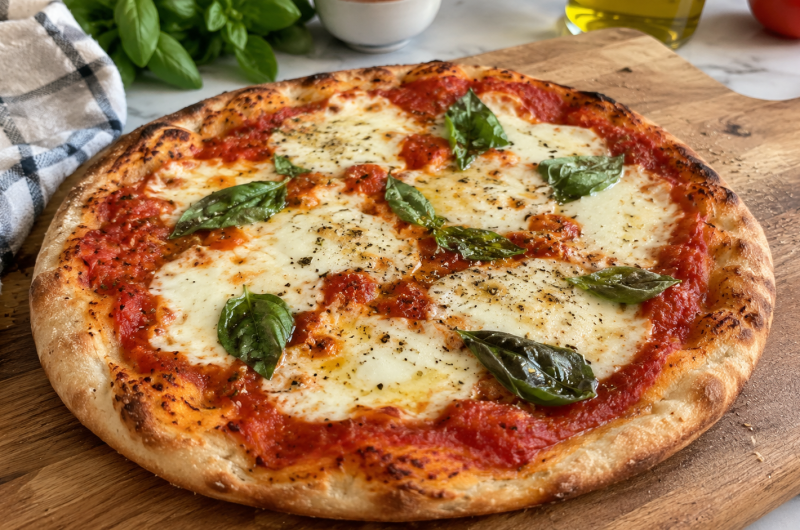
Sourdough discard pizza dough is a delicious way to turn leftover sourdough starter into a homemade pizza crust with a slightly tangy flavor and a satisfying texture. If you regularly maintain a sourdough starter, you probably have discard left over after feeding it.
Instead of throwing it away, you can use it to prepare pizza dough with a handful of everyday ingredients. This recipe combines all-purpose flour, sourdough discard, water, olive oil, and salt to create a versatile dough for homemade pizza night.
One of the best things about this sourdough discard pizza crust is its flexibility. You can prepare the dough ahead of time, allow it to ferment slowly, or refrigerate it until you are ready to bake. The recipe makes two pizzas measuring approximately 10 to 12 inches, making it suitable for a family meal or a relaxed dinner with friends. Once the dough is shaped, add your preferred sauce, cheese, vegetables, or other toppings to create a pizza that suits your taste.
Unlike traditional pizza dough recipes that rely on commercial yeast, this version uses sourdough discard to contribute flavor and make use of an ingredient that might otherwise go to waste. The fermentation process takes several hours, so it requires a little planning, but most of that time is hands-off. You can mix the ingredients, cover the bowl, and let the dough develop while you get on with your day. The result is a homemade pizza base that works well with both classic Italian-inspired toppings and creative combinations.
What Makes This Sourdough Discard Pizza Crust Special?
Sourdough discard pizza dough offers a practical balance of flavor, convenience, and homemade goodness. The discard adds the characteristic taste associated with sourdough, while the flour forms the structure of the crust. Olive oil contributes a little richness, and salt helps bring out the flavor of the other ingredients. Water brings everything together into a workable dough that can be shaped into thin, round pizza bases.
Another advantage is that you do not need an elaborate list of ingredients or special baking equipment to get started. A large mixing bowl, a whisk or your hands, a rolling pin, and an oven are enough for preparing the dough. A pizza stone can help create a crisp base, while a cast iron skillet offers another useful option. Both methods allow you to prepare homemade pizza without purchasing ready-made crusts or relying on packaged dough.
The recipe is also useful for anyone who wants to reduce food waste in a sourdough baking routine. Feeding a starter regularly can leave you with more discard than you need for pancakes, crackers, or bread. Using that discard in pizza dough gives it another purpose and makes it easier to enjoy the benefits of maintaining a starter. Because the dough can be refrigerated or frozen, you can also prepare extra portions for a future meal.
Best Pizza Toppings for Sourdough Discard Crust
One advantage of homemade sourdough pizza is that the crust works with a wide range of flavors. Classic combinations are always welcome, but you can also use leftover cooked ingredients and seasonal vegetables to create something different. Keep the topping quantity balanced so the base can bake properly. Too much sauce or too many wet ingredients may leave the center soft, especially if you prefer a thin crust.
Classic Margherita Pizza
For a traditional combination, use tomato sauce, fresh mozzarella, sliced tomatoes, and fresh basil. The mild cheese and bright tomato flavor pair naturally with the slight tang of sourdough crust. Add the basil near the end of baking or after the pizza comes out of the oven to preserve its fresh aroma. A small drizzle of olive oil and a pinch of sea salt can complete this simple, satisfying topping combination.
Sausage, Mushroom, and Black Olive Pizza
For a hearty option, spread tomato sauce over the crust and add cooked Italian sausage, sliced mushrooms, black olives, and mozzarella. These ingredients provide a mixture of savory, earthy, and salty flavors that work especially well with a chewy sourdough base. Make sure any ingredients that release excess moisture are prepared appropriately before adding them. You can also include small dollops of ricotta for a creamy finish.
Garlic Mushroom and White Sauce Pizza
A white pizza offers a delicious alternative to the usual tomato sauce. Spread a suitable garlic cream sauce over the dough, then add mozzarella, sautéed mushrooms, and thyme. The mushrooms bring an earthy flavor, while garlic and herbs provide aroma without overpowering the crust. Finish with a little truffle oil if desired, using it sparingly so that it complements rather than dominates the other ingredients.
BBQ Chicken Pizza
Use barbecue sauce as the base, then add cooked chicken, thinly sliced red onion, and mozzarella. This combination is useful when you have leftover roast or grilled chicken in the refrigerator. Once the pizza is baked, scatter a little fresh cilantro over the top for color and freshness. Because barbecue sauce can be sweet and thick, use a moderate amount to avoid making the center of the pizza soggy.
Vegetable and Pesto Pizza
For a colorful meat-free option, spread pesto across the crust and top it with mozzarella, bell peppers, red onions, cherry tomatoes, and olives. A little feta cheese can provide a salty contrast to the vegetables. Cut the vegetables into reasonably small pieces so they cook evenly, and avoid adding too much moisture. This combination is especially convenient when you want to use vegetables already available in your kitchen.
How to Prepare Pizza Dough Ahead of Time
Preparing sourdough discard pizza dough a day ahead makes homemade pizza much easier to fit into a busy schedule. Mix the dough, allow it to ferment, and complete the stretch-and-fold step before refrigerating it in a covered container. When dinner time approaches, remove the dough from the refrigerator while you preheat the oven and prepare your toppings. Once it has relaxed and become easier to handle, divide and shape it, then bake as directed.
If you are planning ahead, remember that sourdough fermentation does not follow an identical timetable in every kitchen. Dough left in a warm room may rise much faster than dough prepared in cooler conditions. Refrigeration slows fermentation but does not necessarily stop it entirely. Check the dough before shaping, and allow its appearance and texture to guide your decisions. With a little preparation, you can enjoy freshly baked pizza without having to complete every step immediately before dinner.
Freezing and Thawing Sourdough Discard Pizza Dough
This recipe makes two pizza bases, so freezing one portion is a practical way to save time later. After the initial bulk fermentation and stretch-and-fold step, divide the dough into two portions. Lightly coat each dough ball with olive oil, place each one in a separate airtight freezer bag or suitable container, and remove excess air before sealing. Label the portions with the date and freeze for up to three months for convenient future use.
When you want to make pizza, transfer the frozen dough to the refrigerator and let it thaw for approximately eight to twelve hours. Then leave it at room temperature for about one to two hours, allowing it to soften and become easier to shape. Give the shaped dough another ten to fifteen minutes to relax if it keeps shrinking back. Add your toppings and bake in a preheated 450°F oven until the crust is cooked and the cheese is melted. The precise baking time will depend on the thickness of the crust and your oven, so check for doneness rather than relying on time alone.
Frequently Asked Questions About Sourdough Discard Pizza Dough
Can I use active sourdough starter instead of discard?
Yes, active sourdough starter can be used, but it may change the fermentation schedule. A vigorous starter can encourage the dough to rise more quickly, so monitor the dough rather than following the timing blindly. The final flavor may also be milder or different depending on the starter and fermentation conditions. Keep the original ingredient quantities consistent when first trying the substitution, and observe how the dough develops.
Can I use sourdough discard straight from the refrigerator?
Yes, refrigerated discard can be mixed directly into the dough. Allowing it to warm slightly may make it easier to incorporate, particularly if it is thick, but it is not essential. The dough’s fermentation speed will depend on its overall temperature, so cold discard may slow the initial rise somewhat.
Why is my sourdough pizza dough dense?
A dense crust can result from insufficient fermentation, weak starter activity, an unsuitable dough consistency, or shaping that removes too much of the developed air. Give the dough enough time to expand and look for bubbles before shaping. Make sure the flour and water are properly incorporated, and avoid adding excessive flour during mixing or rolling.
Can I make the dough without refrigerating it?
Yes. Refrigeration is optional in this recipe. It is useful for convenience and handling, but you can skip it when you want to bake sooner. Focus on the fermentation stage, allowing the dough to develop sufficiently at room temperature before shaping it.
Can I use whole wheat flour?
Yes, you can experiment with a mixture of whole wheat and all-purpose flour. A roughly equal blend is a reasonable starting point, although whole wheat flour absorbs water differently and can create a denser crust. Make small adjustments only when necessary, and expect some variation in texture compared with a dough made entirely with all-purpose flour.
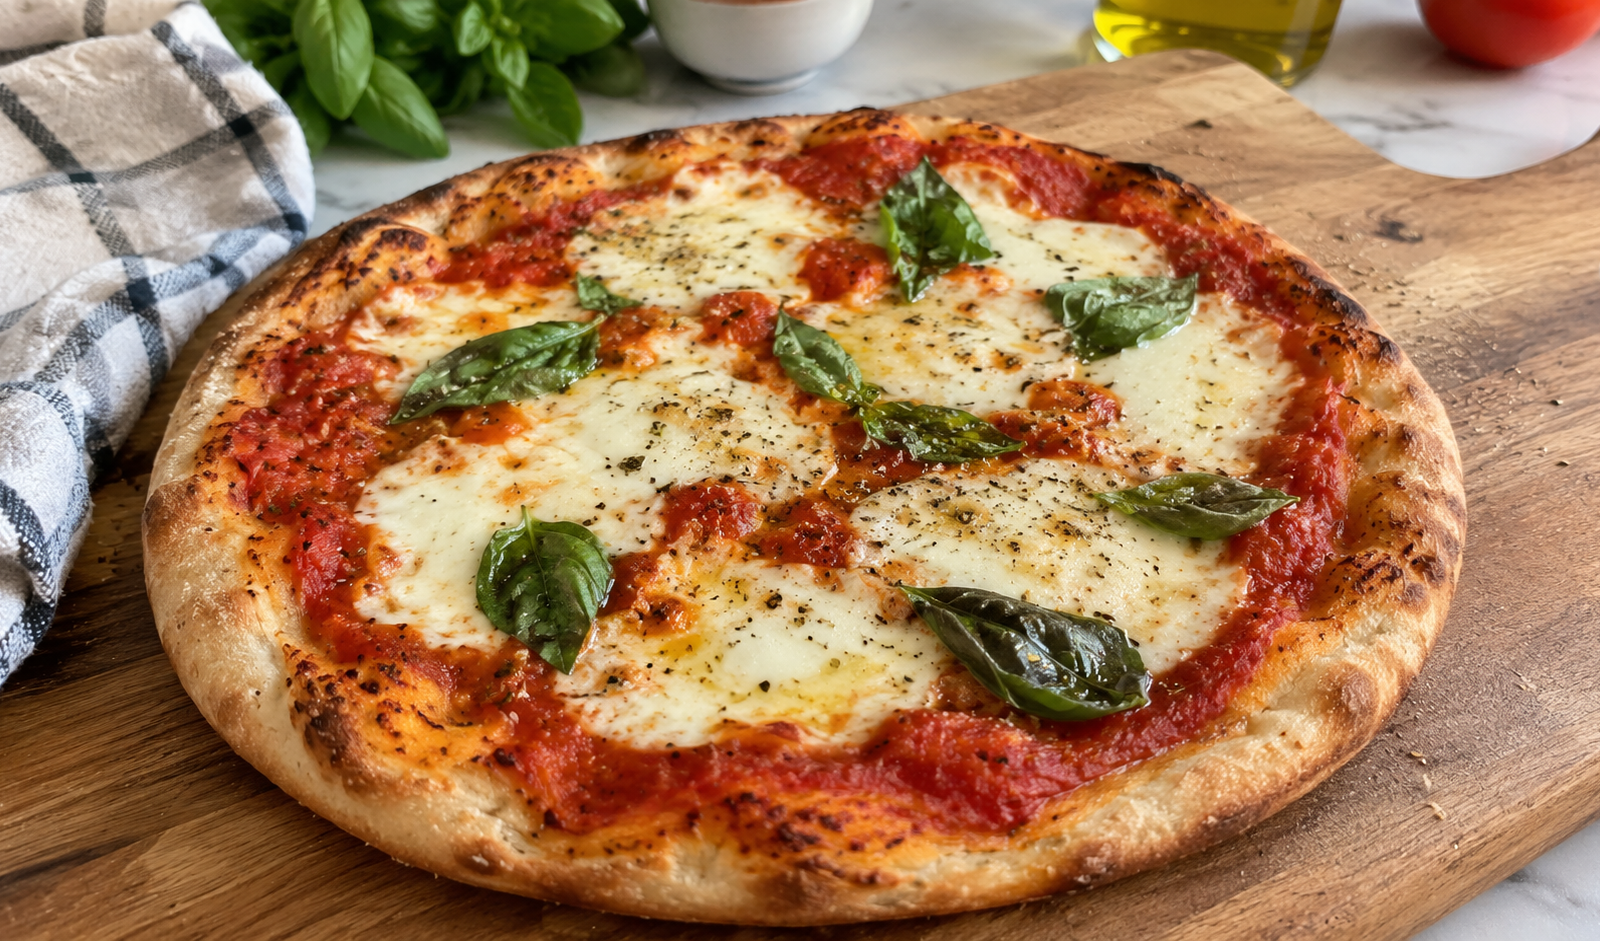
Sourdough Discard Pizza Crust
This sourdough discard pizza dough makes two homemade pizza crusts with a mild tangy flavor and a satisfying texture.
4
servings20
minutes17
minutes402
kcal480
8
hours37
minutesIngredients
3¼ cups all-purpose flour
½ cup sourdough discard
1 cup room-temperature water
2 tsp olive oil, plus more for brushing before baking
1 tsp salt
Directions
- Mix the liquids:
In a large bowl, combine the water, sourdough discard, olive oil, and salt. Stir until blended. - Add the flour:
Gradually mix in the all-purpose flour, approximately half a cup at a time. - Form the dough:
When the mixture becomes too thick for a whisk, use your hands to combine everything into a shaggy dough. - Ferment:
Cover the bowl and leave the dough at room temperature for 6–8 hours or overnight, until noticeably expanded and bubbly. - Stretch and fold:
Lift one side of the dough, stretch it over the center, and repeat around the dough until the entire mass has been folded. - Refrigerate:
Cover and chill for 1–4 hours if desired. This step is optional. - Rest:
Remove the dough from the refrigerator and let it sit at room temperature for 30 minutes. - Shape:
Lightly flour your work surface. Divide the dough into two portions and roll each into a circle approximately ¼ inch thick. - Preheat:
Heat the oven to 450°F (232°C), with the pizza stone inside. - Transfer:
Carefully prepare the hot stone with a light dusting of flour or cornmeal, then place the shaped dough on it. - Top and bake:
Add pizza sauce, cheese, and your favorite toppings. Bake for 10–15 minutes, then broil for about 2 minutes to brown the surface, watching closely. - Serve:
Allow the pizza to cool slightly before slicing and serving.
Notes
- Make ahead: Complete the fermentation and stretch-and-fold steps, then refrigerate the covered dough until needed.
- Cast iron skillet: Preheat the skillet at 450°F (232°C). Carefully add the crust and toppings, then bake for 10–12 minutes. Broil for about 1 minute to brown the toppings.
- Freezing: Divide the dough after bulk fermentation and folding. Lightly coat each portion with olive oil, seal separately in airtight freezer bags, and freeze for up to three months.
- Thawing: Thaw overnight in the refrigerator, then rest at room temperature for 1–2 hours before shaping.
- Fermentation: Rising times depend on room temperature and starter activity. Allow additional time if the dough has not expanded sufficiently.
- Toppings: Avoid excessive sauce or wet toppings to help keep the crust crisp.
Nutrition Facts
- Calories: 402kcal
- Fat: 1g
- Carbohydrates: 8g
- Fiber: 3g
- Sugar: 0.3g
- Protein: 11g