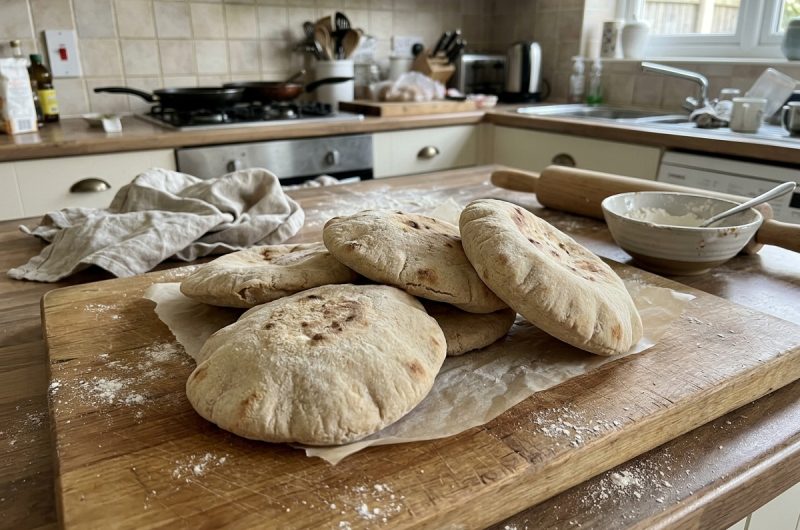
Homemade sourdough pita bread is a wonderful way to bring fresh, soft, and flavorful bread to your kitchen. These round flatbreads are made with an active sourdough starter instead of commercial yeast, giving them a gentle tangy flavor and a tender texture. When baked at a high temperature, the dough can puff up and form the familiar hollow pocket that makes pita bread perfect for sandwiches, wraps, and all kinds of fillings.
This easy sourdough pita bread recipe uses simple pantry ingredients and requires only a short amount of hands-on preparation. Most of the time is spent allowing the dough to ferment and rise naturally. Once the dough is ready, it is divided into portions, rolled into thin circles, and baked on a hot surface. The result is soft, homemade bread with a lightly chewy texture and a delicious sourdough taste.
One of the best things about making pita bread with sourdough is the flavor. Traditional pita bread can be mild and neutral, while sourdough pita has a more developed taste from the natural fermentation process. The flavor remains subtle enough to complement savory fillings, fresh vegetables, grilled meats, and creamy sauces without overpowering the other ingredients.
These homemade pita pockets are also useful for meal preparation. You can bake a batch ahead of time, store the bread properly, and use it throughout the week for quick lunches or easy dinners. Fill each pocket with falafel, chicken, hummus, salad, or your favorite sandwich ingredients for a convenient meal that feels fresh and satisfying.
Why You Will Love This Sourdough Pita Bread Recipe
Naturally Leavened With Sourdough Starter
This recipe relies on an active sourdough starter to help the dough rise, so commercial yeast is not necessary. The natural fermentation process develops the dough gradually and contributes to the distinctive flavor associated with sourdough bread. Using a bubbly starter that has been fed and is ready for baking gives the dough the best chance of rising properly and producing light, tender pita bread.
Soft Bread With a Classic Pocket
A good pita should be soft enough to fold without immediately cracking, yet sturdy enough to hold its filling. Baking the rolled dough on a thoroughly heated baking stone or cast iron skillet encourages rapid expansion, helping steam create the pocket inside. Although the puffing process can vary from one pita to another, proper dough preparation and sufficiently high heat make a noticeable difference.
Simple Ingredients From Your Pantry
You do not need specialty baking ingredients to prepare this homemade sourdough pita. Active sourdough starter, water, whole wheat flour, all-purpose flour, sugar, olive oil, and salt are all that is required. Each ingredient has a specific purpose, from supporting fermentation to improving the dough’s texture and flavor. Keeping the ingredient list simple also makes this recipe convenient for regular home baking.
Useful for Lunches, Dinners, and Snacks
Sourdough pita bread is versatile enough to serve with many different foods. You can stuff the pockets with falafel, grilled chicken, roasted vegetables, cheese, or fresh salad. They also work well alongside soups, dips, and spreads. If you prefer a crunchy snack, leftover pita can be sliced into pieces and baked into homemade pita chips, making this recipe useful beyond traditional sandwiches.
Prepare the Dough Ahead of Time
The dough can be prepared earlier in the day so the bread is ready when you need it. After mixing and kneading, allow the dough to rise until doubled. If your schedule requires additional flexibility, refrigeration can slow fermentation and provide a longer resting period. Because sourdough activity depends on starter strength and room temperature, check the dough’s appearance and expansion rather than relying entirely on the clock.
Tips for Soft and Puffy Sourdough Pita Bread
Start With an Active Starter
The strength of your sourdough starter has a direct effect on how the dough rises. Use a starter that is bubbly and active rather than one that has been sitting unfed for a long time. If the starter is sluggish, the dough may need considerably longer to ferment. Pay attention to visible growth and the dough’s texture, because these signs are more useful than following a fixed schedule without adjustment.
Do Not Skip the High-Heat Preheating
A properly heated pizza stone or cast iron skillet helps the dough puff before the outer surface becomes too firm. Place the baking surface in the oven while it preheats, giving it enough time to absorb heat. Putting the dough onto a cool surface may lead to slower expansion and flatter bread. Always use suitable oven mitts when transferring the pitas, and take care when handling heavy, hot cookware.
Roll the Dough Evenly
Consistent thickness helps the pitas bake more evenly. If one area is considerably thicker than another, the dough may not expand uniformly, and the pocket may be incomplete. Roll from the center outward and turn the dough as needed to maintain a round shape. Keep the circles close to six inches in diameter and avoid making them too thick, following the original recipe’s guidance.
Prevent the Dough From Drying Out
Cover the dough during both resting periods to protect it from dry air. A dry outer layer can become stiff and interfere with the dough’s expansion. Use a damp tea towel that is not dripping wet, or cover the dough loosely with an appropriate cover. If preparing several pitas at once, keep the unbaked rounds covered while you bake the others.
Adjust for Your Kitchen Temperature
Sourdough fermentation is affected by temperature, so the rising times may vary from day to day. A warm kitchen can speed up the process, while a cooler environment may slow it down. Use the suggested four-to-six-hour room-temperature rise as a starting point, then judge the dough by its growth and texture. The refrigerator provides another option when you need to spread preparation over a longer period.
How to Serve Homemade Sourdough Pita Bread
Make Fresh Pita Sandwiches
These soft pita pockets are ideal for sandwiches because their interior can hold a variety of fillings. Slice or gently open a pita and add grilled chicken, sliced vegetables, lettuce, tomatoes, cucumber, cheese, or your preferred dressing. For a quick lunch, combine leftover cooked protein with fresh vegetables and a creamy sauce. The mild tang of sourdough complements both rich fillings and crisp salad ingredients.
Serve With Falafel and Hummus
Pita bread pairs naturally with falafel, hummus, and other Mediterranean-inspired foods. Fill the pockets with crisp falafel, chopped tomatoes, cucumber, herbs, and a spoonful of hummus for a satisfying meal. You can also serve the bread alongside a bowl of hummus or another favorite dip. Tear the pita into smaller pieces for sharing, or warm it briefly before serving to restore some of its softness.
Use Pita for Quick Wraps and Dinner Plates
If a pita does not form a complete pocket, it can still be used as a flatbread wrap or served beside roasted vegetables, grilled meat, soup, and salad. Warm bread makes a useful addition to simple weeknight meals and helps turn leftover ingredients into something different. You can also brush the surface lightly with olive oil and add herbs when serving it alongside a savory dinner.
Turn Leftover Pita Into Homemade Chips
Leftover pita bread can become a crunchy snack with very little effort. Cut the bread into triangles or smaller pieces, arrange them on a parchment-lined baking sheet, and bake until crisp. Add a light sprinkle of salt for a savory version, or use cinnamon sugar if you prefer a sweet snack. Keep an eye on the pieces while they bake because thinner sections can brown faster than thicker ones.
Frequently Asked Questions About Sourdough Pita Bread
What Is the Difference Between Flatbread and Pita Bread?
Flatbread is a broad category of bread that includes many different shapes, textures, and preparation methods. Some flatbreads are unleavened, while others use yeast or another leavening method. Pita is a type of flatbread commonly known for its soft texture and the pocket that can form during high-temperature baking. Not every flatbread develops a hollow center, which is one reason pita is especially useful for stuffed sandwiches.
Why Does Sourdough Pita Bread Sometimes Fail to Puff?
Several factors can affect whether a pita develops a full pocket. An insufficiently hot baking surface, uneven rolling, weak starter activity, or dough that has been over-fermented may prevent the bread from expanding as expected. Try preheating the stone or skillet thoroughly, keeping the dough rounds evenly thin, and using an active starter. Even when a pita does not puff completely, it can still be delicious and useful for wraps or dipping.
Is Sourdough Bread Healthier Than Regular Yeast Bread?
Sourdough fermentation can change the composition of bread, including the breakdown of some phytates and the availability of certain minerals. However, the overall nutritional value depends on the flour, ingredients, fermentation conditions, and portion size. Sourdough is not automatically healthier than every bread made with commercial yeast. This pita recipe includes both whole wheat and all-purpose flour, so its nutritional profile reflects both types.
Can Commercial Yeast Be Added to a Sourdough Recipe?
Yes, commercial yeast can be added to a dough that also contains sourdough starter. Doing so may speed up the rise, but the recipe then relies on both leavening methods rather than the starter alone. If you choose to add commercial yeast, fermentation may happen faster, so monitor the dough carefully to avoid over-proofing. For this particular recipe, extra yeast is unnecessary when the sourdough starter is active and the dough is given enough time.
Can I Make This Recipe With Only All-Purpose Flour?
Yes. If you do not have whole wheat flour, replace the half cup of whole wheat flour with an additional half cup of all-purpose flour. Keep the other ingredient quantities unchanged. The finished pita may have a slightly lighter color and a milder, less nutty flavor, but it can still make soft, versatile pockets. Use the same kneading, rising, shaping, and baking process, checking the dough’s texture as you work.
Can I Prepare the Dough the Night Before?
You can prepare the dough ahead and refrigerate it for up to 12 hours, as described in the recipe. Cover the bowl well and check the dough before shaping because fermentation continues slowly in the refrigerator. If it has expanded substantially, handle it gently and proceed with dividing and shaping. Refrigeration offers flexibility, but the actual rise depends on the starter’s activity and the dough’s temperature when it enters the fridge.
Storage and Make-Ahead Instructions
How to Store Sourdough Pita Bread
Allow the baked pitas to cool before placing them in an airtight container. Store them in the refrigerator for up to one week, following the original recipe’s storage guidance. Keeping the bread sealed helps reduce moisture loss and prevents it from absorbing odors from other foods. If the pitas become slightly firm after chilling, warm them briefly before serving to improve their flexibility.
How to Reheat Pita Bread
For a soft texture, warm the pita briefly in a skillet or in the oven until heated through. Avoid leaving it over high heat for too long, as excess heating can dry the bread and make it brittle. If the pita feels particularly dry, a very light touch of water on the surface before warming may help soften it. Let the bread rest for a moment before opening it for fillings.
Can You Freeze Homemade Pita?
Freezing is another practical option if you want to save bread for later. Once the pitas have cooled completely, place them in a freezer-safe bag or container, separating them with small pieces of parchment if needed. Remove excess air before sealing and freeze them for longer storage. Thaw the quantity you need and warm it before serving. This method helps you enjoy homemade sourdough pita without needing to bake a fresh batch every time.
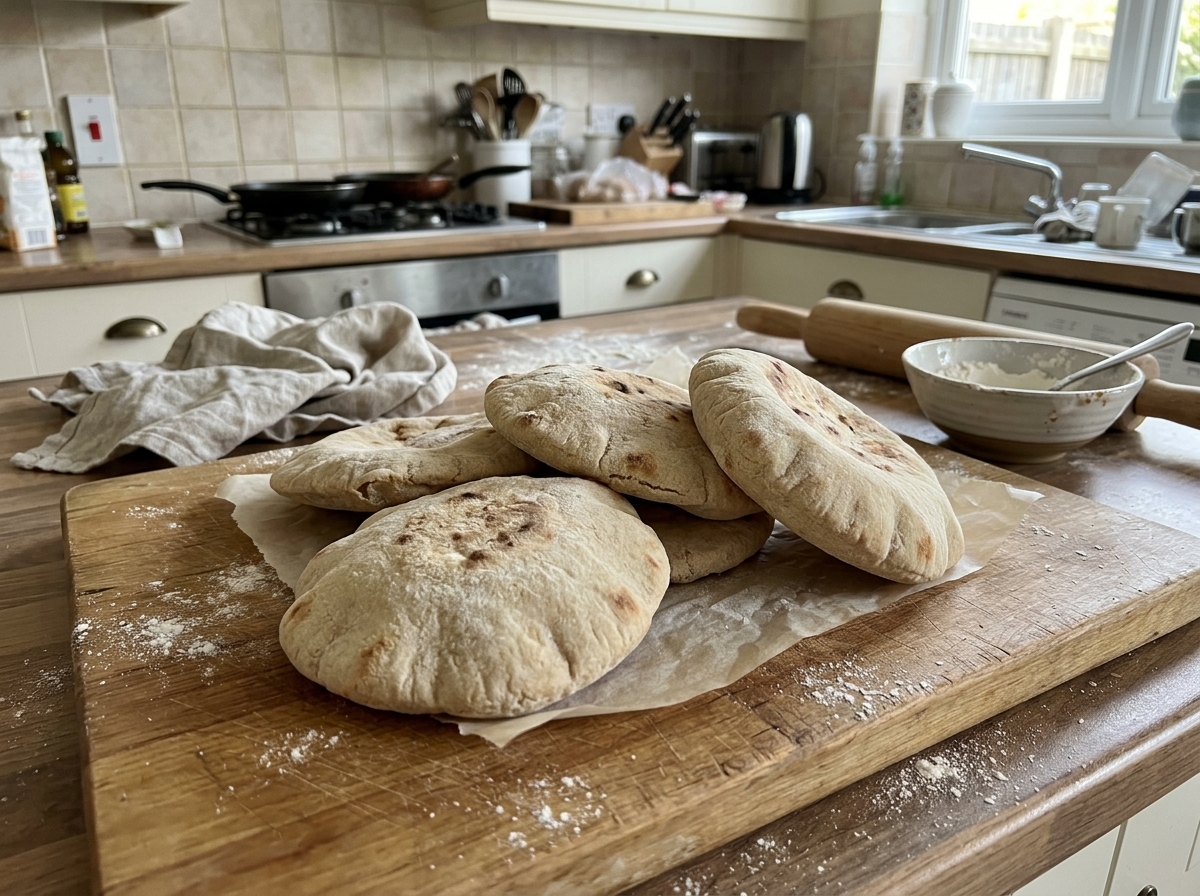
Sourdough Pita Bread
Soft, fluffy sourdough pita bread made with an active sourdough starter, simple pantry ingredients, and no commercial yeast. Perfect for sandwiches, wraps, falafel, and dipping.
8
servings10
minutes5
minutes190
kcal420
7
hours15
minutesIngredients
1/2 cup active and bubbly sourdough starter
1 cup water
1/2 cup whole wheat flour
2 cups all-purpose flour
1 tablespoon sugar
2 tablespoons olive oil, plus more for oiling the bowl
1 teaspoon salts
Directions
- Mix the Dough
Combine the active sourdough starter, water, whole wheat flour, all-purpose flour, sugar, olive oil, and salt in the bowl of a stand mixer fitted with a dough hook. - Knead Until Smooth
Knead the dough on medium-low speed for approximately 10 minutes, or until it becomes smooth, stretchy, and elastic. If you do not have a stand mixer, knead the dough by hand. - Prepare the Dough for Rising
Lightly coat a large bowl with olive oil. Place the dough inside and cover it with a lid or plastic wrap to prevent the surface from drying out. - Let the Dough Rise
Allow the dough to rise in a warm place until doubled in size, approximately 4–6 hours at room temperature. Alternatively, refrigerate the covered dough for up to 12 hours. - Divide the Dough
Transfer the dough to a lightly floured work surface. Divide it into eight equal portions and shape each portion into a small ball. - Rest the Dough Balls
Cover the dough balls and let them rest for 15 minutes. This allows the gluten to relax, making the dough easier to roll. - Roll Into Pita Rounds
Use a rolling pin to roll each dough ball into a thin circle approximately 6 inches in diameter and no more than 1/4 inch thick. - Allow the Second Rise
Cover the rolled dough rounds with a lightweight damp tea towel. Let them rest for 30–60 minutes, until slightly puffy. - Preheat the Oven
Preheat the oven to 500°F (260°C), with a pizza stone or cast iron skillet inside. Make sure the baking surface becomes thoroughly hot before adding the dough. - Bake the Pita Bread
Carefully place the pita rounds on the hot baking surface. Bake for approximately 5 minutes, until the bread puffs up and cooks through. Repeat with the remaining dough rounds. - Cool and Serve
Remove the baked pita breads from the oven and allow them to cool slightly. Serve warm with falafel, hummus, fresh vegetables, grilled chicken, or your favorite sandwich fillings.
Notes
- Active starter: Use an active, bubbly sourdough starter for the best results.
- Flour substitution: If you do not have whole wheat flour, replace it with an additional 1/2 cup of all-purpose flour.
- High heat: Preheat the pizza stone or cast iron skillet thoroughly to help the pita bread puff and form a pocket.
- Prevent drying: Keep the dough covered during resting and rising.
- Storage: Store cooled pita bread in an airtight container in the refrigerator for up to one week.
- Serving ideas: Use the pita for sandwiches, wraps, dipping, or homemade pita chips.
Nutrition Facts
- Calories: 190kcal
- Fat: 4g
- Carbohydrates: 34g
- Fiber: 2g
- Sugar: 2g
- Protein: 5g