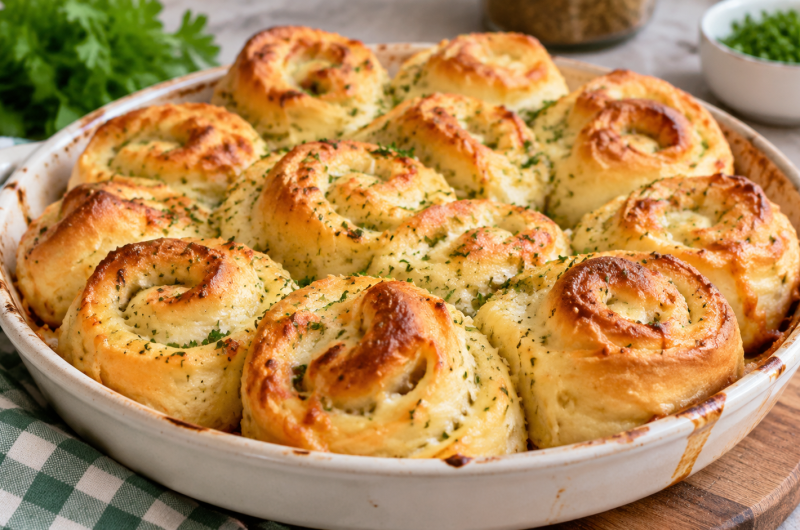
Homemade ham and cheese rolls are soft, fluffy bread rolls filled with savory ham and melted mozzarella cheese, then finished with a delicious garlic butter glaze. They combine the comforting taste of freshly baked bread with the familiar flavors of a ham and cheese sandwich.
Unlike recipes made with store-bought slider buns or refrigerated dough, these savory rolls use homemade yeast dough, giving them a tender texture and freshly baked flavor that makes every bite satisfying.
These ham and cheese rolls are an excellent choice for breakfast, lunch, afternoon snacks, family gatherings, and game-day parties. The dough bakes together in one pan, creating a batch of golden rolls that are easy to serve and share.
The melted cheese adds richness, while the ham provides a savory filling and the garlic butter brings everything together. Whether you serve them fresh from the oven or prepare them for a casual get-together, these homemade rolls are a delicious alternative to ordinary sandwiches.
What Makes These Ham and Cheese Rolls Special?
One of the best things about homemade ham and cheese rolls is their combination of soft bread, flavorful filling, and buttery topping. The dough is made with milk, butter, egg, sugar, flour, yeast, and salt, creating a tender bread that is slightly rich without being overly heavy. As the rolls bake, the dough becomes lightly golden on the outside while remaining soft enough to complement the ham and cheese inside.
The filling is simple but satisfying. Sliced ham and mozzarella cheese are layered over mayonnaise spread across the rolled-out dough. Once the dough is rolled into a log and sliced into individual portions, the filling becomes enclosed in attractive spirals. During baking, the mozzarella melts into the ham, producing a warm, cheesy center. A final coating of garlic butter and dried parsley adds aroma, flavor, and an appealing finish.
Another reason to love this recipe is that it makes approximately 16 individual rolls. This quantity works well for sharing with family or serving guests without assembling individual sandwiches. Because the rolls bake together in a rectangular pan, they can be prepared as a batch and served straight from the baking dish. They are especially useful when you want a homemade savory snack that feels more special than ordinary bread and sandwich fillings.
How to Make Ham and Cheese Rolls from Scratch
Step 1: Activate the Yeast
Begin by combining the active dry yeast, warm water, and approximately one teaspoon of the sugar in the bowl of a stand mixer. The water should be warm rather than hot, ideally between 105°F and 115°F. Allow the mixture to stand for about five minutes, giving the yeast time to activate. A foamy appearance is a helpful indication that the yeast is working and ready for the remaining dough ingredients.
If the mixture does not develop foam, check whether the water temperature was suitable and whether the yeast is still fresh. Water that is too hot can damage the yeast, while water that is too cool may slow its activity. Starting with properly activated yeast helps the dough rise and creates the light texture that makes these homemade ham and cheese rolls so enjoyable.
Step 2: Prepare the Dough
Add the milk, remaining sugar, salt, melted butter, and egg to the yeast mixture. Stir the ingredients together with a wooden spoon until they are reasonably well combined. Attach the dough hook to the stand mixer and add half of the all-purpose flour. Mix until the flour is moistened, then gradually incorporate the remaining flour until no large dry patches remain.
At this point, the dough will look soft, wet, and somewhat sticky. This is normal for a tender bread dough, so resist the temptation to add a large amount of flour all at once. Mixing the ingredients gradually allows the flour to absorb the liquid and helps the dough begin to develop its structure. A stand mixer makes this stage easier, although the dough can also be kneaded by hand with patience.
Step 3: Knead Until Smooth and Elastic
Knead the dough with the stand mixer for approximately five to seven minutes. While the mixer runs, sprinkle in a little extra flour as needed, using only enough to help the dough come together. The original recipe allows approximately four to five additional tablespoons of flour during kneading. The exact amount may vary slightly depending on the flour and the moisture in your ingredients, so pay attention to the dough rather than adding all the extra flour automatically.
As kneading continues, the dough should become smoother and more elastic. It will gradually gather toward the center of the bowl and begin pulling away from the sides, sometimes making a light slapping sound as it moves. These are useful signs that the dough has developed sufficient structure. If you are kneading by hand, work on a lightly floured surface until the dough feels stretchy and smooth. Proper kneading helps the rolls rise evenly and gives the finished bread its soft, fluffy texture.
Step 4: Let the Dough Rise
Lightly dust a clean bowl with flour and shape the kneaded dough into a smooth ball. Place it in the bowl, cover it, and leave it in a warm place for approximately one and a half hours, or until it has doubled in size. The rising time can change depending on the temperature of your kitchen, so use the dough’s appearance as your main guide rather than relying entirely on the clock.
During this first rise, the yeast produces gas that expands the dough and creates a lighter texture. Keeping the dough covered prevents its surface from drying out while it rests. Avoid placing it somewhere excessively hot, as a gentle, warm environment is sufficient. When the dough has doubled in volume, it should feel softer and more airy, making it easier to roll out and shape into the filled bread rolls.
Step 5: Roll Out the Dough and Add the Filling
Transfer the risen dough to a lightly floured work surface. Using a rolling pin, roll it into a rectangle approximately one-quarter inch thick. Trim the edges if necessary to create a neater shape, which will make it easier to roll the dough evenly and produce more uniform portions. Spread the mayonnaise over the surface, then arrange the ham slices across the dough and cover them with mozzarella cheese slices.
Try to distribute the ham and cheese evenly, including toward the edges, so that the filling is present throughout the finished rolls. Slightly overlapping the slices helps avoid empty spaces. Leave yourself enough room to handle the dough comfortably, and avoid piling too much filling in one area. Even distribution is especially helpful when serving a group because each roll will have a more consistent balance of bread, ham, and melted cheese.
Step 6: Roll, Slice, and Arrange the Rolls
Position the long edge of the rectangle nearest you, then roll the dough firmly into a log. Start at that long edge and continue rolling steadily, keeping the filling tucked inside as much as possible. A reasonably tight log helps the slices hold their shape and creates attractive spirals when the rolls are baked. If the dough feels difficult to handle, work gently rather than pulling it too forcefully, which can stretch or tear it.
Cut the log into approximately 16 portions, aiming for slices about one inch thick. Arrange the pieces in a parchment-lined 9-by-13-inch baking pan, placing them close enough to bake together while allowing room for the second rise. Cover the pan loosely and leave the rolls to rise for another 40 minutes to one hour. They should look puffier before baking, which helps produce soft, connected rolls with a tender center.
Step 7: Bake Until Lightly Golden
Preheat the oven to 350°F while the shaped rolls finish rising. Once the oven is ready, bake the rolls for approximately 25 to 30 minutes, or until the tops are lightly golden and the dough is cooked through. Keep an eye on them toward the end of the baking time, since ovens can vary. The tops should have a gentle golden color rather than becoming excessively dark, and the centers should no longer look raw or doughy.
The cheese will melt as the rolls bake, and the ham will warm inside the soft bread. You may notice the rolls expanding and touching one another in the pan, which is normal for this style of pull-apart bread. Allowing them to bake together helps keep the sides soft while the exposed tops develop a little color. If the rolls need a little more time, continue baking briefly and check again rather than relying only on the stated time.
Step 8: Brush with Garlic Butter and Serve
While the rolls are still warm, combine the melted butter and garlic powder in a small bowl. Brush this mixture over the tops, making sure to cover the surface evenly. Finish with dried parsley for a little color and a mild herbal note. Apply the glaze soon after baking so it spreads easily over the warm bread and adds flavor to the soft crust.
Serve the ham and cheese rolls warm, when the mozzarella is still melted and the bread is at its softest. They can be placed on a serving platter for guests or served directly from the baking pan for a relaxed family meal. The buttery garlic topping makes them flavorful enough to enjoy on their own, while their sandwich-style filling means they also pair well with fresh vegetables, salads, or warm soup.
Tips for Soft, Flavorful Ham and Cheese Rolls
Handle Sticky Dough Carefully
A slightly sticky dough is not necessarily a problem. During kneading, flour gradually absorbs moisture, and the dough becomes more manageable as its structure develops. Add extra flour in small amounts instead of covering the dough heavily from the beginning. Too much flour can make the rolls firm and dry, while allowing the dough to remain soft helps produce a more tender crumb after baking.
Roll the Dough Evenly
Try to maintain a consistent thickness when rolling out the dough. An even rectangle makes it easier to distribute the filling and cut similar-sized portions. Rolling the dough from its long edge creates the traditional spiral shape and helps you achieve approximately 16 rolls. A tight but gentle roll also keeps the filling from shifting excessively as you slice the log.
Choose Your Favorite Ham and Cheese
Black Forest ham and mozzarella are the ingredients specified for this version, but the recipe offers room for personal preference. Honey ham can give the filling a slightly sweeter flavor, while cheddar or Swiss cheese creates a different taste. If you want to change the cheese, choose slices that fit comfortably across the dough and distribute them evenly for consistent results.
Make the Glaze Your Own
The garlic butter topping can be adjusted to suit your preferred flavor. The recipe uses melted butter, garlic powder, and dried parsley. You can also add a little honey for a subtle sweet note or include onion powder for additional savory flavor. These additions are optional, so you can keep the glaze simple or adapt it to complement the rest of your meal.
Serving Suggestions and Storage
What to Serve with Ham and Cheese Rolls
These homemade rolls work well for breakfast, lunch, snacks, and casual dinners. Serve them with potato chips or fries for an easy meal, or add a fresh green salad if you want something crisp alongside the warm bread. A bowl of vegetable soup or another hearty soup also makes a comforting pairing, especially on cooler days. For parties and game-day gatherings, arrange the rolls on a platter so guests can take one or two as they please.
They can also be part of a larger buffet with raw vegetables, pickles, dips, and other finger foods. Since each roll is individually portioned, serving is straightforward and no additional sandwich assembly is needed. For a simple family lunch, two rolls with a side salad or soup may be enough, depending on appetite and portion size.
How to Store Leftover Rolls
Allow leftover rolls to cool before transferring them to an airtight container. Refrigerate them for up to two days, following the storage guidance provided with this recipe. Keeping the rolls covered helps prevent the bread from drying out and protects the filling from absorbing odors from other foods in the refrigerator. For the best texture, avoid leaving the baked rolls uncovered for an extended period.
How to Reheat Ham and Cheese Rolls
For a quick serving, place an individual roll in the microwave and heat it for approximately 15 to 20 seconds. Check the center before eating, as microwave strength and the size of the roll can affect the reheating time. If it needs more warmth, continue in short intervals. Reheating just the portion you plan to eat helps keep the remaining rolls in better condition and makes leftovers convenient for a quick snack or lunch.
Frequently Asked Questions
Are Ham and Cheese Rolls the Same as Ham and Cheese Pinwheels?
They share a similar spiral appearance, but the dough makes an important difference. Ham and cheese pinwheels are often prepared with puff pastry, tortillas, or refrigerated dough. This recipe uses homemade yeast dough that rises before baking, giving the rolls a soft, fluffy bread texture. The result is closer to a filled bread roll than a pastry-style pinwheel.
Can These Rolls Be Called Ham Sliders?
Ham sliders usually consist of ham and cheese layered inside small buns and baked together until warm and melty. These homemade rolls deliver a similar combination of flavors, but the bread is made from scratch and the filling is rolled directly into the dough. Although preparing homemade dough takes more time than assembling sliders with purchased buns, it gives the finished rolls their distinctive spiral shape and freshly baked texture.
Can I Change the Filling?
Yes, you can choose different varieties of deli ham and sliced cheese to suit your preferences. The original recipe uses ham, mozzarella, and mayonnaise, so keep those ingredients if you want to follow the recipe as written. Honey ham, cheddar, Swiss cheese, Dijon mustard, honey mustard, or ranch dressing are possible alternatives or variations, depending on the flavor you prefer.
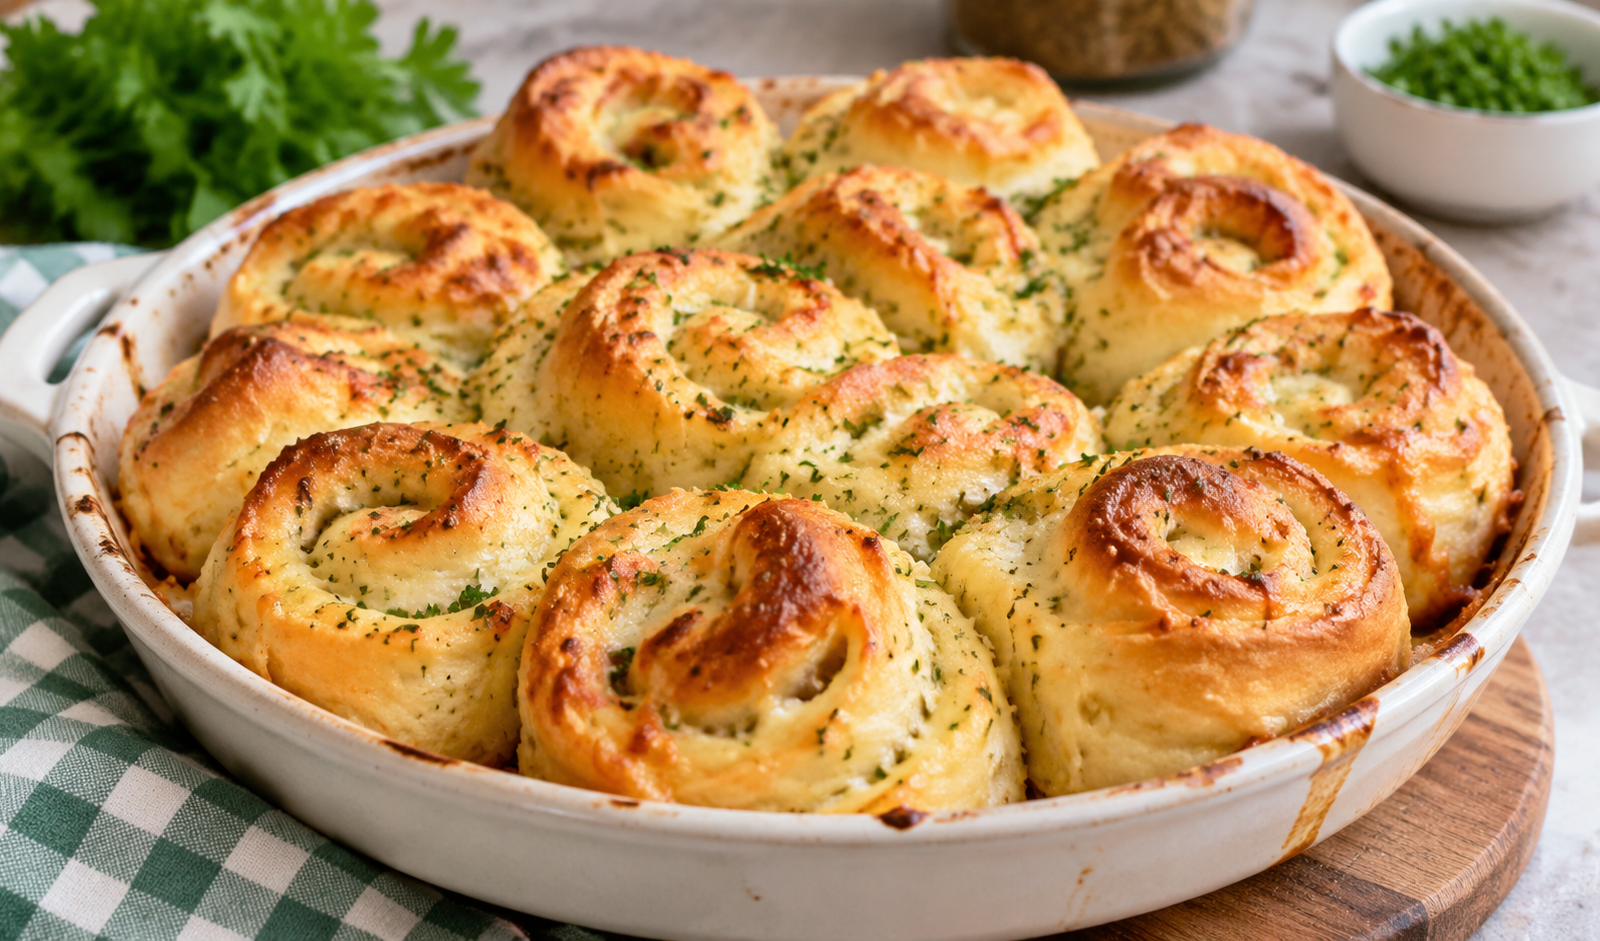
Sourdough Ham and Cheese Rolls
Soft homemade bread rolls filled with sliced ham and mozzarella cheese, finished with a buttery garlic glaze.
16
servings35
minutes25
minutes303
kcal150
3
hours30
minutesIngredients
- For the dough
2¼ tsp (7.1 g) active dry yeast
¼ cup (62.5 g) warm water, 105–115°F
3 tbsp (36.52 g) sugar
¾ cup (193.37 g) milk
¼ cup (59.97 g) butter, melted
1 large egg (44 g)
1 tsp (6.09 g) salt
3½ cups (462.3 g) all-purpose flour, plus a few extra tablespoons as needed
- For the filling
5 tbsp (75 g) mayonnaise
12 slices ham
12 slices mozzarella cheese
- For the garlic butter glaze
2–3 tbsp (28.4 g) melted butter
½ tsp garlic powder
1 tsp dried parsley
Directions
- Activate the yeast:
Combine the active dry yeast, warm water, and approximately one teaspoon of the sugar in the bowl of a stand mixer. Let the mixture rest for about 5 minutes, until foamy. - Mix the dough ingredients:
Add the milk, remaining sugar, salt, melted butter, and egg. Stir with a wooden spoon until combined. - Add the flour:
Attach the dough hook and mix in half of the flour until moistened. Add the remaining flour and mix until incorporated. - Knead the dough:
Knead for 5–7 minutes, adding up to 4–5 tablespoons of extra flour gradually as needed. Continue until the dough becomes smooth, elastic, and begins pulling away from the sides of the bowl. - Let the dough rise:
Place the dough in a lightly floured bowl, cover, and let it rise for approximately 1½ hours, or until doubled in size. - Add the filling:
Roll the dough on a lightly floured surface into a rectangle approximately ¼ inch thick. Trim the edges if necessary. Spread the mayonnaise evenly over the dough, then cover with ham and mozzarella slices. - Shape the rolls:
Starting from the long edge nearest you, roll the dough into a tight log. Cut it into approximately 16 portions, about 1 inch thick. - Allow the second rise:
Arrange the rolls in a parchment-lined 9 × 13-inch baking pan. Cover loosely and let them rise for 40 minutes to 1 hour, until puffed. - Bake the rolls:
Preheat the oven to 350°F. Bake for 25–30 minutes, or until the tops are lightly golden and the rolls are cooked through. - Prepare the glaze:
Mix the melted butter with garlic powder in a small bowl. Brush the mixture over the warm rolls and sprinkle with dried parsley. - Serve:
Enjoy the ham and cheese rolls warm while the bread is soft and the mozzarella is melted.
Notes
- Add extra flour gradually during kneading to avoid making the bread too dense.
- Spread the ham and cheese evenly over the dough for a balanced filling in every roll.
- Honey or onion powder can be added to the garlic butter glaze if desired.
- Baking times may vary slightly depending on your oven.
- Store cooled leftovers in an airtight container in the refrigerator for up to 2 days.
- Reheat individual rolls in the microwave for 15–20 seconds, checking that the center is warm before serving.
Nutrition Facts
- Calories: 303kcal
- Fat: 17g
- Carbohydrates: 24g
- Fiber: 1g
- Sugar: 3g
- Protein: 13g