Homemade English muffins are a delicious breakfast favorite known for their soft centers, lightly crisp surfaces, and distinctive little pockets that hold melted butter, jam, and other tasty toppings. Unlike ordinary bread rolls, traditional English muffins are cooked on a skillet or griddle, giving them a golden exterior while keeping the inside light, airy, and chewy. Making English muffins from scratch is easier than many people expect, and you do not need professional baking experience to achieve excellent results at home.
This easy English muffins recipe uses simple baking ingredients to create muffins that taste fresh, flavorful, and satisfying. The dough is prepared with flour, milk, yeast, butter, sugar, salt, and an egg. After rising, it is shaped into individual rounds, lightly coated with semolina, and cooked in a covered skillet until golden on both sides. The finished muffins have the traditional texture that makes them perfect for breakfast, brunch, and homemade sandwiches.
What Makes Homemade English Muffins Special?
One of the best things about homemade English muffins is their unique texture. The outside develops a lightly toasted crust during cooking, while the inside remains tender and pleasantly chewy. When you split a muffin open, you can see the small air pockets that give English muffins their familiar nooks and crannies. These spaces are especially useful because they catch butter, honey, fruit preserves, and other spreads.
Another advantage of making English muffins at home is having control over the ingredients. Store-bought muffins often contain additional preservatives and ingredients to maintain freshness during packaging and transportation. Homemade versions can be prepared using everyday pantry staples, allowing you to enjoy freshly cooked bread without unnecessary extras. You can also prepare a batch in advance and freeze the muffins for convenient breakfasts throughout the week.
How to Make Soft and Chewy English Muffins
Making English muffins involves preparing the dough, allowing it to rise, shaping individual rounds, and cooking them slowly on a skillet. The process is straightforward, but giving the dough enough time to rise is important. Proper fermentation creates the air pockets responsible for the light texture. Following the correct cooking technique also helps the muffins maintain their height instead of becoming flat or dense.
Step 1: Activate the Yeast
Begin by warming the milk and water until they are comfortably warm to the touch. Add the yeast and sugar, then stir gently to combine everything. Leave the mixture undisturbed for approximately 6 to 7 minutes. During this time, the yeast should begin producing bubbles and a foamy layer on the surface. This indicates that it is active and ready for the dough.
Avoid using very hot liquid because excessive heat can kill the yeast. If the mixture does not become foamy, check whether the yeast is fresh and whether the liquid temperature was appropriate. Starting with properly activated yeast gives the dough a much better chance of rising successfully.
Step 2: Add the Egg and Butter
Once the yeast mixture becomes foamy, add the egg and melted butter. Mix until the ingredients are combined. The egg contributes structure and richness, while the butter gives the dough a softer texture and pleasant flavor. Make sure the butter is not extremely hot when adding it to the mixture.
Step 3: Combine the Flour and Salt
Place the all-purpose flour and salt into the bowl of a stand mixer. Pour in the prepared milk and yeast mixture. Using a stand mixer is recommended because English muffin dough is naturally sticky and can be challenging to handle by hand. Mixing with a dough hook makes it easier to develop an elastic consistency without adding too much extra flour.
Step 4: Knead Until Smooth and Elastic
Mix the ingredients until the dough becomes smooth, stretchy, and elastic. It should remain slightly sticky rather than becoming completely dry. Avoid adding excessive flour during mixing because this can produce heavy muffins with a tight interior. Properly developed dough will be easier to work with after its first rise.
Transfer the dough into a large bowl lightly coated with oil. Turn it gently if necessary so that the surface has a thin coating. Cover the bowl and leave it in a suitable place until the dough doubles in size.
Step 5: Allow the Dough to Rise
The first rise is an important stage in developing flavor and texture. The dough can rise for approximately one hour if you are short on time, but allowing it to ferment for 4 to 8 hours can provide additional flavor. Keep the bowl covered and place it somewhere comfortably warm.
Avoid leaving the dough in direct sunlight or an excessively hot location. High temperatures can affect fermentation and may cause the dough to rise too quickly. A consistent, moderate temperature is generally best for producing light and airy English muffins.
Step 6: Roll and Cut the Muffins
Once the dough has doubled in size, transfer it to a lightly floured work surface. Gently pat it out until it is just under one inch thick. Try to maintain an even thickness so that the muffins cook consistently. Use a 2½-inch round cutter to cut individual muffins from the dough.
If you do not have a round cutter, you can divide and shape the dough into rounds by hand. Keep the shapes reasonably even in size so they finish cooking at approximately the same time.
How to Get Perfect Nooks and Crannies
The signature texture of English muffins comes from a combination of yeast fermentation, proper dough handling, and careful cooking. Allowing the dough enough time to rise helps create the small air pockets that form throughout the interior. These spaces become more noticeable when the muffins are split open, giving them their traditional appearance.
Avoid kneading extra flour into the dough simply because it feels sticky. A slightly sticky dough is normal and helps maintain a soft texture. Using a stand mixer makes handling easier and reduces the temptation to add unnecessary flour. Gentle shaping and a proper second rise also help preserve the air bubbles.
Cooking temperature matters just as much as fermentation. If the skillet is too hot, the outside may brown before the center has time to cook. Medium-low heat allows the muffins to develop a golden crust while gradually cooking the inside. Keeping the pan covered during cooking also helps maintain a suitable environment for the muffins to puff up.
Helpful Tips for the Best English Muffins
A few simple techniques can make a noticeable difference in the final result. First, use a stand mixer whenever possible because the dough is sticky and can be difficult to knead manually. Second, give the dough enough time to rise. Although a shorter proofing period works, a longer fermentation of 4 to 8 hours can produce a more developed flavor.
A cast-iron skillet or griddle is particularly useful because it distributes heat evenly. Keep the temperature moderate and cook the muffins in batches rather than overcrowding the pan. If you notice sticking, use a tiny amount of butter. Remember to remove excess semolina between batches to prevent burnt particles from collecting on the cooking surface.
Use a serrated knife when preparing the muffins for serving. Cutting them horizontally with a regular knife can compress the soft interior, while a serrated knife makes it easier to separate the halves. For the most enjoyable texture and flavor, toast the muffins before adding your favorite spreads.
Delicious Ways to Serve English Muffins
Homemade English muffins are incredibly versatile and can be enjoyed with both sweet and savory toppings. For a simple breakfast, split a muffin in half, toast it until lightly crisp, and spread butter over the warm surface. Add strawberry jam, raspberry preserves, honey, or your preferred fruit spread for a quick and satisfying meal.
For a savory breakfast, use the muffins as the base for breakfast sandwiches. Add scrambled eggs, fried eggs, cheese, sausage, or crispy bacon to create a filling combination. Their sturdy texture makes them suitable for holding different ingredients without becoming too soft or falling apart.
English muffins are also a wonderful choice for eggs Benedict. Their toasted surfaces provide a delicious base for poached eggs and hollandaise sauce. You can also use them for mini pizzas, open-faced sandwiches, or simple lunch snacks. Their mild flavor pairs well with a wide variety of ingredients.
How to Store Homemade English Muffins
Allow the English muffins to cool completely before storing them. Placing warm muffins inside an airtight container can create condensation, which may make the surfaces damp. Once cooled, store them in a suitable airtight container or food storage bag.
For longer storage, freezing is an excellent option. Arrange the cooled muffins in a freezer-safe bag or container and separate them if necessary to make individual portions easier to remove. When you are ready to eat them, thaw them and toast until warmed through. Freezing makes it convenient to prepare a large batch without worrying about using every muffin immediately.
Frequently Asked Questions
Why Are My English Muffins Flat?
English muffins can become flat if they are flipped before the centers have cooked and developed enough structure. Removing the lid too early can also reveal muffins that are not fully puffed. Wait until the tops look dry and the muffins hold their shape before turning them over.
Can I Make English Muffins Without a Stand Mixer?
Yes. A stand mixer is helpful because the dough is sticky, but it is not essential. You can mix and knead the dough by hand using a large bowl and a lightly floured work surface. Work patiently and avoid adding too much flour.
Can I Use Bread Flour Instead of All-Purpose Flour?
Yes. Bread flour can be used if you prefer a chewier texture. However, all-purpose flour is recommended for the original recipe because it produces soft, tender English muffins without requiring specialty flour.
Can I Use Cornmeal Instead of Semolina?
Yes. Cornmeal is a suitable alternative for coating the outside of the muffins. Both ingredients provide a lightly textured surface and help prevent sticking during preparation.
Why Are My English Muffins Undercooked in the Middle?
This usually happens when the cooking temperature is too high or the muffins have not spent enough time in the skillet. Lower the heat and allow them to cook gradually. If they are already browned but still too soft inside, finish them in a 350°F oven for approximately 3 minutes.
Are Homemade English Muffins Good for Freezing?
Yes. Homemade English muffins freeze well once they have cooled completely. Store them in freezer-safe packaging and thaw them when needed. Toasting after thawing helps restore their pleasant texture.
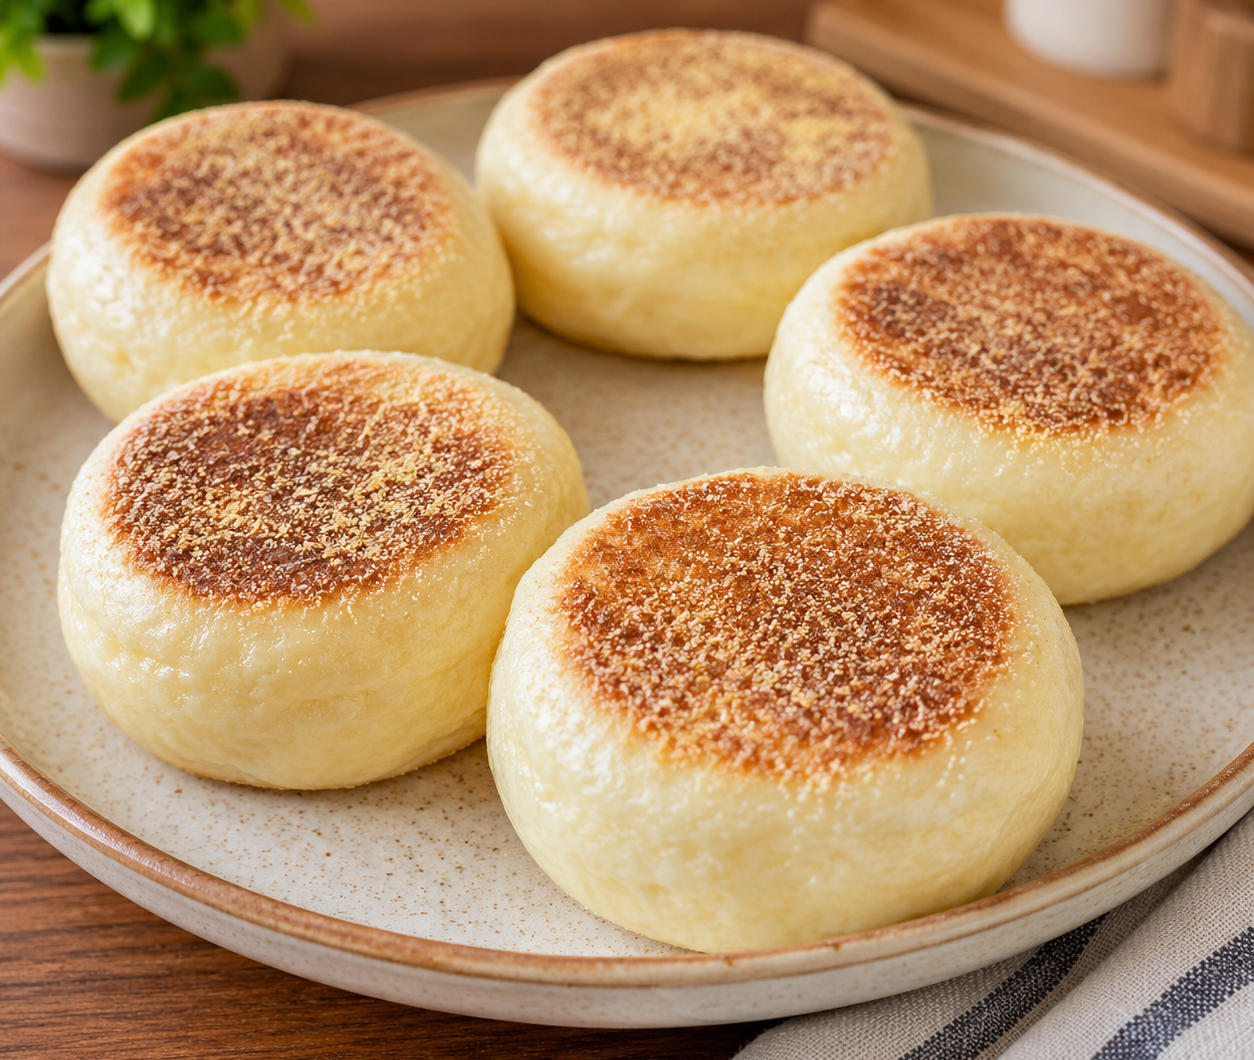
Thermomix English Muffins
Our Thermomix English muffins are made from just a few basic ingredients, are so simple to make… and beat the store-bought versions every single time!
8
servings15
minutes15
minutes326
kcal80
1
hour50
minutesIngredients
2 teaspoons dried active yeast (or 30g fresh yeast)
300 g full-fat milk
30 g caster sugar
30 g butter, room temperature
1 large egg
Pinch of sea salt
540 g bread flour (or plain flour)
Semolina (or polenta) for dusting
Directions
- Place yeast, milk, and sugar into the Thermomix bowl. Heat for 2 minutes at 37°C on Speed 2.
- Add butter, egg, salt, and flour. Mix for 5 seconds on Speed 6.
- Scrape down sides and knead using Interval/Knead function for 2 minutes. (Dough will be sticky.)
- Transfer dough into a greased bowl or ThermoServer. Cover and let rise for 1 hour or until doubled in size.
- Sprinkle semolina onto a surface. Roll dough to 2–3 cm thick.
- Cut out 8 rounds using a 9 cm cutter.
- Place onto a semolina-dusted tray. Rest for 20 minutes.
- Heat frying pan over medium heat. Sprinkle with semolina.
- Cook muffins in batches for 5–8 minutes each side until golden.
- Cool completely. Store in airtight container up to 3 days or freeze up to 3 months.
- To serve, slice in half and toast.
Notes
- Dough should remain soft and slightly sticky.
- Do not roll too thin — thickness ensures fluffiness.
- Always toast before serving for best texture.
- Freeze for convenient breakfast meal prep.
Nutrition Facts
- Serving Size: 16 g
- Total number of serves: 1
- Calories: 326kcal
- Fat: 6g
- Saturated Fat: 3g
- Cholesterol: 32mg
- Sodium: 54mg
- Potassium: 153mg
- Carbohydrates: 56g
- Fiber: 2g
- Sugar: 6g
- Protein: 11g
- Calcium: 56mg
- Iron: 1mg